
Snacks
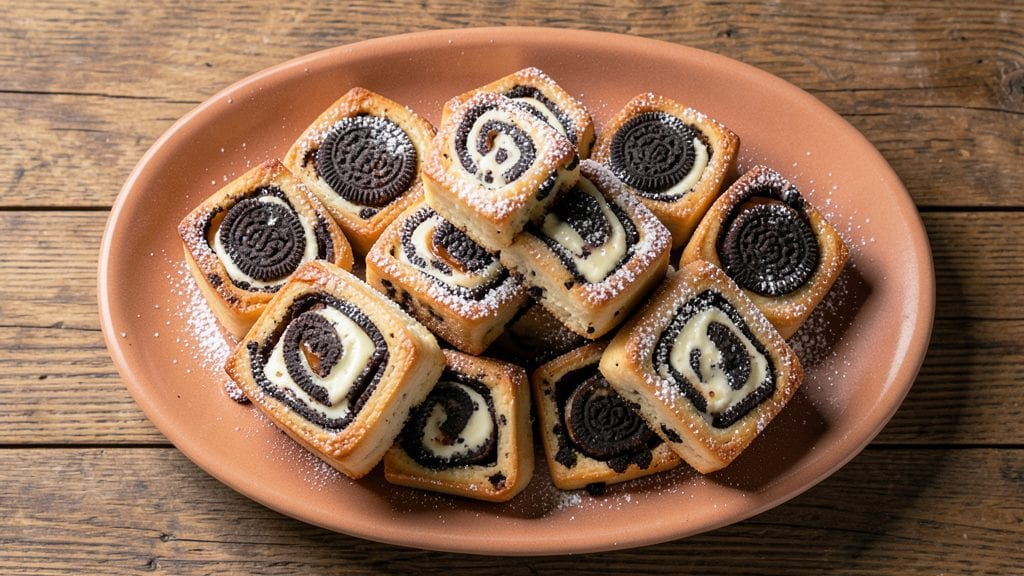
Creating Oreo rolls with that perfect buttery swirl and satisfying chocolate crunch is easier than you think. This recipe delivers restaurant-quality results with a foolproof technique that transforms simple dough into irresistible treats.
The secret lies in layering the dough just right—each fold creates those signature swirls that make these rolls so addictive.
You'll start with a basic dough that's rolled, filled with crushed Oreos, and folded into triangular layers before baking. The high heat ensures a golden, crisp exterior while keeping the inside tender and gooey. Every bite combines the buttery richness of the dough with the familiar chocolate crunch you love.
What makes these Oreo rolls truly special is how they balance texture and flavor—crispy edges, flaky layers, and pockets of melted chocolate. They're perfect for parties, movie nights, or satisfying that afternoon sweet tooth. The best part? You can customize them with different fillings or glazes to suit any occasion.
With just a few ingredients and simple steps, you'll have warm, aromatic Oreo rolls ready in about 30 minutes. The aroma alone will have everyone asking for seconds before they even take their first bite. Let's get started on creating these delicious treats!
Ingredients for oreo rolls
Twelve classic ingredients for golden, swirled Oreo rolls that taste like dessert heaven.
| Ingredient | Amount | Notes |
|---|---|---|
| All-Purpose Flour 🌾 | 4 cups | Sifted for flaky texture |
| Unsalted Butter 🧈 | 1 cup | Cold and cubed for layers |
| Granulated Sugar 🍚 | ¼ cup | For dough sweetness |
| Large Eggs 🥚 | 1 whole | Room temperature preferred |
| Milk 🥛 | ¼ cup | Room temperature |
| Salt 🧂 | ½ tsp | Kosher or sea salt |
| Vanilla Extract 🍯 | 1 tsp | Pure vanilla preferred |
| Oreo Cookies 🍪 | 18 whole | Crushed into fine crumbs |
| Powdered Sugar 🍚 | ½ cup | For dusting rolls |
| Melted Butter 🧈 | 2 tbsp | For brushing dough |
| Heavy Cream 🥛 | ½ cup | Optional for glazing |
| Chocolate Chips 🍫 | ¼ cup | Optional for extra crunch |
The butter is your secret weapon—use European-style if you can find it, but regular unsalted works too. Don't melt it for the dough; keep those cubes cold for flaky layers. The flour? King Arthur or Gold Medal are my go-to brands—they handle folding like a dream. For the Oreos, double-double is best—crush them finely so they melt into the dough instead of staying as chunks. If you're in a rush, the microwave works for crushing, but a bag and rolling pin is faster. Grab extra cookies—you'll want seconds.
No vanilla extract? Vanilla bean paste works too, or even a splash of vanilla syrup. Short on powdered sugar? Granulated sugar works in a pinch, but the texture won't be as light. The dough gets sticky—chill it for 30 minutes before rolling if it feels too soft. Want extra richness? Add 1 tbsp melted white chocolate to the filling. The heavy cream glaze is optional but makes these look restaurant-worthy—just whisk it with a pinch of vanilla and powdered sugar. Pro tip: Use a pastry brush for the melted butter on top—it makes those golden swirls pop.
Dough keeps 3 days wrapped in plastic in the fridge, or 3 months frozen. The filled rolls? Bake fresh for best texture—they stay tender for 2 days at room temp, but after that, the Oreos get soggy. Store leftovers in an airtight container with parchment between layers. These reheat beautifully—5 seconds in the microwave brings back that gooey magic. Freeze unbaked rolls for 2 months—just add 5 minutes to baking time.
Why You'll Love This Recipe
- No-Fuss Dough: The butter gets cut into flour in three minutes—no food processor needed. Roll it out, fold it, and you’re done. Honestly, the hardest part is deciding whether to roll it thicker or thinner.
- Creamy Crunch Magic: That first bite? Buttery, pillowy dough with a crispy edge, all wrapped around a gooey Oreo center. Between us, it’s the kind of dessert that makes you set the fork down mid-bite just to savor it.
- Party in a Box: Slice them fresh for brunch, freeze the extras for lazy mornings, or pack them in lunchboxes—kids (and adults) will devour them. I’ve served them at book clubs, potlucks, and even as a “dessert” for a work meeting. They’re that good.
- Pantry Staple Power: Flour, butter, sugar—ingredients you already own. No weird substitutions, no last-minute grocery runs. And because they freeze like a dream, you’ll always have a backup treat when cravings hit. (Yes, even on a Tuesday night.)
Step-by-step instructions for Oreo rolls recipe
Get ready to create flaky, buttery rolls packed with Oreo crunch—this method ensures perfect layers every time!
Mix the Dough for Flaky Layers
In a large mixing bowl, combine the 4 cups all-purpose flour, 0.25 cup granulated sugar, and 0.5 teaspoon salt. Whisk until evenly distributed—this ensures no pockets of flour remain when you add the wet ingredients later.
Cut in the 1 cup unsalted butter (cold and cubed) using a pastry cutter or your fingers until the mixture resembles coarse crumbs with pea-sized butter pieces. This step is crucial—overworking the butter will create tough rolls instead of flaky ones. Add the 1 whole large egg and 0.25 cup milk, then mix until just combined. The dough should come together but still feel slightly shaggy.
Wrap the dough in plastic wrap and refrigerate for 30 minutes. This chilling step firms up the butter, preventing it from melting during rolling and ensuring those beautiful layers when baked. I like to flatten the dough into a disk shape before refrigerating for easier handling later.
Roll and Fill with Oreo Magic
Preheat your oven to 350°F and line two baking sheets with parchment paper. On a lightly floured surface, roll the chilled dough into a 12x16-inch rectangle (about ¼-inch thickness). Brush the entire surface with 2 tablespoons melted butter, leaving a 2-inch border around the edges.
Crush the 18 whole Oreo cookies into fine crumbs using a rolling pin or food processor. Sprinkle the crumbs evenly over the buttered dough, leaving the 2-inch border clear. Fold the dough over the filling by bringing the long sides toward the center, then fold the short ends inward to create a sealed packet. This creates a log with all that Oreo goodness trapped inside.
Seal the edges by pressing gently with your fingers. The dough should feel firm but not too tight—this prevents the rolls from bursting open during baking. Cut the log into 12 equal pieces (about 1-inch thick) and place them on the prepared baking sheets, 2 inches apart. This spacing gives them room to rise beautifully.
Bake to Golden Perfection
Bake the rolls for 20-25 minutes until they're golden brown at the edges and the internal temperature reaches 190°F. You'll know they're done when they pull away slightly from the parchment paper and smell heavenly. Avoid opening the oven door early—this can cause the rolls to sink.
While the rolls bake, prepare the glaze by whisking together 0.5 cup powdered sugar and 0.5 cup heavy cream until smooth. If using the optional 0.25 cup chocolate chips, gently press a few into the tops of the warm rolls for extra crunch.
Immediately after removing the rolls from the oven, brush the tops with the 2 tablespoons melted butter (reserved from earlier) and drizzle with the powdered sugar glaze. The heat will help the glaze set instantly, giving those rolls that bakery-fresh shine. Let them cool on a wire rack for 5 minutes before serving—this prevents the glaze from making them soggy.
Serve Warm for Maximum Enjoyment
Serve the rolls warm straight from the oven while the glaze is still slightly sticky. Each bite should deliver that perfect combination of flaky, buttery layers, crunchy Oreo crumbs, and sweet glaze. For an extra touch, dust with additional powdered sugar or sprinkle with chocolate chips.
These rolls are best enjoyed fresh, but you can store leftovers in an airtight container at room temperature for 2 days or freeze them for up to 3 months. To reheat, wrap them in foil and warm in a 350°F oven for 10 minutes—this restores that bakery-fresh texture and aroma.
Pro Tips For Making Oreo Rolls
- CHILL THE DOUGH: Roll this dough out when it’s cold straight from the fridge—about 15 minutes after shaping. Warm dough sticks, tears, and fights you. I used to ignore this and ended up with a lumpy mess every time. Trust me, the cold makes it easier.
- WEIGH YOUR FLOUR: Scoop and level that flour? Skip it. Use a kitchen scale for 3 cups—packing it slightly loosens the crumb and prevents dry, dense rolls. I learned this after my first batch turned out like hockey pucks.
- DON’T OVERWORK THE BUTTER: Cut that cold butter into the flour until it’s pea-sized, no smaller. Overmixing turns the dough tough, and you’ll end up with chewy rolls instead of flaky layers. I used to pulse it into dust, and the texture suffered.
- BAKE IN A TRAY: Line a half-sheet pan with parchment, then place rolls in a single layer—no crowding. They’ll expand, and if you stack them, the bottoms burn while the tops stay raw. I’ve lost count of the batches I ruined by ignoring this.
Pro cooking tips for oreo rolls
Dough Temperature Control
The key to flaky Oreo rolls starts with cold butter—never let it soften before mixing. I cut my 1 cup unsalted butter into ½-inch cubes and keep it chilled in the fridge until ready to use.
When cutting butter into flour, aim for pea-sized pieces—anything smaller will melt during baking and create dense rolls. If your dough feels too warm after mixing, pop it back in the fridge for 10-15 minutes before rolling. 🧈
Precision Rolling Technique
Use a rolling pin with measurements (like the Norpro 12-inch) to roll the dough to exactly ¼-inch thickness. Press down firmly but evenly—uneven thickness causes some rolls to bake faster than others. For extra precision, place the dough between two sheets of parchment paper before rolling.
This prevents sticking and makes transferring the dough to your baking sheet effortless. Flour your surface lightly, but not excessively—too much flour makes the dough dry and tough.
Folding Like a Pro
When folding the dough around the Oreo filling, work quickly to maintain the 2-inch border—this prevents the filling from leaking out during baking.
I press the edges with my fingers to create a tight seal, then use a sharp chef's knife to cut the log into 12 even pieces. For perfectly shaped rolls, rotate the log ¼ turn between cuts—this ensures consistent thickness.
If the dough resists folding, chill it for 10 minutes to firm up before proceeding.
Baking Time Mastery
Watch these rolls like a hawk during the last 5 minutes of baking—they go from perfect to overdone fast. The edges should be golden brown, and a toothpick inserted should come out with a few moist crumbs (not wet batter).
If your oven runs hot, reduce temperature to 340°F and add 2-3 minutes to baking time. For even browning, rotate the baking sheets halfway through using oven mitts. A digital thermometer (like the Thermoworks Sous Chef) ensures accuracy—aim for 190°F internal temperature.
Glaze Application Secrets
Timing is everything with the glaze—apply it immediately after baking while the rolls are still warm. I whisk the powdered sugar glaze until completely smooth (no lumps!) and drizzle it over the rolls using a small offset spatula for even coverage.
For extra shine, add ½ teaspoon vanilla extract to the glaze. If your rolls cool too much before glazing, rewarm them in a 200°F oven for 3-4 minutes to reactivate the glaze's stickiness. 💫
Equipment Upgrades
Invest in a pizza wheel (like the OXO Good Grips) for clean, professional cuts—it glides through dough like butter. A pastry brush with silicone bristles (such as West Bend) distributes melted butter evenly for those golden swirls.
For crushing Oreos, a mini food processor (like the Cuisinart DLC-6) is faster than a rolling pin, but pulse just until fine crumbs form—over-processing creates Oreo dust instead of chunks. Store your dough scraps in a resealable plastic bag to minimize drying between uses.
Nutrition facts
Frequently asked questions
Can I make these Oreo rolls without a food processor?
Crush the Oreos by placing them in a ziplock bag and using a rolling pin or heavy pan. For extra crunch, leave some small pieces intact. Just make sure they're finely crushed so they distribute evenly in the dough. This method works just as well as a food processor for this recipe.
Why did my Oreo rolls turn out dense instead of flaky?
Dense rolls usually happen when the butter melts too early. Keep your butter cold throughout mixing and refrigerate the dough for the full 30 minutes before rolling. Also, avoid overworking the dough—just mix until combined. If your kitchen is warm, chill the dough longer or roll it on a cool surface.
How can I make these rolls ahead of time?
You can prepare the dough up to 3 days ahead and store it wrapped tightly in plastic in the fridge. For filled rolls, bake them fresh for best texture, but you can freeze unbaked rolls for 2 months. Thaw in the fridge overnight before baking. Reheat baked rolls in a 350°F oven for 10 minutes to restore that fresh-baked warmth.
Can I substitute regular cookies for Oreos?
Yes, but the flavor will differ. Chocolate sandwich cookies like Nutter Butters or Mounds work well, though they won't have the same creamy filling. For a similar texture, use chocolate wafer cookies crushed finely. The key is to use 18 cookies total to maintain the right filling-to-dough ratio.
What's the best way to store leftovers?
Keep baked rolls in an airtight container at room temperature for up to 2 days. For longer storage, freeze them for 3 months. To prevent sogginess, place parchment paper between layers. When reheating, wrap them in foil and warm in a 300°F oven for 8-10 minutes until heated through.