
Desserts
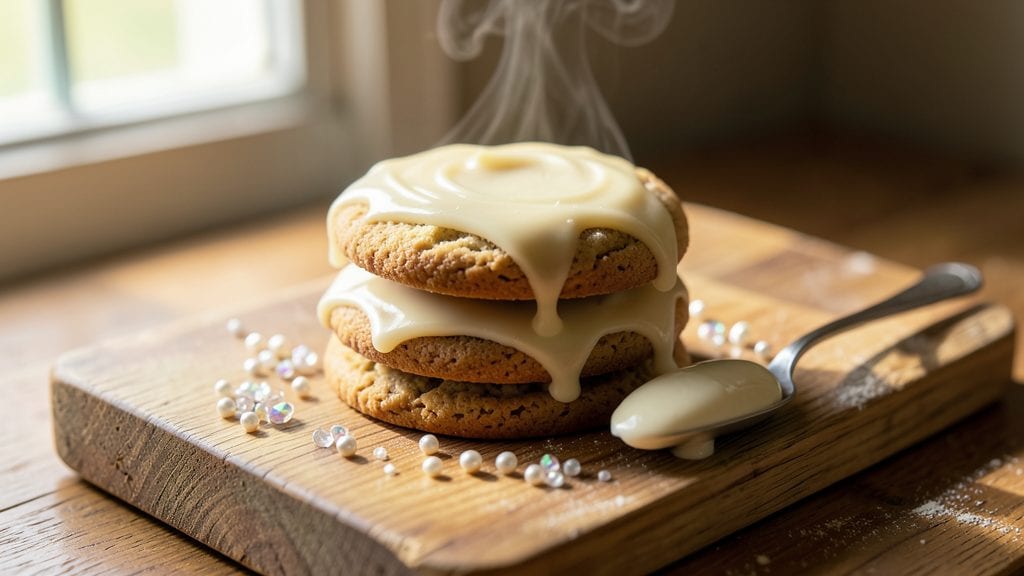
Betty Crocker’s original sugar cookie recipe delivers that perfect balance of tender crumb and buttery swirls—just like the ones you remember from childhood. The secret lies in precise ingredient ratios and a chilled dough that holds its shape without cracking, ensuring every bite stays sturdy yet melt-in-your-mouth soft. I’ve baked these for holidays for years, and this method never fails to impress.
What sets these apart is the classic combination of butter, sugar, and vanilla, with just enough flour to create that signature texture. The dough needs 30 minutes of chilling to firm up before rolling, which prevents spreading and guarantees clean edges when cutting shapes.
Baking at 375°F for 8–10 minutes yields golden-brown cookies with a crispy edge and a tender center—exactly as Betty Crocker intended.
Once out of the oven, these cookies maintain their shape long enough for decorating, whether you’re piping royal icing or pressing sprinkles. The buttery flavor shines through, making them ideal for gifting, holiday parties, or satisfying a sweet tooth.
With this recipe, you’ll achieve bakery-quality results every time, without shortcuts or guesswork.
Pair them with vanilla ice cream for a nostalgic dessert or serve as a festive centerpiece. The dough can even be made ahead and stored for up to 48 hours, so you’re always ready for last-minute celebrations. Let’s get baking!
Ingredients for betty crocker original sugar cookie
Buttery richness meets precise technique—these ingredients deliver classic sugar cookies with nostalgic crunch.
| Ingredient | Amount | Notes |
|---|---|---|
| Unsalted Butter 🧈 | 1 cup | Cold, cubed for cutting into dough |
| Granulated Sugar 🍚 | 1 ½ cups | Superfine preferred for smooth texture |
| Pure Vanilla Extract 🌿 | 2 tsp | Imitation-free for authentic flavor |
| Large Eggs 🥚 | 1 whole | Room temperature for even mixing |
| All-Purpose Flour 🌾 | 3 ½ cups | Sifted for lightest crumb |
| Baking Powder 🍞 | 1 tsp | Freshly opened for leavening |
| Diamond Crystal Kosher Salt 🧂 | ½ tsp | Fine grain for even distribution |
| Vanilla Bean Seeds 🌿 | 1 tbsp | Scraped from 1 pod (optional) |
| Powdered Sugar 🍚 | 1 cup | For royal icing (optional) |
| Heavy Cream 🥛 | 2 tbsp | For royal icing (optional) |
| Milk 🥛 | 1 tbsp | For royal icing (optional) |
| Decorating Sprinkles 🎀 | ½ cup | Assorted colors (optional) |
The butter is non-negotiable—use European-style unsalted for superior flavor and tenderness. Plugrá or Kerrygold are my go-tos, but any good-quality brand works. Keep it cold when cutting into the dough to prevent spreading. Sugar matters too: superfine sugar dissolves better, but if you only have granulated, pulse it in a food processor. Vanilla extract should be pure—McCormick or Nielsen-Massey are reliable. For the ultimate flavor boost, scrape seeds from one vanilla bean and mix them in with the extract. The flour? King Arthur or Gold Medal are my baking staples—they’re reliable for consistent results.
No vanilla bean? Extra vanilla extract (up to 2.5 tbsp) works, but the flavor won’t be as complex. Running short on butter? Shortening like Crisco can substitute at the same weight, though the flavor won’t be as rich. For the royal icing, if you don’t want to make it from scratch, Betty Crocker’s powdered icing mix is a lifesaver—just add water. The sprinkles? Jolly Rancher or Wilton are the best for vibrant colors and staying power. Pro tip: If your dough feels too sticky, chill it 10 minutes longer—it’s better to wait than to rush.
Dough keeps 48 hours in the fridge, wrapped tightly in plastic. For longer storage, freeze portions for up to 3 months—thaw overnight in the fridge before rolling. Once baked, cookies stay fresh 5 days in an airtight container. Royal icing sets in 24 hours, so decorate a day ahead if you’re gifting. And if you’re feeling fancy, dust with powdered sugar before sprinkles—they’ll stick better. These cookies reheat beautifully too: 30 seconds at 350°F brings back that bakery-fresh warmth.
Why You'll Love This Recipe
- No-Fuss Dough: The butter and sugar mix is so forgiving—just cream, fold, chill. No stand mixer? No problem. My hands and a wooden spoon do the job just fine, and the dough comes together faster than I can finish a podcast episode.
- Vanilla Kiss Magic: That pure vanilla extract isn’t just flavor—it’s memory. The cookies smell like holiday mornings, but honestly? I bake them year-round because the buttery crunch with that whisper of vanilla is pure satisfaction. (Yes, even on a Tuesday night.)
- Party-Proof Staple: Holiday gatherings? Last-minute teacher gifts? These cookies freeze like champs. Toss a batch in the freezer, and when you need them, they thaw and bake like new. My go-to for when I forget to RSVP to my own party.
- Pantry Goldmine: Five ingredients, zero weird substitutions. You’re using what you already have—no specialty flours or hard-to-find extracts. And the best part? A batch costs less than takeout, but the leftovers? They disappear faster than my willpower on a sugar cookie day.
Step-by-step instructions for Betty Crocker original sugar cookies
Here's how to create the iconic buttery swirls and perfect festive crunch that make these sugar cookies legendary.
Cream Butter and Sugars to Light and Fluffy
In a stand mixer fitted with the paddle attachment, combine the 1 cup unsalted butter (cold and cubed) with the 1.5 cups granulated sugar. Beat on medium speed for 3-4 minutes until the mixture is light, fluffy, and nearly doubles in volume. You'll see the color change from pale yellow to a creamy white—this indicates proper aeration. Here's the thing: if you rush this step, your cookies will be dense rather than tender.
Scrape down the sides of the bowl with a rubber spatula to ensure even mixing. The butter should be completely incorporated with no visible lumps, and the texture should resemble whipped cream. This creaming process is what creates those signature crackly tops and buttery swirls in the final cookies.
Incorporate Eggs, Vanilla, and Dry Ingredients
Add the 1 whole large egg (room temperature) and the 2 teaspoons pure vanilla extract to the butter-sugar mixture. Beat on low speed for 1 minute until fully combined. The mixture will look slightly curdled at first, but don't worry—this will resolve when we add the dry ingredients.
In a separate bowl, whisk together the 3.5 cups all-purpose flour, 1 teaspoon baking powder, and 0.5 teaspoon diamond crystal kosher salt. With the mixer on low speed, gradually add the dry ingredients to the wet mixture, mixing just until combined. Avoid overmixing—you should still see small streaks of flour. Scrape down the sides of the bowl again to ensure everything is evenly incorporated.
For that authentic Betty Crocker flavor, add the 1 tablespoon vanilla bean seeds (scraped from 1 pod) and mix on low speed for 10 seconds until evenly distributed. The vanilla bean seeds add a subtle depth of flavor that sets these cookies apart from basic sugar cookies.
Chill the Dough for Perfect Texture
Divide the dough into two equal portions and flatten each into a 4-inch disk. Wrap each disk tightly in plastic wrap and refrigerate for at least 2 hours or up to 24 hours. This chilling step is non-negotiable—it allows the gluten to relax, prevents excessive spreading, and ensures those beautiful buttery swirls when you roll out the dough.
I know it's tempting to skip this step, but trust me: cold dough holds its shape better in the oven, resulting in thicker cookies with crisp edges and tender centers. If you're short on time, you can also freeze the dough disks for up to 3 months—just thaw them in the refrigerator overnight before rolling.
Roll, Cut, and Bake to Golden Perfection
Preheat your oven to 375°F and line two baking sheets with parchment paper. On a lightly floured surface, roll out one disk of dough to 1/4-inch thickness. Use a 2-inch round cutter to cut out cookies, then reroll the scraps and cut more shapes. For that classic Betty Crocker look, press a fork across the top of each cookie to create the signature crisscross pattern.
Place the cut-out cookies 2 inches apart on the prepared baking sheets. Bake for 8-10 minutes until the edges are golden brown and the centers still look slightly soft. They'll continue to set as they cool. Rotate the baking sheets halfway through for even baking. Don't overbake—you want a tender cookie with just a hint of crispness around the edges.
Cool and Decorate (Optional)
Allow the cookies to cool on the baking sheets for 5 minutes before transferring them to a wire rack to cool completely. This brief resting period prevents them from becoming too crisp as they cool. While the cookies are still warm, you can press 0.5 cup decorating sprinkles onto the tops for a festive touch.
For the optional royal icing, whisk together the 1 cup powdered sugar, 2 tablespoons heavy cream, and 1 tablespoon milk until smooth and pipeable. This icing sets at room temperature, so you can decorate the cooled cookies with borders, flowers, or other designs. If you're making these for a special occasion, the icing adds that extra touch of elegance.
Pro Tips For Making Betty Crocker Original Sugar Cookie
- CREAM BUTTER AND SUGAR FIRST: I learned this the hard way—skipping this step means you’ll end up with a dough that fights you. Use the paddle attachment (or a wooden spoon) and mix the butter and sugar on medium-high until it’s light and fluffy, about 2-3 minutes. You’re not just combining ingredients; you’re incorporating air for those classic Betty Crocker cookies.
- CHILL THE DOUGH LONGER THAN YOU THINK: I was skeptical until I tried it: wrap the dough in plastic and let it rest in the fridge for at least 2 hours—or overnight if you’re planning ahead. This isn’t just about easier rolling; it’s about flavor development and preventing cookies that spread into sad, flat pancakes. Trust the process.
- WEIGH THE FLOUR—DON’T SCOOP: Sounds weird, but it works: use a kitchen scale for the flour. Scooping from the bag packs it down, and you’ll end up with cookies that are denser than they should be. For this recipe, aim for 2 ¼ cups by weight—about 280 grams. Your future self will thank you when the texture is just right.
- BAKE ONE SHEET AT A TIME: Resist the urge to double-stack your cookies—this recipe’s butter content means they need room to breathe. Crowd the pan, and you’ll get uneven baking: some edges crispy, others still doughy. Use two baking sheets and rotate halfway if needed. Yes, it takes longer, but the result is worth it.
Essential equipment for this recipe
Stand Mixer Essentials
Your stand mixer is the MVP for creaming butter and sugar—no hand fatigue here! I swear by the KitchenAid Artisan Series with the paddle attachment for this recipe. The paddle’s flat edges ensure even mixing without overaerating the butter.
If you’re on a budget, the Cuisinart SM-50BC delivers similar performance at half the price. Avoid hand mixers—they can’t handle the 3-4 minutes of creaming needed for those signature swirls. 🔥
Precision Measuring Tools
Accurate measurements are non-negotiable for sugar cookies. Invest in a digital kitchen scale (like the OXO Good Grips) for dry ingredients—it’s more precise than scooping. For liquids, use a liquid measuring cup with a spout to avoid spills.
Pro tip: Sift your flour and baking powder together through a fine-mesh sieve to prevent lumps. I keep a King Arthur sifter in my pantry—it’s a game-changer for even distribution.
Dough Chilling Gear
Chilling dough properly requires the right tools. Wrap dough disks in plastic wrap (not foil—it can stick) and flatten them with a rolling pin (I love the OXO Good Grips nonstick version). For longer storage, use quart-sized freezer bags—they’re stackable and prevent freezer burn.
A digital thermometer (like the Thermoworks Thermapen) ensures your dough is at 65°F before rolling—too warm, and it’ll spread.
Cookie Cutters & Baking Sheets
Classic sugar cookies need the right cutter. A 2-inch round cutter with scalloped edges (like the Wilton Scalloped Round) gives that nostalgic look. For baking, use heavy-duty half-sheet pans (like Wilton Premium) with parchment paper—no sticking, ever.
I also keep a fork nearby to press those signature crisscross patterns. A cookie scoop (like the OXO Good Grips) helps portion dough scraps evenly for rerolling.
Decorating Extras
For decorating, a piping bag with a small round tip (like Wilton 1M) is perfect for royal icing. A damp paper towel under the piping bag keeps it from sticking. For sprinkles, use a fine-mesh sieve to distribute them evenly.
I also keep a small offset spatula handy to smooth out icing mistakes. And don’t skip the powdered sugar duster**—it adds a professional finish before adding sprinkles. ✨
Nutrition facts
Frequently asked questions
Why does the dough need to chill for so long?
The 2-hour chill is crucial for two reasons: it relaxes the gluten so cookies hold their shape, and it prevents excessive spreading in the oven. Cold butter in the dough creates those signature buttery swirls when baked. Skipping this step often results in flat, cakey cookies instead of the classic thick, sturdy texture. Think of it as a non-negotiable baking rule for perfect sugar cookies!
Can I substitute shortening for butter?
You can use 1 cup shortening instead of butter, but your cookies will lose that rich, buttery flavor. Shortening also creates a slightly denser texture. If you do substitute, reduce the sugar by 1 tablespoon since shortening is less sweet. For the best results, stick with butter—it's what gives these cookies their signature taste and tender crumb.
How do I prevent my cookies from spreading too much?
First, ensure your dough is properly chilled (65°F or colder) before rolling. Second, roll the dough to exactly 1/4-inch thickness—no thinner! Third, use a 2-inch round cutter and place cookies 2 inches apart on the baking sheet. Finally, bake at 375°F for 8-10 minutes max. Overbaking causes spreading, so pull them out when edges are just golden.
What's the best way to store leftover cookies?
Store cookies in an airtight container at room temperature for up to 5 days to maintain freshness. For longer storage, freeze them on a tray first (to prevent sticking), then transfer to a freezer bag for up to 3 months. Thaw at room temperature before serving. The key is preventing moisture buildup—never store them in plastic wrap without ventilation.
Can I make these cookies gluten-free?
Yes, but you'll need a 1:1 gluten-free flour blend (like King Arthur or Bob's Red Mill) plus 1/4 cup xanthan gum to mimic gluten's structure. Replace the all-purpose flour and baking powder with these, but expect slightly denser cookies. The texture won't be identical, but they'll still be delicious! For best results, use a gluten-free measuring cup to avoid compaction.