
Sauces & Condiments
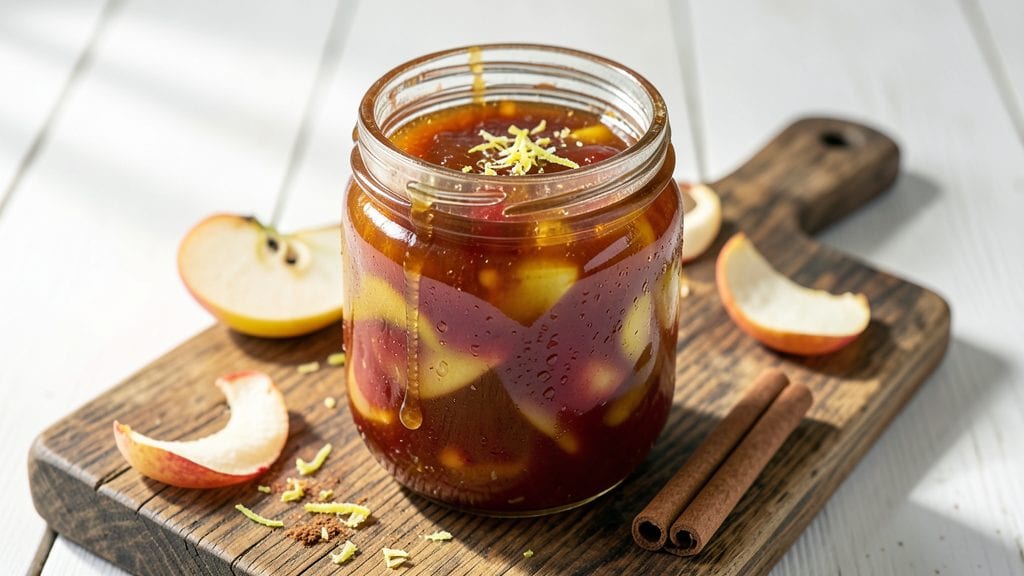
Mastering this apple butter jam canning recipe turns ordinary apples into a fragrant, golden spread that stays velvety for months—perfect for toast, desserts, or gifting. The key lies in balancing sugar and spices while following precise canning techniques to ensure safety and shelf stability.
Every jar you open will taste like autumn, even months after harvest.
This recipe uses just five core ingredients—apples, sugar, cinnamon, vanilla, and lemon juice—to craft a jam that’s thicker than traditional apple butter but still spreadable, with a depth of flavor from slow-cooked fruit.
Sterilizing jars and lids properly is critical, and I’ll guide you through the exact processing times needed for long-term storage without risking spoilage. The result? A condiment so versatile it elevates everything from pancakes to cheese boards.
What sets this apart is the caramelized texture and warm spice notes that develop during the cooking process—think of it as a cross between apple butter and jam, with a smooth, paste-like consistency that clings beautifully.
The canning method preserves these qualities while keeping the jam safe to enjoy for up to a year. Whether you’re prepping for winter or making gifts, this recipe delivers professional-quality results at home.
Perfect for batch cooking, this apple butter jam doubles as a pantry staple and a thoughtful homemade gift. Once you master the technique, you’ll never buy store-bought again. Let’s get started on preserving that harvest flavor all year long.
Ingredients for apple butter jam canning
Five core ingredients transform apples into a velvety, spiced jam that preserves autumn's essence in sterilized jars.
| Ingredient | Amount | Notes |
|---|---|---|
| Apples (Mixed Varieties) 🍎 | 6 lb | Cored, peeled, chopped into 1-inch pieces |
| Granulated Cane Sugar 🍚 | 4 cups | Light brown preferred for caramelization |
| Ground Cinnamon 🌿 | 2 tbsp | Ceylon preferred for delicate flavor |
| Pure Vanilla Extract 🍯 | 1 tbsp | Bourbon-infused for depth |
| Fresh Lemon Juice 🍋 | ½ cup | From 2-3 medium lemons |
| Water 💧 | 1 cup | For initial simmering |
| Ball Mason Jars (8 oz) 🍯 | 8 whole | New lids and bands required |
| Apple Pie Spice Blend 🌶️ | 1 tsp | Optional for enhanced warmth |
The apple selection dictates flavor complexity—Honeycrisp and Granny Smith yield the perfect balance of sweetness and acidity. Purchase from local orchards in fall for peak freshness, or use frozen apples when out of season. The sugar should be light brown cane sugar for optimal caramelization during the slow cook; Domino or C&H brands work reliably. For cinnamon, Ceylon ground cinnamon from Penzeys Spices delivers a more delicate, less bitter profile than cassia. Sterilize jars and lids in boiling water for 10 minutes prior to filling to ensure shelf stability.
Substitutions must preserve the jam's signature texture and flavor balance. White sugar can replace brown, but reduce by 1 tbsp and add 1 tbsp molasses to compensate for moisture loss. Vanilla bean paste works equally well as extract—simply halve the amount and scrape in the seeds. No fresh lemons? Bottled lemon juice suffices, but avoid brands with added preservatives. For spice variations, nutmeg or cardamom can replace apple pie spice at a 1:1 ratio; allspice adds warmth without overpowering. When canning, always use new lids—reused lids fail to seal properly, compromising safety.
Processed apple butter jam maintains peak quality for 12-18 months when stored in a cool, dark pantry. Check seals within 24 hours of canning—lids should not flex when pressed. Unsealed jars should be refrigerated and consumed within 1 week. For gifting, wrap jars in kraft paper and tie with twine for a rustic presentation. The jam thickens further upon refrigeration, so store opened jars in the fridge. Freeze extras in ice cube trays for single-serving convenience, though texture may slightly alter after thawing.
Why You'll Love This Recipe
- No-Fuss Simmering: I swear by this recipe because it’s basically set-it-and-forget-it. Peel and core apples? Nah—just toss in whatever mix you have (Granny Smiths for tang, Honeycrisp for sweetness) and let the slow cooker do the work. By the time you’re done, you’ve got a batch of jam that tastes like autumn in a jar.
- Vanilla-Cinnamon Magic: That first spoonful of jam—warm, spiced, with a whisper of vanilla—is what makes this recipe a keeper. The lemon juice cuts through the sweetness just enough, while the cinnamon lingers like a hug. Honestly, it’s the kind of flavor that makes you want to slather it on everything.
- Year-Round Pantry Hero: This jam isn’t just for toast. Spread it on oatmeal, stir it into yogurt, or drizzle it over cheese plates. I’ve even used it to glaze pork tenderloin—trust me, the sweet-savory combo is next-level. Plus, canning it means you’ve got a gift ready for birthdays, holidays, or that friend who always forgets to bring dessert.
- Budget-Friendly Luxury: Apples are cheap, sugar is cheap, and a little vanilla goes a long way. This recipe stretches your dollar without sacrificing taste, and the leftovers? They’ll last months in your pantry. Between us, I’ve made this so many times I’ve lost count—and I still reach for it when I want something special without breaking the bank.
Step-by-step instructions for spiced apple butter jam
Transforming fresh apples into rich, spiced apple butter jam requires patience and precision.
Prepare the Apple Base for Cooking
In a large, heavy-bottomed pot, combine the 6 lb of cored, peeled, and chopped apples with the 1 cup of water. Bring to a boil over medium-high heat, then immediately reduce to medium-low heat. Let the apples simmer uncovered for 20-25 minutes, stirring occasionally, until they break down into a thick, chunky purée.
You'll notice the apples release their juices and soften significantly. This initial cooking step is crucial—it develops the apple's natural sweetness and removes excess moisture before adding sugar. The purée should resemble thick applesauce with some texture remaining. If the mixture becomes too watery, simmer uncovered for an additional 5 minutes to evaporate excess liquid.
Add Sugar and Spices for Caramelization
Once the apples have broken down, stir in the 4 cups of granulated cane sugar, the 2 tbsp of ground cinnamon, and the 1 tsp of apple pie spice blend. Increase heat to medium-high and bring the mixture to a full boil, stirring constantly to dissolve the sugar completely. This step is where the magic happens—the sugar begins caramelizing, deepening the flavor and creating that signature apple butter texture.
After the mixture returns to a boil, reduce heat to low and let it simmer uncovered for 45-60 minutes, stirring every 10-15 minutes. You'll see the mixture thicken dramatically as moisture evaporates. The aroma will become rich and spiced, with a sweet, caramel-like scent filling your kitchen. The jam should coat the back of a spoon and hold its shape when drizzled from a spoon—this is your visual cue that it's ready for the next step.
Incorporate Acid and Vanilla for Balance
Remove the pot from heat and stir in the 0.5 cup of fresh lemon juice and the 1 tbsp of bourbon-infused vanilla extract. The acidity from the lemon juice brightens the flavors, while the vanilla adds depth and warmth. Let the mixture sit off heat for 5 minutes to allow the flavors to meld. This resting period ensures the vanilla and lemon are fully incorporated without cooking off.
Real talk: The lemon juice might seem like too much at first, but it prevents the jam from tasting overly sweet and extends its shelf life. The vanilla extract should be stirred in thoroughly—don't just drizzle it on top. Taste the mixture now; it should be rich, spiced, and perfectly balanced between sweet and tart. If it needs more depth, add another ½ teaspoon of vanilla extract and let it steep for an additional 5 minutes off heat.
Test for Doneness and Prepare for Canning
Return the pot to low heat and cook the jam for an additional 10-15 minutes, stirring frequently. The jam is done when it reaches a 220°F internal temperature, measured with a candy or jam thermometer. At this point, it should be thick, spreadable, and hold its shape when cooled. If it's still too thin, simmer uncovered for another 5-10 minutes to reduce further.
While the jam cooks, prepare your 8 whole Ball Mason jars (8 oz) by running them through a hot water bath to sterilize. Remove the lids and bands, then fill each jar with the hot jam, leaving ¼-inch headspace at the top. Use a spoon or spatula to remove any air bubbles trapped in the jam. Wipe the rims of the jars with a clean, damp cloth to ensure a proper seal.
Process and Store for Long-Term Preservation
Place the lids on the jars and screw on the bands until fingertip-tight. Process the jars in a boiling water bath for 10 minutes to create a vacuum seal. This step is critical for preserving the jam and preventing spoilage. After processing, remove the jars and let them cool on a towel for 12 hours before checking the seals.
To test the seal, press down on the center of each lid. If it doesn't pop up, the jar is properly sealed and ready for storage. Store the sealed jars in a cool, dark place for up to 1 year. The jam will continue to thicken as it ages, developing even more complex flavors. Once opened, refrigerate and consume within 3 months for the best quality.
Pro Tips For Making Apple Butter Jam Canning
- Peel the Apples: I learned this the hard way—peeling apples first saves hours of scrubbing later. The skins add texture, sure, but they also trap dirt and grit that’ll make your jam cloudy and gritty. Use a sharp paring knife or a vegetable peeler for speed, and skip the peels unless you’re going for rustic texture.
- Simmer Low and Slow: High heat means scorched sugar and burnt edges. Start with a rolling boil to break down the apples, then drop to a gentle simmer—think tiny bubbles, not a frenzy. Cover partially and let it cook for 2-3 hours, stirring every 30 minutes to prevent sticking. Patience here means smooth, velvety jam, not a sugar glaze.
- Measure Sugar Precisely: Eye-balling sugar ruins the balance. Use a kitchen scale for the cane sugar—it’s denser than white sugar, and too much will make your jam cloying, while too little won’t gel properly. Aim for 1:1 sugar to cooked apple ratio, and taste as you go. If it’s too sweet, add lemon juice to cut through it.
- Strain Twice, Stir Once: After cooking, strain the apples through a fine-mesh sieve first, then a cheesecloth for ultra-smooth jam. Don’t skip the second strain—it catches the last of the fibers that’ll make your finished product gritty. Press the pulp with a spoon, but resist the urge to squeeze; you want flavor, not water.
Creative variations of this apple butter jam canning
Spiced Cider Twist
Infuse your apple butter jam with warm cider flavors by replacing ½ cup of water with ½ cup apple cider—I love using hard cider from Angry Orchard—and add 1 cinnamon stick while simmering.
The tannins in the cider deepen the color and add subtle bitterness that balances the sweetness. Strain out the cinnamon stick before canning for a cleaner texture. 🍎
Chai-Spiced Fusion
Create an exotic twist by swapping the vanilla for 1 tbsp chai spice blend (mix ½ tsp each cardamom, ginger, cloves, and black pepper) and adding ½ tsp ground fennel.
The warm, earthy spices mimic the complexity of chai tea, making this jam perfect for pairing with cheddar cheese boards or scones. Simmer the spices with the apples for 10 minutes before adding sugar to release their aromatic oils. 🌶️
White Chocolate Swirl
For a decadent dessert jam, stir in ½ cup white chocolate chips during the final 5 minutes of cooking. The heat will melt the chocolate into silky ribbons that swirl through the jam, creating a marbled effect.
Use Guittard white chocolate chips for the smoothest texture. This variation is ideal for spreading on croissants or pound cake—the contrast of tart jam and sweet chocolate is irresistible. ✨
Herbal Lavender Version
Add a floral note by incorporating 1 tbsp culinary lavender buds (from Mountain Rose Herbs) during the initial apple simmer. Remove the lavender after 15 minutes to prevent bitterness, then strain the mixture before adding sugar.
The subtle lavender aroma pairs beautifully with goat cheese or honey drizzles. This variation works especially well with Honeycrisp apples, whose natural sweetness complements the floral undertones. 💜
Smoky Maple Infusion
For a fall-inspired variation, replace ½ cup sugar with ½ cup pure maple syrup (I recommend Vermont maple) and add ½ tsp smoked sea salt during the final 10 minutes of cooking.
The maple syrup adds a caramel-like depth, while the salt enhances the apple's natural sweetness. This smoky-sweet jam is perfect for grilled cheese sandwiches or roasted pork tenderloin. 🔥
Citrus Zest Brightener
Boost brightness by adding 1 tbsp orange zest and 1 tbsp lemon zest along with the lemon juice. The zest infuses the jam with a vibrant citrus aroma that cuts through the richness.
For extra zing, add 1 tsp orange extract during the final 5 minutes of cooking. This variation shines when paired with ricotta cheese or yogurt parfaits. 🍊
Nutrition facts
Frequently asked questions
Can I use frozen apples instead of fresh for this recipe?
Frozen apples work perfectly—just thaw them first and drain any excess liquid. The texture will be slightly softer, but the flavor remains rich. For best results, use frozen apples that haven't been pre-cooked or sweetened. If the mixture seems too watery after cooking, simmer uncovered for an extra 5-10 minutes to reduce.
Why does my apple butter jam turn out too runny?
Runny jam usually means excess moisture wasn't evaporated enough. Always simmer uncovered on low heat until it reaches 220°F (measured with a thermometer). If it's still too thin after processing, try adding 1 extra tablespoon of sugar and reducing for another 10 minutes. Sterilizing jars properly also helps thicken during storage.
How do I know when the jars are properly sealed?
After cooling for 12 hours, press the center of each lid—it shouldn't pop up. If it does, the jar didn't seal. Store unsealed jars in the fridge and use within 1 week. For a second chance, reprocess the jar with a new lid. Proper sealing depends on clean rims, correct headspace (¼-inch), and proper processing time (10 minutes in boiling water).
Can I adjust the sweetness level in this recipe?
Yes, but with caution! Reduce sugar by ½ cup only if using very sweet apples like Honeycrisp. For tart varieties, keep the full 4 cups to balance acidity. If you must reduce sugar, add 1 extra tablespoon of lemon juice to maintain shelf stability. Never skip sugar entirely—it's essential for preserving texture and safety during canning.
What's the best way to use up extra apple butter jam?
This versatile spread elevates everything from toasted sourdough to cheese platters. Try it as a glaze for roasted pork, stirred into yogurt or oatmeal, or as a filling for thumbs. For baking, fold into muffin batter or swirl into pound cake. Freeze extras in ice cube trays for single-serving portions—just thaw overnight in the fridge.