
Snacks
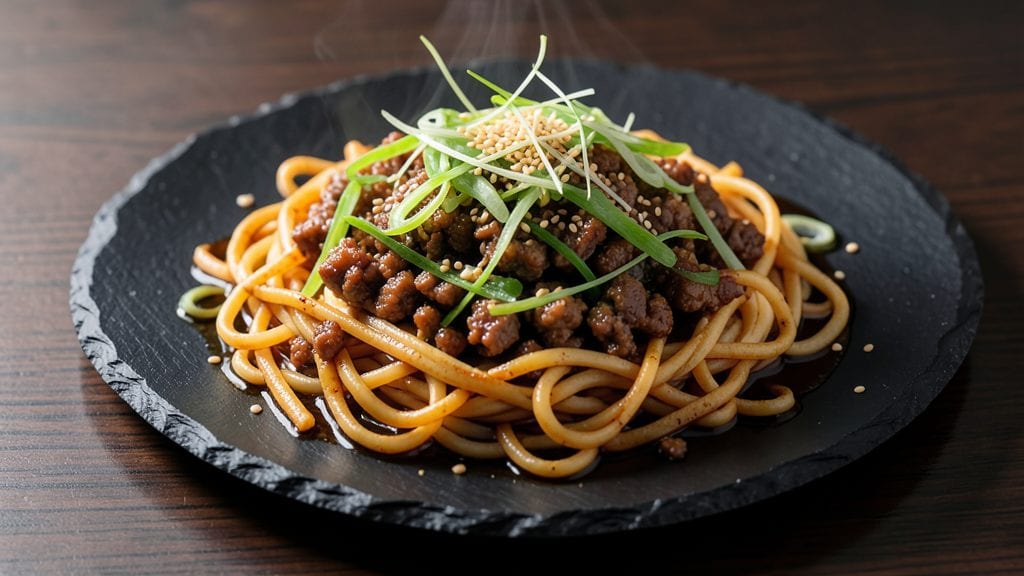
This fry udon recipe transforms chewy udon noodles into crispy-fried bites that pack layers of savory umami in just 15 minutes—a perfect balance of Japanese street-food authenticity and home-cook simplicity.
The secret lies in high-heat frying, where noodles develop a satisfying crunch while staying tender inside, all while absorbing a punchy soy-ginger glaze.
I first discovered this technique at a Tokyo izakaya, where the sizzle of hot oil met the aroma of cabbage and pork—an experience that changed how I think about noodles forever.
What makes this recipe work is the two-stage cooking process: first, the udon noodles are briefly blanched to remove excess starch, then fried in small batches to ensure even crispiness without overcrowding the pan.
Traditional ingredients like shredded cabbage, ground pork, and a splash of sesame oil elevate the dish with authentic Japanese flavors, while optional additions like chili oil or green onions let you customize the heat and freshness to your taste.
This method delivers restaurant-quality results without requiring specialized equipment—just a sturdy frying pan and a little patience.
The outcome is a plate of crispy-fried udon that crackles with each bite, combining the satisfying texture of fried noodles with the rich umami of the stir-fried filling. The cabbage wilts just enough to soften, while the pork adds a deep, savory note that ties everything together.
Serve immediately with a drizzle of extra sesame oil and a sprinkle of sesame seeds for that final touch of authenticity. This dish is equally at home as a quick snack, a light lunch, or even a bold appetizer for a dinner party.
For those looking to adapt the recipe, swapping pork for shrimp or tofu keeps it vegetarian-friendly while maintaining the same crispy texture. The technique also works with other chewy noodles like ramen or soba if you're feeling experimental. Let’s get cooking—your taste buds will thank you for the umami-packed crunch.
Ingredients for fry udon
Authentic Japanese flavors meet crispy-fried texture in this umami-packed udon dish.
| Ingredient | Amount | Notes |
|---|---|---|
| Udon Noodles 🍜 | 8 oz | Fresh or dried, cut into 4-inch pieces |
| Ground Pork 🐷 | ½ lb | Lean or standard, finely ground |
| Green Cabbage 🥬 | 4 cups | Shredded, thinly sliced |
| Sesame Oil 🫒 | 1 ½ tbsp | Toasted, for frying and finishing |
| Soy Sauce 🍶 | 2 tbsp | Japanese or tamari preferred |
| Fresh Ginger 🌿 | 1 tbsp | Finely grated, aromatic |
| Vegetable Oil 🫒 | 1 ½ cups | High smoke point, neutral flavor |
| Garlic Cloves 🧄 | 3 cloves | Minced, aromatic |
| Sesame Seeds 🌰 | 1 tbsp | Toasted, for garnish |
| Chili Oil 🌶️ | 1 tbsp | Optional, for heat |
| Green Onions 🧅 | ¼ cup | Sliced, for garnish |
| Salt 🧂 | 1 tsp | Kosher or sea salt |
| White Pepper 🌶️ | ½ tsp | Freshly ground |
The udon noodles are the foundation—opt for fresh udon if possible, as it holds its shape better during frying. Japanese specialty stores like Mitsuwa Market carry high-quality udon, but most Asian grocery sections stock reliable brands like Nissin or Maruchan. For dried udon, soak it for 2-3 minutes in boiling water before cutting into even 4-inch pieces. The cabbage should be shredded finely—think matchstick thickness—to ensure it wilts quickly during the stir-fry. Ground pork adds depth, but lean pork works best to avoid excess grease during frying. If you can't find it pre-ground, pulse it in a food processor for finer texture.
No ground pork? Shrimp or tofu crumbles make excellent substitutes—just ensure they're finely chopped to mimic the texture. For the ginger, freshly grated is non-negotiable; jarred lacks the aromatic punch. Sesame oil can be swapped for neutral oil in the frying stage, but toasted sesame oil is essential for finishing—it carries the nutty, toasty notes that define this dish. The cabbage can be pre-shredded from a bagged mix, but freshly sliced cabbage holds up better during frying. If you're vegetarian, mushroom stems or king oyster mushrooms add umami and hold their shape well.
Prep the udon and cabbage ahead—they keep well in the fridge for up to 2 days if stored in airtight containers. The stir-fry filling (pork, garlic, ginger) can be made 1 day in advance and reheated gently before frying. For optimal crispiness, fry the udon in small batches—overcrowding steams instead of frying. Serve immediately with a drizzle of extra sesame oil and sesame seeds; the dish loses its crunch as it cools. Leftovers? Reheat in a dry skillet over medium heat for 2-3 minutes to restore crispiness.
Why You'll Love This Recipe
- One-Pan Magic: I swear by this recipe—just toss everything in one skillet, and boom, dinner’s ready. No fancy tools, no stress. The pork browns while the cabbage wilts, and those udon noodles soak up all the savory goodness without a single pot to wash.
- Umami Bomb: That sesame oil hit? Chef’s kiss. It turns the simple soy sauce into something richer, almost like a little flavor explosion in every bite. The cabbage adds crunch, but the pork keeps it hearty—it’s the kind of dish that makes you go back for seconds without even thinking.
- Lunchbox Hero: Between us, this is my secret weapon for meal prep. Fry up a big batch on Sunday, and you’ve got lunch sorted all week. Pack it cold or reheat it—it’s just as good either way. My kids actually finish their lunch when it’s in there.
- Budget Win: Ground pork and udon noodles stretch far, and cabbage? It’s practically free. I make this when I’m pinching pennies, and no one ever complains. The sesame oil is the only splurge, but a little goes a long way—trust me, you won’t miss the fancy stuff.
Step-by-step instructions for crispy-fried umami udon
Master this technique for perfectly crispy udon bites with a savory pork and cabbage filling.
Prepare the Udon Noodles and Pork Filling
Cut the 8 oz udon noodles into 4-inch pieces using a sharp knife. Soak them in cold water for 5 minutes if using dried noodles to soften slightly, then drain and pat completely dry with paper towels. This step prevents soggy noodles during frying.
In a mixing bowl, combine the 0.5 lb ground pork with 2 tbsp soy sauce, 1 tbsp finely grated fresh ginger, 3 minced garlic cloves, 1 tsp salt, and 0.5 tsp white pepper. Mix thoroughly with your hands until the pork is evenly coated. The seasoning should adhere completely, ensuring every bite carries umami depth.
Fry the Udon Noodles to Crispy Perfection
Heat 1.5 cups vegetable oil in a deep skillet or wok over medium-high heat until it reaches 350°F. Test with a small piece of udon—it should sizzle immediately and float to the surface. Add the prepared udon noodles in batches, avoiding overcrowding, and fry for 2-3 minutes until they turn golden brown and crispy.
Use a slotted spoon to remove the fried udon and drain on a wire rack lined with paper towels. The high heat is critical here—it transforms the noodles from soft to delightfully crisp while locking in their texture. If the oil smokes excessively, reduce the heat slightly to maintain control without compromising crispness.
Cook the Pork and Cabbage Filling
In the same skillet, add 1.5 tbsp sesame oil and increase heat to medium-high. Cook the seasoned pork mixture for 4-5 minutes, breaking it apart with a spatula, until it turns golden brown and loses its raw color. Remove the pork and set aside.
In the same pan, add 4 cups shredded green cabbage and stir-fry for 3-4 minutes until it wilts and softens. Return the pork to the pan and mix well. The cabbage should absorb the pork's juices, creating a cohesive filling. Remove from heat and let it cool slightly for easier handling.
Assemble and Finish the Crispy Udon Bites
Fill each piece of crispy udon with 1 tablespoon of the pork and cabbage mixture, pressing gently to secure. Heat 1 tbsp sesame oil in a clean skillet over medium heat until shimmering. Add the filled udon bites and sear for 1-2 minutes per side until lightly browned and heated through.
Garnish immediately with 1 tbsp toasted sesame seeds, 0.25 cup sliced green onions, and 1 tbsp chili oil for added heat and aroma. Serve while still crispy—each bite should deliver a satisfying crunch followed by the rich, savory filling. The contrast between the crispy exterior and tender interior is what makes this dish irresistible.
Pro Tips For Making Fry Udon
- Prep Cabbage Thin: Shave those cabbage leaves paper-thin with a sharp knife—like you’re slicing butter. Thick strips turn mushy in the stir-fry, and nobody wants soggy greens in their udon. Use the core as a handle for stability (yes, it works).
- Cook Pork Until Dry: Push the ground pork until it’s no longer pink inside—even if it looks overcooked. I used to stop at "well-done," but the meat stays greasy and dull. Break it into small, even crumbles while cooking so it fries up crisp, not clumpy.
- Shock Noodles First: Drain udon, rinse briefly in cold water, then immediately shock them in ice water for 30 seconds. This stops the cooking and keeps them firm for frying—no more mushy noodles clinging together like a sad pile of spaghetti.
- Toss Noodles in Oil: Toss the drained udon in a tablespoon of sesame oil before adding everything else. It coats them instantly, giving that signature nutty aroma and preventing the cabbage from stealing all the flavor. (Your future self will notice the difference.)
Make-ahead tips for fry udon
Prep Ahead Strategy
Start by prepping the udon noodles and cabbage the night before—store them in airtight containers in the fridge. The udon can be cut into 4-inch pieces and kept dry, while the cabbage should be shredded and stored separately. This saves 15 minutes on cooking day and keeps ingredients fresh. 🌟
Filling Prep
Make the pork filling one day ahead and store it in the fridge. Combine the ground pork, soy sauce, ginger, garlic, salt, and white pepper, then chill until ready to use.
The flavors meld beautifully overnight, deepening the umami. Just reheat gently before frying to maintain texture.
Batch Frying
For optimal crispiness, fry the udon in small batches—never overcrowd the pan. Use a wire rack lined with paper towels to drain excess oil, which helps maintain crunch.
I fry two batches at a time, resting the first batch while the second cooks. This ensures even cooking and prevents soggy noodles. ⚡
Assembly Efficiency
Fill the udon pieces with the pork mixture just before serving to keep everything crisp. Store the filling and fried udon separately in airtight containers at room temperature for up to 2 hours.
Reheat the filling in a skillet for 1-2 minutes before assembling—this keeps the udon from getting soggy.
Garnish Prep
Toast the sesame seeds and slice the green onions ahead of time. Store them in small jars or containers so they’re ready to garnish immediately. A quick drizzle of chili oil right before serving adds fresh heat without overpowering the dish.
Keep these garnishes on the table for a restaurant-style finish. 💫
Reheating Leftovers
If you have leftovers, reheat them in a dry skillet over medium heat for 2-3 minutes to restore crispiness. Avoid microwaving—they’ll turn rubbery. Serve with extra sesame oil and chili oil to revive the flavors.
These crispy udon bites taste best fresh but can be reheated for up to 2 days.
Nutrition facts
Frequently asked questions
Can I use dried udon noodles instead of fresh?
Soak dried udon in boiling water for 2-3 minutes until just tender, then drain and pat completely dry with paper towels. The key is removing all excess moisture before frying—otherwise, the noodles will steam instead of crisp up. Fresh udon is ideal for texture, but dried works perfectly with this method.
How do I get the udon extra crispy?
Fry in small batches over medium-high heat with oil at 350°F, and use a wire rack lined with paper towels to drain. The secret is high heat and minimal crowding—overcrowding steams the noodles instead of frying them. For extra crunch, double-fry: fry once, drain, then fry again for 30 seconds until golden.
What if I don't have pork?
Great substitutes include finely chopped shrimp, tofu crumbles, or even mushrooms for a vegetarian version. For shrimp, cook just until pink (1-2 minutes), while tofu should be pressed and pan-fried until crispy. Mushrooms add umami and hold their shape well—just slice them thinly for quick cooking.
Can I make this ahead of time?
Prep the udon and filling separately up to 2 days ahead, storing them in airtight containers. Reheat the filling in a skillet for 1-2 minutes before assembling to keep the udon crispy. Avoid microwaving—it ruins the texture. Garnish fresh before serving for the best flavor.
Why did my udon turn soggy?
Soggy udon usually means excess moisture or overcrowding during frying. Always pat noodles completely dry and fry in batches. If the oil wasn't hot enough (350°F), the noodles will steam instead of crisp. Test oil with a small piece of udon—it should sizzle immediately.