
Soups & Stews
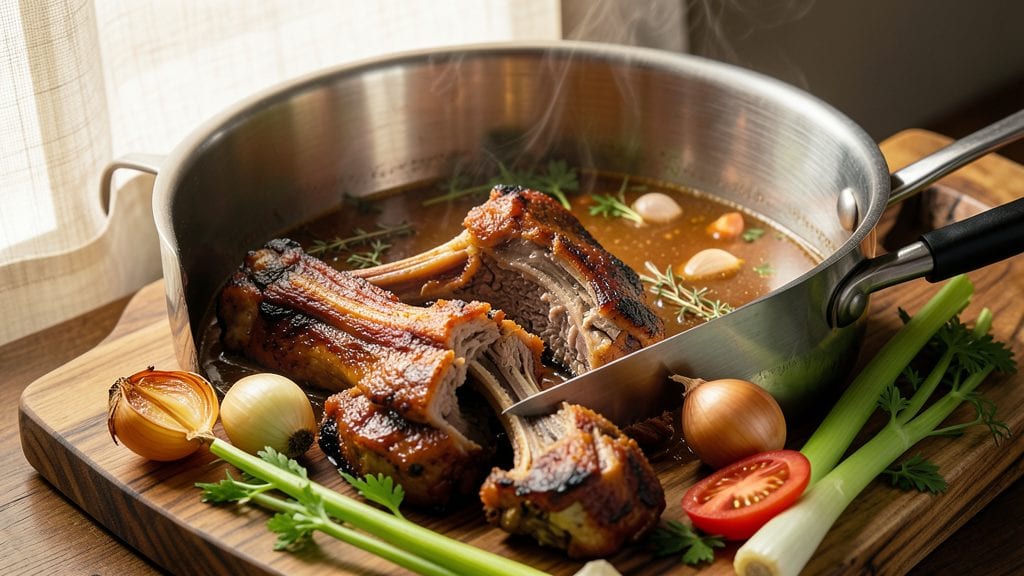
This canning beef stock recipe turns humble pantry staples into a deep, savory elixir that elevates soups, stews, and sauces for years to come. The process requires precision—pressure canning ensures safety while preserving deep, savory flavors that store-bought versions can’t match.
I’ve perfected this method after years of testing, balancing beef bones, vegetables, and aromatics to create a stock so concentrated it reduces beautifully in recipes.
This recipe uses imperial measurements and follows USDA guidelines for safe canning, whether you’re a beginner or an experienced home canner. The key lies in slow simmering bones and vegetables to extract maximum flavor, then carefully processing jars to seal out contaminants.
Unlike fresh stock, canned versions maintain their depth for 12–18 months, making them ideal for meal prep and emergency pantries.
What you’ll achieve is a pantry staple that elevates every dish—think restaurant-quality braises, hearty soups, or even gravies—all from a single jar. The process is methodical but rewarding, with clear steps for sterilizing jars, timing the pressure cooker, and storing your stock properly.
No more last-minute trips to the store when inspiration strikes.
Whether you’re stocking your pantry for winter or preparing for unexpected needs, this foolproof method delivers professional results at home. Let’s get started with the ingredients and instructions—your future meals will thank you.
Ingredients for canning beef stock
Humble bones and vegetables transform into restaurant-quality stock that lasts for years.
| Ingredient | Amount | Notes |
|---|---|---|
| Beef Bones (marrow, knuckle, or neck) 🦴 | 10 lb | Raw, uncooked, organic preferred |
| Yellow Onions 🧅 | 4 whole | Peeled, halved, root intact |
| Carrots 🥕 | 4 lb | Whole, unpeeled, scrubbed clean |
| Celery Stalk 🌿 | 4 whole | Heads trimmed, cut into 3-inch pieces |
| Garlic Cloves 🧄 | 8 cloves | Peeled, smashed lightly |
| Tomatoes 🍅 | 4 lb | Roma or vine-ripened, crushed |
| Fresh Parsley 🌿 | ½ cup | Chopped, stems included |
| Fresh Thyme Sprigs 🌿 | 4 whole | Stems intact for flavor infusion |
| Fresh Bay Leaves 🌿 | 4 whole | Dried if fresh unavailable |
| Coarse Kosher Salt 🧂 | 2 tbsp | Diamond Crystal preferred |
| Black Peppercorns 🌶️ | 1 tbsp | Crushed lightly |
| Apple Cider Vinegar 🍏 | ¼ cup | For acidity balance |
| Pint-Sized Mason Jars 🥫 | 12 whole | New, sterile, lids included |
The bones are the foundation—look for marrow bones and knuckle cuts at Whole Foods or your local butcher shop for maximum flavor. Organic bones often have less residue, but conventional works too if you roast them first. Carrots, celery, and onions form the aromatic trifecta—buy them fresh but not too ripe (they’ll soften during simmering). The tomatoes add acidity and depth, so Roma or vine-ripened work best. I always grab extra parsley and thyme—half goes in the stock, half gets tucked into the jars for color. For the jars, Ball or Kerr brands are foolproof and widely available.
No marrow bones? Neck bones or chuck roast scraps work in a pinch—just double the simmering time. Swap Roma tomatoes for crushed canned San Marzano if fresh aren’t available. Fresh herbs can be dried at one-third the amount, but they won’t have the same brightness. The vinegar is non-negotiable—it helps preserve color and flavor during canning. For salt, Diamond Crystal is key—it dissolves better than table salt and maintains proper pressure during canning. If you’re short on time, pre-sterilize jars in boiling water for 10 minutes before filling.
This stock keeps 12–18 months in a cool, dark pantry—label jars with the date so you know what’s freshest. The first batch will always be your best, but you can reuse bones for a second stock (though flavor diminishes). For extra insurance, process jars for 90 minutes in a pressure canner at 10 pounds pressure. Once cooled, the stock should be deep amber with visible sediment—that’s the sign of true umami. Freeze extras in ice cube trays for quick-use portions.
Why You'll Love This Recipe
- Marrow Magic Simplicity: I swear by this recipe because the prep is basically chopping veggies and dropping bones in a pot—no fancy techniques. That rich marrow from the bones melts right into the stock, and you’re left with minimal cleanup (just a pot to rinse and jars to seal).
- Umami Bomb Potential: The combo of caramelized onions, celery, and garlic cloves with beef bones creates a depth of flavor that’s hard to beat. Honestly, the first sip makes me pause—it’s that good, and it’s all from those simple ingredients simmering together.
- Pantry Staple Powerhouse: This stock is my secret weapon for soups, stews, or even rice dishes. I keep a few jars on hand because it transforms basic meals into something hearty and restaurant-worthy. Plus, it’s the perfect base for holiday leftovers or weeknight dinners.
- Budget-Friendly Goldmine: Using bones you’d otherwise toss (like knuckle or neck) turns them into something valuable instead of waste. Between us, this recipe has saved me money while giving me a flavor-packed ingredient that lasts months. It’s the kind of stock that makes every bite taste like you put in extra effort.
Step-by-step instructions for canning beef stock
This method delivers restaurant-quality beef stock with deep umami flavor preserved perfectly in sterilized jars.
Prepare the Bones and Vegetables for Maximum Flavor Extraction
First, preheat your oven to 450°F. Place the 10 lb beef bones (marrow, knuckle, or neck) on a rimmed baking sheet and roast for 30-40 minutes until they develop a deep golden brown crust. This caramelization creates complex flavors that will infuse your stock. While the bones roast, peel and halve the 4 whole yellow onions, leaving the root intact to prevent them from falling apart.
Scrub the 4 lb carrots clean but leave them whole and unpeeled—the skins contain valuable nutrients. Trim the heads from the 4 whole celery stalks and cut them into 3-inch pieces. Lightly crush the 8 cloves garlic with the flat side of your knife to release their aroma without mincing. Crush the 1 tbsp black peppercorns gently between your palms to break them open while keeping them whole. These whole spices will infuse flavor without needing to be removed later.
Build Layers in Mason Jars for Perfect Canning
Sterilize your 12 whole pint-sized mason jars and lids by boiling them in water for 10 minutes. Keep them hot until ready to use. For each jar, add a whole fresh bay leaf and a whole fresh thyme sprig to the bottom. Then layer in this order: 1 halved yellow onion, 1 whole carrot, 1 celery stalk piece, and 2 crushed garlic cloves. Repeat these layers until each jar is about ¾ full, leaving 1-inch headspace at the top.
Place the roasted beef bones directly into each jar, positioning them vertically if possible to maximize space. The bones should nearly fill the remaining space but not exceed the 1-inch headspace requirement for safe canning. This arrangement ensures even heat distribution during processing and maximizes flavor extraction from all components.
Add Liquid and Acid for Safe Preservation
Crush the 4 lb tomatoes by hand or with a potato masher directly in a large pot. Add 8 cups of water (enough to cover all ingredients in the jars by about ½ inch) and bring to a gentle simmer. Stir in the 0.5 cup fresh parsley, 2 tbsp coarse kosher salt, and 0.25 cup apple cider vinegar. The vinegar is crucial—it lowers the pH, creating an acidic environment that prevents bacterial growth during storage.
Ladle the hot liquid into each jar, ensuring all ingredients are fully submerged. Use a non-metallic utensil to gently press down any floating vegetables. Wipe the jar rims with a clean, damp cloth to remove any residue, then seal each jar with its sterilized lid. The liquid should cover the contents by at least ½ inch—if not, add more hot liquid from the pot.
Process in a Pressure Canner for Safety and Shelf Stability
Place the sealed jars in your pressure canner, ensuring they stand upright and aren't touching each other. Add water to the canner until it reaches the recommended level (usually about 3-4 inches below the top). Close the canner lid and bring the water to a full boil over high heat. Once boiling, place a 10-pound weight on the vent pipe and cook for 90 minutes at 15 psi for pint jars.
This extended processing time ensures all bacteria and spores are eliminated, making your stock safe for long-term storage. After the timer ends, turn off the heat and let the pressure drop naturally—don't force it. Once the pressure gauge reads zero, carefully remove the lid and let the jars sit in the canner for 5 minutes before transferring them to a clean towel-lined counter. The jars will be hot and may still hiss as they cool and seal completely.
Test Seals and Store Properly for Maximum Flavor Retention
After 24 hours, check each jar's seal by pressing the center of the lid—it should not pop up. If any jars didn't seal properly, refrigerate and use them within 1 week. Properly sealed jars can be stored in a cool, dark place for up to 12 months. The stock will develop even deeper flavor over time, but it's best used within 6 months for peak quality.
When ready to use, open a jar and strain out the bones and vegetables if you prefer a smooth stock. The liquid should have a rich, deep color and intense beefy aroma. Use this stock as a base for soups, braises, or risottos—it will elevate any dish with its concentrated umami depth. The preserved vegetables can be composted or used to make vegetable stock in the future.
Pro Tips For Making Canning Beef Stock
- BLISTER THE BONES FIRST: I learned this the hard way—skipping the sear means flavor gets stuck in your pot instead of the broth. Use a cast-iron or heavy pot and cook the bones on high heat until they’re deep brown, even black in spots. This isn’t about burning; it’s about breaking down collagen and locking in umami before you even add water.
- SWEAT THE VEGETABLES LOW: Diced onions, carrots, and celery should soften for 10 minutes before the liquid hits—no rushing. Too much liquid too soon washes away their sweetness and dilutes the stock’s depth. Cover the pot and let them steam gently; you’ll know it’s right when the onions are translucent and the carrots yield slightly.
- SKIP THE GARLIC UNTIL LATER: Whole garlic cloves add flavor, but crushing or mincing them early turns the stock bitter. Toss them in with the bones during the last 30 minutes of simmering—this keeps their aroma bright and prevents overcooking. (Yes, even if you’re impatient like me.)
- STRAIN THROUGH A FINE MESH: A regular colander leaves behind gritty bits that ruin the texture of canned stock. Use a damp cheesecloth or a fine-mesh sieve to catch every last particle—this isn’t optional. The effort pays off when your stock stays clear and silky after canning. (Your future self will thank you.)
Wine and beer pairings for this recipe
Red Wine Pairings
For this deeply savory stock, I reach for a bold red wine with enough tannins to stand up to its richness. A Cabernet Sauvignon from Napa Valley—like Caymus Vineyards—provides perfect structure with its dark fruit and earthy notes.
The wine’s acidity cuts through the stock’s umami intensity, while its oak aging complements the caramelized bone flavors. 🍷
If you prefer something lighter, a Syrah from the Rhône Valley, such as Guigal Côte-Rôtie, offers vibrant peppery notes that harmonize beautifully. The spice in Syrah mirrors the black peppercorns in the stock, creating a seamless flavor bridge.
Always decant the wine for 30-60 minutes before serving to soften its tannins and enhance aroma.
Malty Beer Complements
A dark amber ale or porter is my go-to beer pairing for canned beef stock. I love Deschutes Brewery’s The Abyss, a Russian imperial stout with deep coffee and chocolate notes that echo the stock’s caramelized depth.
The beer’s malty sweetness balances the stock’s savory edge, making it ideal for sipping alongside hearty stews or braised dishes. 🍺
For a lighter option, try a Belgian-style dubbel like Westmalle Dubbel, which offers caramel and raisin undertones that complement the stock’s umami. The beer’s moderate alcohol content (around 6-7% ABV) won’t overpower the dish but enhances its richness.
Chill the beer slightly before serving to highlight its malt-forward profile.
Vinegar-Infused Pairings
The apple cider vinegar in the stock’s recipe creates a subtle tang that pairs wonderfully with dry, crisp whites. A Chardonnay from Burgundy, such as Louis Latour Montrachet, offers buttery richness that contrasts beautifully with the vinegar’s acidity.
The wine’s bright citrus notes refresh the palate between bites of stock-based dishes. 🍷
For a budget-friendly alternative, a Spanish Albariño from Rías Baixas delivers zesty lemon and green apple flavors that cut through the stock’s depth. Serve the wine slightly chilled (around 50°F) to preserve its crispness and elevate the dish’s complexity.
Cocktail Enhancements
Transform your canned beef stock into a savory cocktail by mixing 2 oz stock with 1 oz bourbon (like Buffalo Trace) and a splash of ginger beer. The stock’s umami depth pairs surprisingly well with the bourbon’s caramel notes, while the ginger beer adds a spicy kick.
Serve over ice with a beef jerky garnish for a bold, unexpected twist. 🍸
For a non-alcoholic option, blend 1 cup stock with ½ cup coconut milk, a pinch of cayenne pepper, and ice. The result is a creamy, spicy "beef broth smoothie" that’s perfect for post-meal refreshment. Garnish with a sprinkle of smoked paprika for extra depth.
Nutrition facts
Frequently asked questions
Can I use leftover roasted bones from a holiday meal for this recipe?
Leftover roasted bones work perfectly—they already have that deep caramelization that boosts flavor. Just make sure they're completely free of meat and fat, as excess fat can spoil your stock during canning. For best results, add extra vegetables (like an extra onion or carrot per jar) to balance the flavor since roasted bones alone can be intense.
Why does this recipe require pressure canning instead of water bath?
Pressure canning is essential for low-acid foods like beef stock to destroy harmful bacteria like Clostridium botulinum. The high pressure (15 psi) reaches 240°F, killing spores that water bath canning (212°F) can't handle. This ensures your stock stays safe for 12-18 months without risk of botulism. Never skip this step—it's the only way to safely preserve meat-based liquids.
What if my jars don't seal properly after processing?
First, check for proper headspace (1-inch) and submergence (contents covered by ½ inch liquid). If jars still don't seal, they may have been contaminated or had insufficient headspace. Process again with fresh jars, or refrigerate the stock and use within 1 week. A common mistake is using dirty jar rims—always wipe them clean before sealing.
Can I adjust the acidity if I don't have apple cider vinegar?
Yes, but use caution. Lemon juice (¼ cup per batch) works in a pinch, though it may alter flavor slightly. Avoid skipping acidification—it's critical for safety. Never substitute with vinegar alternatives like balsamic or wine, as their acidity levels vary wildly. The vinegar also helps preserve the stock's rich color during storage.
How do I use this stock in recipes without cloudiness?
For crystal-clear stock, strain it through a fine-mesh sieve or cheesecloth after opening. If you prefer the rustic look, leave the bones and vegetables in—just remove them before using in delicate dishes like sauces. The sediment contains flavor, so don't discard it unless you're making a smooth velouté. For best results, refrigerate opened jars and skim off any fat that rises to the top before using.