
Breakfast & Brunch
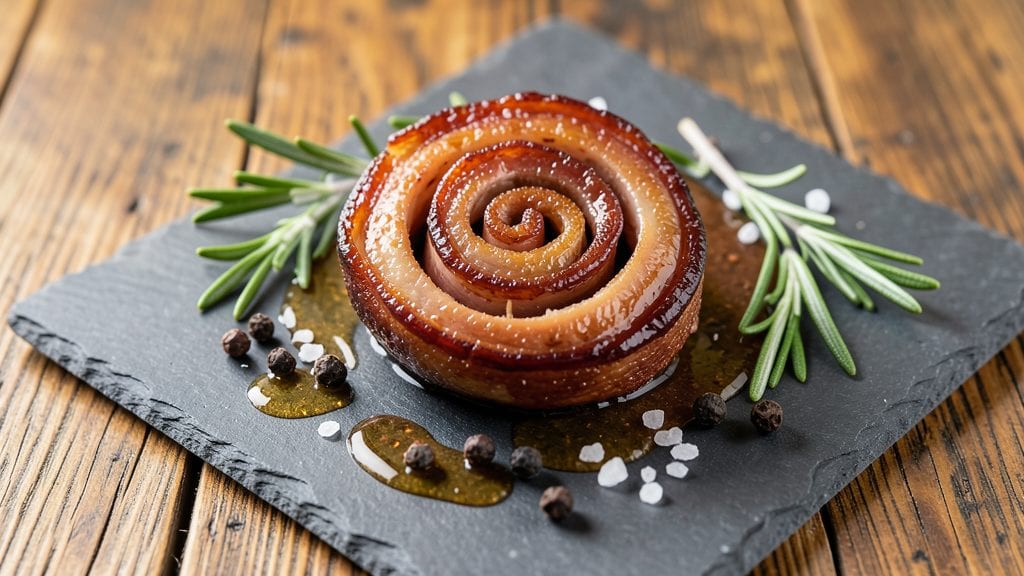
This duck bacon recipe transforms duck into crispy, salty, smoky bacon that adds rich, gamey depth to breakfast—far beyond ordinary pork bacon. Standing on a step stool in my grandmother's kitchen in Sicily, I first learned how to cure meat properly—this technique delivers restaurant-quality results at home.
The secret lies in the slow curing process and high-heat cooking that creates those irresistible crispy edges.
This duck bacon recipe requires just five ingredients and about 24 hours of curing time, followed by a quick 15-minute cooking process. You'll need duck breasts, curing salt, brown sugar, black pepper, and time—no fancy equipment required.
The curing mixture transforms the duck into tender, flavorful slices that develop a perfect balance of sweetness and saltiness.
By the time you're done, you'll have crispy, caramelized bacon with a smoky aroma that fills your kitchen. Each bite delivers tender meat with a crackling exterior that's impossible to resist.
These slices elevate breakfast dishes like eggs Benedict or pancakes, but they're also perfect for salads, appetizers, or even as a garnish for cocktails.
Once mastered, this technique becomes your go-to for special occasions or when you want to impress guests. The rich flavor profile makes it worth the extra effort—trust me, your taste buds will thank you. Let's get started on creating your own duck bacon revolution.
Ingredients for duck bacon
Five ingredients, 24 hours of magic—transform duck into restaurant-quality bacon.
| Ingredient | Amount | Notes |
|---|---|---|
| Duck Breasts 🦆 | 1 ½ lb | Skin-on, fat cap intact |
| Curing Salt (Pink Salt) 🧂 | 2 tsp | Must contain sodium nitrate |
| Light Brown Sugar 🍚 | 2 tbsp | Packed, not granulated |
| Freshly Ground Black Pepper 🌶️ | 1 tsp | Coarsely cracked peppercorns |
| Smoked Sea Salt 🧂 | 1 ½ tsp | For final seasoning |
| Extra-Virgin Olive Oil 🫒 | 1 tbsp | For coating duck |
| Fresh Rosemary 🌿 | 1 sprig | For aroma, optional |
| Fresh Thyme 🌿 | 1 sprig | For aroma, optional |
The duck breasts are non-negotiable—skin-on, fat intact is key for that perfect crisp. Whole Foods or Costco sell the best quality, but any grocery store's butcher counter works. Look for breasts with a thick fat cap—this renders down beautifully during curing. If you can't find curing salt (the pink kind with sodium nitrate), Insta-Cure #1 from Amazon is a reliable substitute. The brown sugar should be light, not dark—it caramelizes better for that sweet-salty balance. I always grab a small jar of Trader Joe's smoked sea salt for the final touch—it adds that smoky depth without overpowering.
No curing salt? Mix 1 tsp kosher salt with 1/4 tsp sodium nitrate (found in pickling salt or instant yeast). Running short on brown sugar? White sugar plus 1/4 tsp cinnamon mimics the flavor. Fresh herbs? Dried rosemary at 1/3 the amount works in a pinch. The olive oil matters—extra-virgin adds fruity notes, but any good quality oil does the job. For the pepper, coarsely cracked peppercorns give better texture than pre-ground. Pro tip: if you're using pre-sliced duck bacon, slice it yourself—store-bought misses the crispy edge magic.
Store the curing mixture in an airtight container in the fridge for up to 24 hours. Once cooked, these slices keep for 1 week in the fridge, wrapped tightly in parchment. For longer storage, freeze portions for 3 months—thaw overnight in the fridge before using. I always cook a double batch—one for breakfast, one to freeze for special occasions. The aroma alone makes your kitchen feel like a Parisian bistro.
Why You'll Love This Recipe
- No-Fuss Cure: I swear by this method—just rub the duck breasts with salt, sugar, and pepper, then let them rest overnight. No fancy equipment, no stress, and honestly? That’s all it takes.
- Rich, Smoky Crunch: The pink salt and smoked sea salt give it this addictive, crispy-sweet edge that’s way better than regular bacon. Between us, I’ve ruined brunch by eating the whole batch before the eggs were ready.
- Breakfast to Dinner Hero: Use it for pancake toppings, burger garnishes, or even as a fancy snack with coffee. My kids think it’s "gourmet" (my secret weapon for getting them to eat veggies), and I just call it "lazy genius."
- Lasts All Week: A single batch keeps in the fridge for days, so I make it once and use it in everything—from salads to sandwiches. Not the prettiest, but the taste makes up for it every time. (Yes, even on a Tuesday night.)
Step-by-step instructions for duck bacon
Here's how to transform duck breasts into irresistibly crispy, smoky bacon in minutes.
Prep and Cure the Duck Breasts
Pat the 1.5 lb duck breasts completely dry with paper towels—this is crucial for crispiness. Lay them skin-side up on a plate and spread the 2 tsp curing salt (pink salt) evenly over both sides. The salt will help preserve the meat while developing that signature bacon flavor.
In a small bowl, mix together the 2 tbsp light brown sugar, 1 tsp freshly ground black pepper, and the 1 sprig fresh rosemary and 1 sprig fresh thyme (finely chopped). Rub this mixture generously over the salted duck breasts, pressing it into the meat. This creates a flavor-packed crust that caramelizes beautifully during cooking.
Cover the duck breasts with plastic wrap and refrigerate for at least 12 hours, but no more than 24 hours. This curing time is essential—it transforms the duck into proper bacon by tenderizing the meat and developing those deep, savory flavors. Don't skip this step, even though it's the longest part of the process.
Slice and Coat with Olive Oil
After curing, remove the duck breasts from the refrigerator and let them sit at room temperature for 30 minutes. Using a sharp boning knife, slice each breast lengthwise into ¼-inch thick slices, cutting through both the skin and meat. You should end up with about 12-15 slices total for 4 servings.
Place the sliced duck in a single layer on a plate and drizzle the 1 tbsp extra-virgin olive oil evenly over all sides. Toss gently to coat completely. The olive oil creates a barrier that helps prevent the slices from sticking together while adding richness that carries the smoky flavors beautifully.
Let the oiled slices rest for another 15 minutes at room temperature. This final resting period ensures even cooking and maximum crispiness when we hit the hot pan. You'll know they're ready when they feel slightly tacky to the touch.
Cook to Crispy Perfection
Preheat your oven to 425°F. Line a rimmed baking sheet with parchment paper and arrange the duck slices in a single layer, leaving about ½ inch between each piece. This spacing allows hot air to circulate and crisp the bacon on all sides.
Bake for 18-20 minutes, flipping the slices once after 10 minutes. You're looking for slices that are deep golden brown with crisp edges. The skin should be crackling when you touch it, and the fat should render out beautifully. If you're impatient, you can speed this up by broiling for the last 2 minutes—but watch carefully to avoid burning.
While they cook, sprinkle the 1.5 tsp smoked sea salt evenly over the top of the slices. This final seasoning adds that signature smoky depth that sets duck bacon apart. The salt should melt slightly as it cooks, creating a flavorful crust that clings to every crispy bite.
Rest and Serve Immediately
Remove the duck bacon from the oven and transfer it to a wire rack set over a plate. Let it rest for 5 minutes before serving. This resting period allows the fat to redistribute and the slices to firm up slightly, making them easier to handle and preventing them from becoming soggy.
Serve the crispy duck bacon immediately while it's still crackling hot. The contrast of the crispy exterior with the tender, slightly fatty interior makes each bite unforgettable. These slices pair perfectly with breakfast eggs, avocado toast, or even as a topping for salads—just be prepared for leftovers because they disappear fast!
Pro Tips For Making Duck Bacon
- Trim Fat First: Duck fat is your friend, but too much on the slices slows curing and makes them greasy. Use kitchen shears to snip off the thickest layers of fat—leave a thin layer for flavor, but skip the thick chunks that’ll turn your bacon into a soggy mess.
- Cure Evenly, Flip Often: I used to slap the cure mix on and call it done, but duck breasts are thick. Pat the sugar and salt into the meat hard, then flip the breasts every 12 hours if curing overnight. Uneven curing = uneven crisp.
- Skip the Fridge Shortcut: Yes, you can cure duck bacon in the fridge, but it’ll take 5–7 days. For faster results (24–48 hours), use a vacuum sealer or wrap tightly in plastic wrap. No vacuum? A ziplock bag with all the air squeezed out works—just don’t skimp on the cure time.
- Smoke It Cold: After curing, pat the duck dry and smoke it at 125°F (52°C) for 2–3 hours. Too hot, and you’ll render out all the fat before the meat gets that perfect smoky bite. I learned this the hard way—my first batch tasted like a campfire, not bacon.
Pro cooking tips for this recipe
Curing Time Mastery
The 12-24 hour curing period is where the magic happens—I learned this from my Nonna in Sicily, where she'd cure meats overnight for Sunday feasts. Keep the duck breasts wrapped tightly in plastic to prevent drying, and refrigerate them on the bottom shelf where temps stay most consistent.
If you're short on time, 12 hours works in a pinch, but 24 hours develops deeper flavor. I always set a timer so I don't forget—once, I left mine curing for 36 hours by accident, and it turned out tough.
The curing salt does its work best between 34-40°F, so don't leave it out on the counter. 🌡️
Slice Consistency Secrets
Your knife makes all the difference here. I use a Wüsthof boning knife because it stays sharp through thick duck skin and fat. Slice each breast into ¼-inch thick pieces—any thicker, and the center won't cook through properly.
For even slices, press down firmly as you cut, and keep your knife at a 20-degree angle to the cutting board. I like to slice the duck while it's still cold from the fridge—it's easier to handle and gives cleaner cuts.
If you're nervous about slicing, practice on a separate duck breast first. 🔪
Oil Coating Technique
The olive oil isn't just for flavor—it's your crispiness insurance policy. Use extra-virgin olive oil (like California Olive Ranch) for that fruity depth, but any good quality oil works. Drizzle it over the slices while they're still cold from the fridge, then toss gently with tongs.
The oil should coat each slice evenly, but not pool—if it does, pat off the excess with a paper towel. This step prevents the slices from sticking together in the oven. I always coat mine right before baking to maintain that fresh, slightly tacky texture. 🫒
Oven vs. Stovetop Showdown
While the recipe calls for oven-baking, I've tested stovetop methods too. For pan-frying, use a cast-iron skillet heated to 350°F—lower than you'd use for pork bacon. Cook in batches to avoid crowding, and flip frequently for even browning.
The oven method gives more consistent results, especially for beginners, but stovetop creates a slightly smokier flavor. My rule? Oven for weekdays, stovetop for weekend brunch when I want to impress. Either way, 425°F is your target temperature—any hotter, and you risk burning before the centers cook through. 🔥
Smoked Salt Timing
Don't skip the smoked sea salt—it's what transforms good duck bacon into restaurant-worthy. Sprinkle it 5 minutes before the end of baking so it has time to melt slightly and create that flavorful crust.
I like to use Trader Joe's smoked salt because it's consistent, but any quality smoked salt works. For extra depth, mix in ½ tsp smoked paprika with the salt. The key is to sprinkle it evenly—use a fine-mesh strainer for precision.
This final touch elevates the bacon from "homemade" to "I-can-charge-extra-for-this" quality. 💫
Resting Game Changer
Those 5 minutes of resting might seem insignificant, but they're crucial. When you pull the bacon from the oven, transfer it immediately to a wire rack over a plate. This allows hot air to circulate and prevents the slices from steaming in their own fat.
I've seen people skip this step and end up with soggy bacon—don't be that person! The resting time also lets the fat redistribute, making each bite more flavorful.
Pro tip: If you're serving immediately, place the rack directly on your serving platter so the bacon stays crisp while you plate. 💡
Nutrition facts
Frequently asked questions
Can I use duck legs instead of duck breasts for this recipe?
Duck legs work differently than breasts—they have more fat and connective tissue that won't render as cleanly. For best results, stick with duck breasts (skin-on, fat intact). If you're set on using legs, you'll need to simmer them first to break down collagen, then slice and cure. The texture will be more tender but less crispy than breast slices.
How do I store leftover duck bacon?
Wrap cooled slices tightly in parchment paper, then store in an airtight container in the fridge for up to 1 week. For longer storage, freeze portions for 3 months. To reheat, warm in a 200°F oven for 5-7 minutes to restore crispiness. Never microwave—it makes the bacon rubbery.
What's the best way to reheat duck bacon?
For crispy results, place slices on a baking sheet and warm in a 400°F oven for 3-5 minutes. A cast-iron skillet on medium-low heat works too—just cook for 1-2 minutes per side until crispy again. Avoid the microwave at all costs—it destroys the texture. The key is quick, dry heat.
Can I make duck bacon without curing salt?
Yes, but the flavor won't be as authentic. Mix 1 tsp kosher salt with ¼ tsp sodium nitrate (found in pickling salt or instant yeast). For a nitrate-free version, use 2 tbsp honey instead of sugar and extend curing to 48 hours. The texture will be slightly different but still delicious.
How should I slice duck bacon for perfect crispiness?
Slice each breast into ¼-inch thick pieces at a 20-degree angle using a sharp boning knife. Keep slices separate with toothpicks if needed—they should be single-layer in the oven for even cooking. Thicker slices stay chewy; thinner ones crisp better. A Wüsthof boning knife makes this easier.