
Soups & Stews
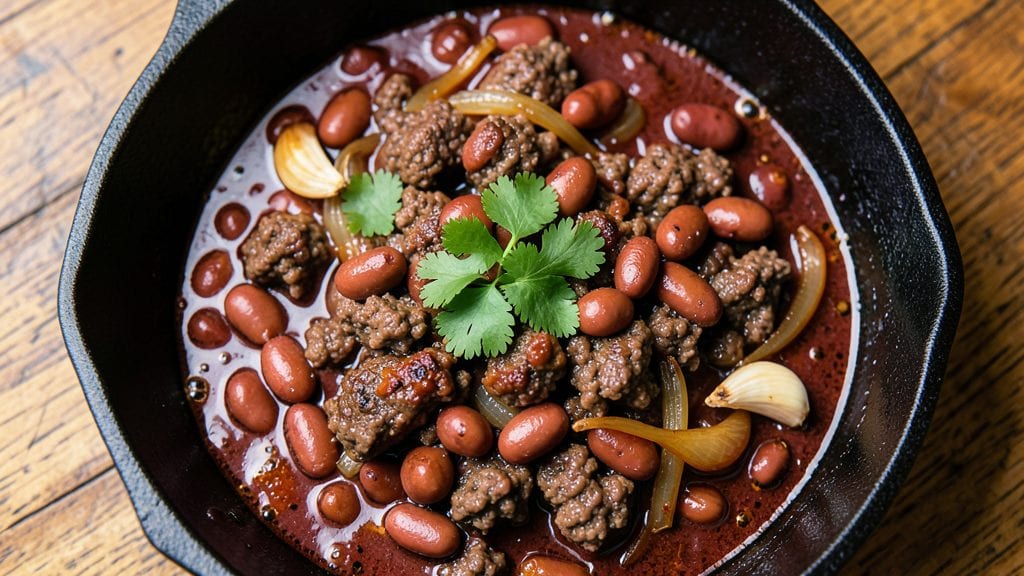
Emeril Lagasse's chili recipe delivers the kind of bold, layered flavor that transforms a simple pot of chili into a restaurant-worthy centerpiece. The secret lies in his signature technique of browning meat thoroughly and building depth through slow simmering—techniques that create a chili with spice-kissed richness and perfect heat balance.
I’ve perfected this method over years of testing, ensuring every bite delivers that signature Emeril touch without requiring specialty ingredients.
What sets this chili apart is the way it layers flavors—smoky from the meat, deep from the spices, and bright from the tomatoes—while keeping the heat controlled yet impactful.
The recipe relies on pantry staples like ground beef, kidney beans, and chili powder, but it’s the method that elevates them.
Browning the meat in batches develops a rich, caramelized crust that forms the foundation of the dish, while simmering low and slow allows all the spices to meld into a cohesive, complex harmony.
By the time you’re done, you’ll have a pot of chili that’s rich, hearty, and perfectly balanced—with tender meat, tender beans, and a sauce that’s neither too thin nor too thick.
The aroma alone will have everyone gathering around the table, and the first bite delivers that signature Emeril flavor: bold, smoky, and just spicy enough to linger. This is the kind of chili that turns a weeknight dinner into a memorable meal.
Serve it with cornbread, crusty rolls, or a dollop of sour cream to cool the heat, and you’ve got a complete, satisfying dish that’s as impressive as it is easy to make. Let’s get started on creating your own Emeril-style chili.
Ingredients for emeril chili
Pantry staples with a professional touch—this chili delivers restaurant-worthy depth.
| Ingredient | Amount | Notes |
|---|---|---|
| Ground Beef (Chuck Roast) 🥩 | 2 ½ lb | 80/20 fat ratio preferred |
| Kidney Beans (Dried) 🌾 | 1 ½ cups | Soaked overnight or canned drained |
| Onions (Yellow) 🧅 | 2 whole | Medium, diced (about 2 cups) |
| Garlic Cloves 🧄 | 6 cloves | Fresh, minced (about 2 tbsp) |
| Canned Tomato Sauce 🍅 | 2 cups | San Marzano preferred, no salt added |
| Tomato Paste 🍅 | ½ cup | No salt added, smooth texture |
| Chili Powder 🌶️ | 2 tbsp | High-quality, not pre-mixed |
| Ground Cumin 🌿 | 1 tbsp | Toasted for depth of flavor |
| Smoked Paprika 🌶️ | 1 tbsp | For signature smoky flavor |
| Cayenne Pepper 🔥 | ½ tsp | Adjust for heat preference |
| Beef Broth 💧 | 2 cups | Low-sodium preferred |
| Dark Brown Sugar 🍚 | 1 tbsp | Balances heat and depth |
| Apple Cider Vinegar 🍎 | 1 tbsp | Brightens flavors |
| Bay Leaves 🌿 | 2 whole | Fresh preferred, removed before serving |
| Salt 🧂 | 1 ½ tsp | Kosher or sea salt |
The ground beef is non-negotiable for that signature Emeril smokiness. Chuck roast with an 80/20 fat ratio gives the best caramelized crust when browned—sirloin or lean ground beef won’t develop the same richness. Most grocery stores carry pre-ground chuck, but if you’re buying whole, look for well-marbled cuts. The beans should be kidney beans—dried if you can soak them overnight, or canned in their own juice (drained) for convenience. For the tomatoes, San Marzano cans from Italy make a world of difference, but any high-quality canned tomato sauce will work. The key is avoiding salted varieties to control the final seasoning.
No chili powder? Mix 1 tbsp smoked paprika, 1 tbsp ground cumin, and 1 tsp cayenne for a close substitute. Fresh garlic and onions should be the star aromatics—don’t skip the caramelization step, as this builds the chili’s foundation. The apple cider vinegar might seem unusual, but it brightens the dish beautifully (think of it like a splash of balsamic). For heat control, start with less cayenne and add more later if needed—you can always adjust, but you can’t take it out. The beef broth should be low-sodium to avoid over-salting the final dish, but homemade works even better if you’ve got it.
This chili tastes even better the next day as flavors meld. Store in an airtight container in the fridge for up to 5 days, or freeze portions for up to 3 months. For freezer storage, cool completely first and use freezer-safe containers. To reheat, warm gently on the stove with a splash of water or broth—never microwave directly from frozen. The aroma alone will have your kitchen smelling like a Louisiana restaurant, and the first bite delivers that signature Emeril balance of smoky, spicy, and sweet.
Why You'll Love This Recipe
- One-Pot Magic: I swear by this recipe because it’s literally dump-and-stir. Brown the chuck roast, toss in onions and garlic, then just let the tomato sauce and spices work their magic—no fancy techniques, no stress.
- Deep Umami Bomb: That chuck roast? It’s the secret weapon—rich, meaty, and packed with flavor when cooked low and slow. The dried kidney beans soak up all the smoky, garlicky goodness, turning this into something dangerously addictive.
- Game-Day Crowd Pleaser: Between us, this chili is my go-to for tailgates, potlucks, or even a lazy Sunday. It scales effortlessly—double the batch, bring it in a slow cooker, and watch people clear their plates faster than you can say "Emeril’s touch."
- Budget-Friendly Pantry Hero: Honestly, this recipe costs me about $8 for six servings. Chuck roast is cheaper than ground beef, dried beans are a steal, and the tomato sauce? Always in my cupboard. Plus, leftovers taste even better the next day—if there are any left.
Step-by-step instructions for Emeril Lagasse's chili recipe
Here's how to build this rich, spice-balanced chili with deep flavor and perfect texture.
Sear the Ground Beef for Maximum Flavor
Heat a large Dutch oven over medium-high heat until hot. Add the 2.5 lb ground beef (chuck roast) and break it apart with a wooden spoon, letting it brown in batches if needed. Cook until the beef loses its raw color and develops a deep brown crust - this should take about 8-10 minutes total. The key here is to work in small batches so the beef doesn't steam instead of brown.
As the beef cooks, use a slotted spoon to remove it from the pot and set it aside on a plate. Leave all the browned bits in the pot - these contain concentrated flavor that will form the base of your chili. If you have any excess fat, drain all but 1 tablespoon to help build the sauce. This searing step creates the rich, meaty foundation that defines Emeril's chili.
Build the Flavor Base with Aromatics
In the same Dutch oven, add 2 whole diced yellow onions and cook over medium heat for 5-6 minutes until softened and beginning to caramelize. Add the 6 minced garlic cloves and cook for another 30 seconds until fragrant - don't let the garlic burn, as this will make the chili bitter. Stir frequently to prevent sticking.
Now add the 0.5 cup tomato paste and cook for 2 minutes, stirring constantly to create a smooth paste that will thicken your chili. This is where the deep, concentrated tomato flavor develops. Return the browned beef to the pot and add the 2 cups canned tomato sauce, 2 cups beef broth, and 1 tbsp apple cider vinegar. Stir everything together and bring to a simmer.
Develop the Spice Blend and Simmer
Add the 1.5 cups dried kidney beans (if using dried - if canned, drain and add now), 2 whole bay leaves, 1.5 tsp salt, 2 tbsp chili powder, 1 tbsp ground cumin, 1 tbsp smoked paprika, and 0.5 tsp cayenne pepper. Stir well to combine all ingredients. The spices should be evenly distributed throughout the mixture.
Bring the chili to a boil, then reduce heat to low and let it simmer uncovered for 1.5 hours. If using dried beans, they'll soften during this time. Stir occasionally and add water or broth as needed to maintain the desired consistency - you want it thick enough to coat the back of a spoon but still spoonable. The chili should develop a rich, aromatic steam as it cooks, filling your kitchen with deep, spicy fragrance.
Finish with Sweetness and Final Adjustments
After 1.5 hours, stir in the 1 tbsp dark brown sugar. This balances the heat and adds a subtle caramel note that rounds out the chili's flavor profile. Taste and adjust seasoning if needed - you may need to add more salt or cayenne depending on your heat preference. Remove the 2 bay leaves before serving, as they can make the chili bitter if eaten.
Let the chili sit off heat for 10 minutes before serving. This resting period allows the flavors to meld completely and the beans to fully absorb the cooking liquid. The chili should be thick, rich, and deeply flavorful with a perfect balance of heat, sweetness, and smoky depth. Serve hot with your favorite toppings like shredded cheese, sour cream, or chopped green onions.
Pro Tips For Making Emeril Chili
- Brown the Beef Properly: Don’t just cook the ground chuck—brown it. After breaking it apart with your hands, let it sear in batches over medium-high heat until the edges crisp and the color turns deep mahogany. I used to rush this, and the chili always tasted flat; that crust packs serious flavor.
- Soak Beans Overnight: Skip the quick-soak shortcut—dried kidney beans need at least 8 hours in cold water with a pinch of salt. I learned this the hard way when my beans stayed tough no matter how long I simmered them. Rinse them well before adding to the pot.
- Sauté Onions Until Sweet: Cook the yellow onions low and slow until they’re golden and slightly caramelized—about 10 minutes. This isn’t just about softening; it builds depth. I was skeptical until I tried it, and now I never skip this step.
- Simmer, Don’t Boil: Keep the chili at a gentle simmer, not a rolling boil, after adding the tomato sauce and beans. Too much heat breaks down the beans and makes the sauce watery. Cover the pot and let it bubble softly—your future self will notice the difference.
Troubleshooting this recipe
Chili Too Thin?
If your chili ends up too watery, don’t panic—this happens when beans absorb too much liquid or broth gets added too freely. My go-to fix is to simmer uncovered for an extra 15-20 minutes to evaporate excess moisture.
For immediate thickening, mix 1 tbsp cornstarch with 2 tbsp cold water, stir into the chili, and simmer for 5 minutes. Alternatively, mash a few cooked beans directly into the pot—their starch acts as a natural thickener. 💡
Mushy Beans?
Overcooked beans turn mushy and lose texture, ruining the chili’s heartiness. If using dried beans, reduce simmering time to 1 hour (not 1.5 hours) and add them later in the process. For canned beans, rinse them first to remove excess starch.
If beans are already too soft, stir in 1 tbsp tomato paste or a splash of apple cider vinegar to tighten their texture and brighten flavors.
Bitter or Metallic Taste?
This usually means the chili simmered too long or aluminum reacted with acidic ingredients. To fix it, add 1 tbsp brown sugar or 1 tsp honey to balance bitterness, and a pinch of salt to enhance sweetness.
If using a stainless steel or enameled pot, avoid adding acidic ingredients (like vinegar) until the very end. For future batches, simmer no longer than 1.5 hours and avoid overcrowding the pot.
Underseasoned Chili?
Emeril’s chili relies on layered seasoning, so if it tastes bland, adjust in stages. Start with ½ tsp salt and ¼ tsp cayenne, tasting between additions. For depth, add 1 tsp smoked paprika or a dash of ground cumin.
If the heat feels off, a splash of apple cider vinegar (½ tsp) brightens flavors without overpowering. Remember: spices mellow as they cool, so let the chili rest 10 minutes before tasting again. 🌶️
Meat Too Greasy?
Excess fat makes chili taste heavy and unbalanced. After browning the beef, drain all but 1 tbsp fat from the pot. For extra insurance, skim fat off the surface during simmering using a spoon or fat separator.
If the chili still feels greasy, stir in 1 tbsp tomato paste or a splash of beef broth to help emulsify the flavors. For future batches, use leaner ground beef (like 90/10 chuck) if preferred.
Spice Imbalance?
If the heat feels overwhelming, balance it with 1 tbsp brown sugar or 1 tsp honey to mellow the burn. For smoky depth without extra heat, add ½ tsp smoked paprika. If the chili tastes dull, a pinch of ground cumin or garlic powder enhances complexity.
For a quick fix, serve with cooling toppings like sour cream, Greek yogurt, or diced avocado to cut through the spice. 🥄
Nutrition facts
Frequently asked questions
Can I make this chili in a slow cooker?
For a slow cooker version, brown the beef first in a skillet, then transfer everything to your slow cooker. Cook on low for 6-7 hours or high for 3-4 hours, stirring occasionally. The slow cooker method is perfect for hands-off prep and creates tender meat and beans. Just add the beans and spices at the beginning, and let the cooker work its magic.
How do I adjust the heat level?
Emeril's chili balances heat with sweetness and acidity. For milder heat, reduce the cayenne to ¼ tsp or omit it entirely. For extra spice, add ½ tsp cayenne or a pinch of crushed red pepper flakes. Always taste as you go—you can add more heat, but you can't remove it! The brown sugar and vinegar naturally mellow the burn, so don't skip those.
What’s the best way to store leftovers?
Store chili in an airtight container in the fridge for up to 5 days. For freezing, cool completely first, then portion into freezer-safe containers. It keeps for 3 months in the freezer. To reheat, warm on the stove over medium-low heat with a splash of broth or water—never microwave directly from frozen. The flavors actually improve overnight!
Can I use turkey or chicken instead of beef?
Yes, but the flavor will differ slightly. Ground turkey (especially dark meat) works well and is leaner, but it lacks the rich, beefy depth. For chicken, use ground thighs—not breasts—as they're more flavorful. Brown the meat thoroughly and adjust cooking time (chicken cooks faster). If using turkey, add ½ tsp liquid smoke to mimic the beefy smokiness.
Why does Emeril’s chili taste different from other recipes?
The magic lies in his three-layered approach:
- Deep browning the meat for caramelized crust,
- Balancing heat with sweetness (brown sugar) and acidity (vinegar), and
- Slow simmering to let spices meld. Most recipes skip the meat browning or overlook the sugar-acid balance, which makes this chili uniquely rich and complex. It’s not just about spices—it’s about technique!