
Side Dishes
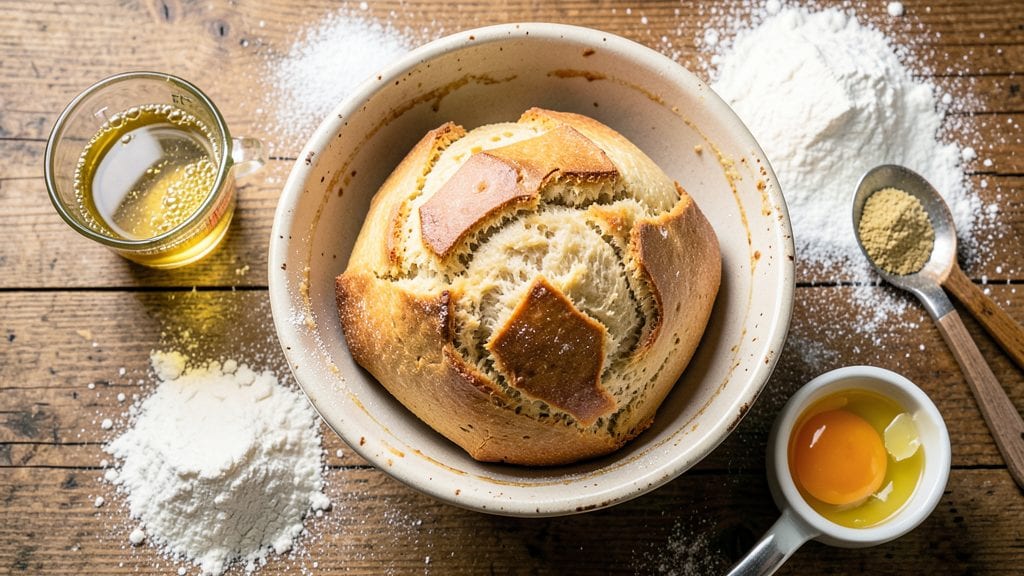
Grandma's country white bread recipe brings back the comforting aroma of a rustic kitchen where time-honored techniques create bread with a golden crust and an irresistibly soft, pillowy crumb. This recipe preserves the art of traditional bread-making, where patience and simple ingredients transform into a loaf that tastes like home.
I've perfected this method over years, ensuring every slice delivers that perfect balance of crispy exterior and tender interior.
The beauty of this recipe lies in its simplicity and the joy of the process. You'll knead the dough by hand (or use a stand mixer), let it rise slowly, and bake it until that crust turns a deep, inviting brown.
The result is a loaf that's perfect for toast, sandwiches, or simply enjoying with butter. What makes this bread truly special is how it captures the essence of country kitchens—where bread isn't just food, but a tradition passed down through generations.
By the time you pull this loaf from the oven, your kitchen will smell like childhood memories, and every slice will be light, airy, and bursting with flavor.
The crust has just the right amount of snap, while the crumb inside is so tender it practically melts in your mouth. This is the kind of bread that makes people pause and say, "This tastes just like Grandma's." The best part?
It's easier to make than you think, with just a few simple ingredients and a little time.
Whether you're baking for a family gathering or just treating yourself to a taste of nostalgia, this recipe delivers. Serve it warm with butter, or save slices for toast the next morning.
Here's how to bring Grandma's country white bread to life in your own kitchen—one perfect loaf at a time.
Ingredients for grandma's country white bread
Just nine simple ingredients transform your kitchen into Grandma's rustic bread haven.
| Ingredient | Amount | Notes |
|---|---|---|
| All-Purpose Flour 🌾 | 4 cups | Unbleached, high protein preferred |
| Active Dry Yeast 🍞 | 2 ¼ tsp | Fresh yeast at half the amount |
| Granulated Sugar 🍚 | 1 tbsp | Feeds the yeast for rise |
| Unsalted Butter 🧈 | ½ cup | Cold, cubed for dough |
| Large Eggs 🥚 | 1 whole | Room temperature for best mix |
| Warm Water 💧 | 1 ¼ cups | 110°F for ideal yeast activation |
| Salt 🧂 | 1 ½ tsp | Kosher or sea salt |
| Cornmeal 🌽 | ¼ cup | For dusting loaf pan |
| Milk 🥛 | 1 tbsp | Brushes for golden crust |
| Coarse Sugar 🍚 | 1 tbsp | For sprinkling crust |
The flour is everything here—King Arthur or Gold Medal are my go-tos, but any unbleached all-purpose works. If your yeast isn't fresh, test it first by mixing with warm water and sugar—it should bubble in 5-10 minutes. Butter should be cold when you mix it in (trust me on this), but don't microwave it to soften. For the water, 110°F is perfect—too hot kills the yeast, too cold makes it sluggish. I always use a kitchen thermometer to check. The salt matters too—Diamond Crystal kosher dissolves better than table salt, so use it if you can.
No yeast on hand? Sourdough starter works at 1:1 ratio, but it'll taste different. Butter too expensive? Vegetable shortening or lard keeps the same tender crumb. Eggs not room temp? Let them sit in warm water for 5 minutes—they mix so much better. The cornmeal is non-negotiable for that perfect crust release, but if you're out, semolina or flour works in a pinch. For the crust, milk and sugar are classic, but egg wash alone works too—just skip the sugar sprinkle. Pro tip: Buttermilk instead of milk gives extra richness.
This dough doubles in size—give it space in your bowl. First rise takes 1-2 hours, second rise 30-45 minutes (until it springs back when poked). For storage, wrap tightly in foil—keeps 3 days at room temp or 1 week refrigerated. Freeze slices for up to 3 months—toast straight from frozen. The crust gets crispier as it sits, so warm slices in a 300°F oven for 5 minutes before serving. Leftovers? Perfect for French toast.
Why You'll Love This Recipe
- No-Knead Magic: I swear by this trick—just mix the dough, let it rise overnight, and bake it the next day. That butter and sugar combo makes it so tender, you’ll forget you didn’t slave over it for hours.
- Buttery Softness: The secret’s in the butter—rich, flaky layers that melt into that pillowy crumb. Honestly, I’ll take this over store-bought any day, especially when it’s still warm.
- Weeknight Wonder: Takes less than 10 minutes to prep, and the dough can chill in the fridge for days. Perfect for when you’re starving but don’t want to cook—just pull it out, shape it, and bake.
- Budget-Friendly Staple: Flour, yeast, sugar, butter, eggs—all pantry basics that stretch far. I freeze leftovers in slices, and toast them straight from the freezer for breakfast. Never waste a loaf.
Step-by-step instructions for Grandma's country white bread
Here's how to make that perfect homemade crust with a soft, pillowy crumb—just like Grandma used to bake.
Activate the Yeast for Maximum Rise
In a small bowl, combine the 1.25 cups warm water (about 110°F) with the 1 tbsp granulated sugar and 2.25 tsp active dry yeast. Stir gently and let it sit for 5-10 minutes until it becomes frothy and bubbly—this means your yeast is alive and ready to work its magic.
If the mixture doesn't bubble within 10 minutes, your yeast might be dead. Start over with fresh yeast—this is the foundation of your bread, and skipping it won't work. Once it's active, proceed to the next step without delay to keep the yeast energized.
Mix the Dough Until Silky Smooth
In the bowl of a stand mixer fitted with the dough hook, combine the 4 cups all-purpose flour and 1.5 tsp salt. Mix on low speed to distribute evenly. Add the 0.5 cup cold unsalted butter, cut into small cubes, and let the mixer work it into the flour until it resembles coarse crumbs.
Pour in the yeast mixture and add the 1 whole large egg. Mix on low speed for 2 minutes, then increase to medium speed for another 5 minutes until the dough pulls away from the sides of the bowl and forms a smooth, elastic ball. If it's too sticky, add 1 tablespoon of flour at a time until it comes together without sticking to your fingers.
Knead Until Gluten Develops
Switch to medium-high speed and knead the dough for 5-7 minutes until it becomes smooth, elastic, and springs back when poked. You'll know it's ready when it passes the "windowpane test"—stretch a small piece of dough thin enough to see light through it without tearing.
If the dough feels too soft or sticky, add 1 tablespoon of flour at a time until it reaches the perfect consistency. Over-kneading can make the bread tough, so stop as soon as it meets these criteria. Once done, shape the dough into a ball, place it in a lightly oiled bowl, cover with a damp towel, and let it rise in a warm place for 1-1.5 hours or until it doubles in size.
Shape and Proof for a Perfect Loaf
Punch down the risen dough to release air, then turn it out onto a lightly floured surface. Gently shape it into a 9-inch loaf by folding the ends toward the center and rolling it tightly. Place the loaf seam-side down into a 9-inch loaf pan that's been lightly dusted with 0.25 cup cornmeal to prevent sticking.
Cover the pan with a damp towel and let the dough proof for another 30-45 minutes until it rises about 1 inch above the rim of the pan. Preheat your oven to 375°F during this time—you want it hot and ready for baking. This final proofing step ensures a light, airy crumb that's just begging to be sliced.
Bake to Golden Perfection
Brush the top of the loaf with 1 tbsp milk and sprinkle generously with 1 tbsp coarse sugar for that classic Grandma-style crust. Bake for 30-35 minutes until the bread is deep golden brown and sounds hollow when tapped on the bottom. If the top browns too quickly, tent it loosely with aluminum foil to prevent over-browning while it finishes baking.
Remove the bread from the oven and let it cool in the pan for 5 minutes, then transfer it to a wire rack to cool completely. The crust will firm up as it cools, and the crumb will become even softer. Slice it thick and enjoy it warm with butter—this is where all the magic happens!
Pro Tips For Making Grandma'S Country White Bread
- Bloom the Yeast First: Skip mixing yeast straight into dry flour—it’s a rookie move. Instead, dissolve it in warm (not hot) water with a pinch of sugar first, then let it sit for 5-10 minutes until frothy. This guarantees your dough rises properly, not because you hope the yeast works but because you know it’s active. (Yes, even if you’re impatient like me.)
- Soften Butter Properly: Cold butter makes tough bread. Warm it just until it yields to light pressure—about 65°F—then let it sit at room temp for 20 minutes. If it melts into a puddle, you’ve gone too far. The goal is creamy, not liquid, so the dough stays tender without turning greasy. I learned this the hard way after kneading a butter bomb.
- Don’t Over-Knead: This dough fights back. Once it passes the "windowpane test" (stretch a piece—it should tear thin like plastic wrap), stop. Overworking it develops gluten too much, and your bread turns chewy instead of tender. Set a timer for 8-10 minutes of kneading by hand, or 4-5 minutes in a stand mixer with the dough hook. Trust the test, not your arms.
- Proof in a Warm Drawer: Your oven isn’t just for baking—turn it on low (70°F) with a bowl of boiling water inside for 10 minutes, then place your shaped dough in the turned-off oven with the light on. This mimics a warm proofing environment without risking over-rising. I was skeptical until I tried it: no more dough that collapses like a sad soufflé.
Make-ahead tips for leftovers
Prep Ahead Timeline
Plan your bread-making marathon the night before! Mix the dough ingredients in the evening and let it rise overnight in the refrigerator for a slow, flavorful fermentation. This cold proofing (called retardation) develops deeper flavor and makes the dough easier to handle in the morning.
Just remove it from the fridge 2 hours before baking to let it warm up and rise properly. 🌙
Freezer-Friendly Dough
Make the dough up to 24 hours ahead and freeze it in a single ball wrapped tightly in plastic wrap and foil. When ready to bake, thaw it in the fridge overnight, then let it rise at room temperature for 1-2 hours before shaping and baking.
This works especially well for busy mornings—just wake up to the smell of baking bread! ⏰
Baked Bread Storage
Cool the bread completely before storing. Wrap it in plastic wrap and place in an airtight container or resealable bag. It keeps at room temperature for 3 days, though I find it's best within the first 24 hours.
For longer storage, slice the bread and freeze individual slices on a tray before transferring to a freezer bag. Toast straight from frozen for perfect texture. ❄️
Make-Ahead Serving Ideas
Prep breakfast ahead by toasting bread slices and freezing them with a pat of butter between layers. Wrap tightly in foil and reheat in a 350°F oven for 5 minutes—instant buttery toast!
For sandwiches, assemble them with fillings, wrap in parchment, and freeze. Reheat in a toaster or skillet for a quick lunch. 🥪
Yeast Activation Shortcut
Mix your yeast with warm water and sugar the night before, then refrigerate it. When ready to bake, let it sit at room temperature for 10 minutes to reactivate. This saves time in the morning and ensures your yeast is ready to work when you are.
Store the activated mixture in the fridge for up to 24 hours before using. 🍞
Equipment Prep
Get your tools ready the night before! Dust your loaf pan with cornmeal and store it covered. Measure out all your ingredients (including the coarse sugar and milk for the crust) and keep them in small bowls.
Preheat your oven the morning of baking—this ensures even cooking and a perfect crust. A little prep work makes the whole process smoother. 🔥
Nutrition facts
Frequently asked questions
Why does my homemade bread turn out dense instead of light and airy?
Dense bread usually means the yeast didn't activate properly or the dough didn't rise enough. Always test your yeast first by mixing with warm water and sugar—it should bubble within 5-10 minutes. Also, ensure your dough rises in a warm spot (like near the oven with the light on) for 1-1.5 hours until doubled in size. Over-kneading or skipping proofing time are common culprits too.
Can I make this recipe without a stand mixer?
This dough works perfectly by hand. Knead for 10-12 minutes on a floured surface until smooth and elastic. Press down hard with the heel of your hand, then fold the dough over itself—this builds gluten just like a mixer. The extra effort ensures that same tender crumb, just with a little more arm work.
How do I get that perfect golden crust without burning the bread?
Brush the top with milk or egg wash before baking, then sprinkle with coarse sugar or cornmeal. Bake at 375°F for 30-35 minutes, and if the crust browns too quickly, loosely tent with foil. For extra shine, broil for 1-2 minutes at the very end—just watch it closely to avoid over-browning.
What's the best way to store leftovers to keep them fresh?
Wrap cooled bread tightly in plastic wrap or foil, then store in an airtight container. It stays fresh for 3 days at room temperature or 1 week refrigerated. For longer storage, slice and freeze individual pieces—this prevents freezer burn. Toast straight from frozen for perfect texture every time.
Can I substitute butter with another fat for a lighter texture?
For a lighter crumb, try vegetable shortening or lard—they create the same tender texture without butter's richness. If you must use oil, replace the butter with 0.25 cup melted oil (like vegetable or canola), but expect a slightly denser result. For extra flavor, keep the butter and add 1 tablespoon of honey to the dough.