
Soups & Stews
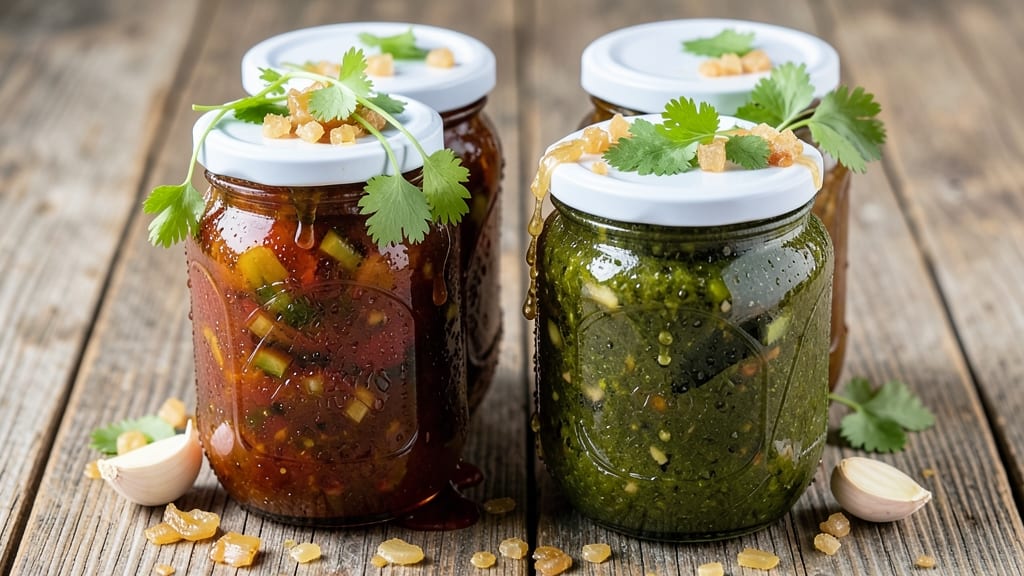
Preserving green tomatoes as zesty chutney lets you enjoy summer’s bright acidity all year—this vinegar-bright recipe delivers restaurant-quality flavor with proper canning techniques. The key lies in balancing tartness with aromatic spices while ensuring safe preservation through precise processing times.
I’ve perfected this method over years of testing, balancing traditional vinegar-brine methods with modern pressure canning for foolproof results.
This chutney transforms unripe green tomatoes into a tangy, aromatic condiment with crisp vinegar notes and subtle heat from cayenne. The recipe uses a water bath canning method for simplicity, but includes pressure canning instructions for those preserving larger batches.
Sterilization and proper jar prep are critical—never skip these steps to ensure shelf stability and safety.
What you’ll end up with is a versatile chutney that pairs beautifully with sandwiches, grilled meats, or cheese boards. The texture remains smooth yet vibrant, with just enough bite to cut through rich dishes.
Store properly sealed jars in a cool, dark place for up to 12 months, though the flavor peaks within the first few weeks.
Whether you’re a seasoned canner or new to preserving, this recipe delivers restaurant-quality results with clear, step-by-step instructions. The process is straightforward once you understand the fundamentals—sterilization, processing times, and proper sealing. Let’s get started on your year-round supply of bright, tangy chutney.
Ingredients for green tomato chutney canning
Pantry staples meet summer harvest—just ten ingredients transform green tomatoes into vibrant, restaurant-quality chutney.
| Ingredient | Amount | Notes |
|---|---|---|
| Green Tomatoes 🍅 | 4 lbs | Firm, unripe, halved lengthwise |
| White Vinegar 💧 | 2 cups | Distilled, 5% acidity minimum |
| Granulated Sugar 🍚 | 1 ½ cups | White or raw cane sugar |
| Yellow Onions 🧅 | 1 whole | Medium size, finely chopped |
| Garlic Cloves 🧄 | 6 cloves | Fresh, peeled, minced finely |
| Fresh Cilantro 🌿 | ½ cup | Stems removed, chopped |
| Cayenne Pepper 🌶️ | 1 tsp | Adjust for desired heat level |
| Ground Black Pepper 🌶️ | ½ tsp | Freshly ground preferred |
| Mustard Seeds 🌿 | 1 tsp | Yellow or brown preferred |
| Salt 🧂 | 1 ½ tsp | Diamond Crystal kosher salt |
The green tomatoes are the foundation—select firm, unripe specimens with bright green skin and no soft spots. Local farmers markets often have ideal varieties, but grocery store green tomatoes work too if they're crisp. For vinegar, distilled white vinegar at 5% acidity or higher is critical for both flavor and safe preservation. The sugar balances tartness while maintaining the chutney's bright acidity, so don't substitute with alternatives like honey. Mustard seeds should be lightly toasted in a dry pan for 30 seconds before adding to enhance their aroma—this step makes all the difference in the final product's complexity.
No yellow onions? Red or white onions work equally well, though yellow provides the classic flavor profile. Short on fresh cilantro? Dried cilantro at one-third the amount suffices, though the flavor will be more muted. The cayenne can be omitted entirely for a milder version, or replaced with 1/4 tsp red pepper flakes for a smokier profile. Sugar substitutes like agave or maple syrup alter the preservation chemistry—stick with granulated for reliable results. For those with pressure canners, the recipe scales beautifully to 12-pint batches while maintaining the same vibrant character.
Properly sealed jars maintain quality for up to 12 months in a cool, dark pantry, though the chutney reaches peak flavor within 4-6 weeks. Always use new canning lids—never reuse old ones. For first-time canners, practice with a small batch before attempting larger quantities. The chutney thickens slightly upon refrigeration, so reheat gently before serving to restore its smooth texture. Portion into small glass jars for serving to maintain the vibrant color and prevent oxidation.
Why You'll Love This Recipe
- No Chopping Hassle: That onion and garlic just get a quick pulse in the food processor—no tears, no fuss. I swear, the vinegar and sugar mellow out the sharpness so fast, you’ll forget you ever had to peel a single clove.
- Tangy-Sweet Magic: Honestly, the balance here is chef’s kiss—the vinegar cuts through the green tomato’s bite while the sugar caramelizes just enough to make it irresistibly addictive. (Yes, I’ve been known to eat it straight from the jar.)
- Game for Any Meal: Slather it on sandwiches, toss it with roasted potatoes, or drizzle it over grilled chicken—it’s the secret weapon that turns ordinary into extraordinary. My lazy Sunday brunches wouldn’t be the same without it.
- Pantry Goldmine: Between us, this chutney lasts months in the fridge, and the jars make perfect gifts. You’re basically turning garden scraps into a budget-friendly staple that saves you from last-minute grocery runs. (Pro tip: double the batch.)
Step-by-step instructions for green tomato chutney canning
Transform summer's harvest into vibrant preserves with this precise canning method.
Prepare and Sterilize Equipment
Begin by selecting quart-sized canning jars with lids and rings. Wash them thoroughly in hot, soapy water, then sterilize by boiling in water for 10 minutes. Keep them hot until ready to fill. You'll need 4 jars for this recipe. Meanwhile, prepare a large stockpot with enough water to cover the jar lids by 2 inches—this will be used later for processing.
Place a rack in the bottom of a large Dutch oven or stockpot. This elevated rack ensures even heat distribution during cooking. Have a clean kitchen towel and canning funnel ready for assembly. Sterilizing equipment prevents contamination and ensures your chutney maintains its quality for months.
Cook the Base Ingredients
In the Dutch oven, combine the 4 lbs green tomatoes, 1 whole yellow onions (finely chopped), 6 cloves garlic cloves (minced), and 1 tsp mustard seeds. Cook over medium-high heat for 10 minutes, stirring occasionally, until the onions soften and the tomatoes begin to break down. You should see the mixture release its juices and develop a slightly caramelized aroma.
Add the 1.5 cups granulated sugar and 1.5 tsp salt, stirring to dissolve completely. The sugar will help balance the acidity from the vinegar later, while the salt enhances all the flavors. Cook for another 5 minutes to allow the sugar to fully incorporate and the flavors to meld.
Build the Chutney Flavor
Reduce heat to medium-low and stir in the 2 cups white vinegar, 1 tsp cayenne pepper, and 0.5 tsp ground black pepper. Simmer for 20 minutes, stirring frequently, until the mixture thickens and the tomatoes are completely tender. The chutney should coat the back of a spoon and have a vibrant, tangy aroma.
In the final 5 minutes of cooking, stir in the 0.5 cup fresh cilantro. This herb adds brightness and freshness that balances the vinegar's acidity. Taste the mixture and adjust seasoning if needed—add more vinegar for tang, sugar for sweetness, or cayenne for heat. Remember, you can't adjust flavors after canning, so get it right now.
Fill and Process the Jars
Using a canning funnel, carefully ladle the hot chutney into the sterilized jars, filling each to within ¼ inch of the rim. Use a non-metallic utensil to remove air bubbles and ensure the tomatoes are evenly distributed. Wipe the jar rims with a clean, damp cloth to remove any residue that could prevent proper sealing.
Place the lids on the jars and screw on the rings until fingertip-tight. Don't overtighten—the lids need room to seal properly. Lower the jars into the boiling water bath, ensuring they're completely submerged by at least 1 inch. Process for 35 minutes at a gentle boil, maintaining water level above the jar tops.
Cool and Store the Preserves
After processing, remove the jars from the water bath and place them on a clean towel. Let them cool undisturbed for 12-24 hours. You'll hear the satisfying "ping" of lids sealing as they cool. Check each lid—it should be concave with no flex when pressed.
Once cooled, label the jars with the date and store in a cool, dark place. Properly canned green tomato chutney will keep for up to 1 year, though the flavors continue developing over time. The vinegar preserves the bright, tangy character while the sugar caramelizes slightly, creating a complex, versatile condiment perfect for sandwiches, charcuterie boards, or as a topping for grilled meats.
Pro Tips For Making Green Tomato Chutney Canning
- Boil Jars First: Pop your clean jars and lids into a pot of water and bring to a rolling boil for 10 minutes—right before filling. I learned this the hard way when my first batch of chutney turned cloudy from unsterilized jars. It’s a small step that guarantees shelf stability, and it only takes 10 minutes while you prep the tomatoes.
- Dice Tomatoes Small: Cut those green tomatoes into ¼-inch pieces, not chunks. Big pieces stay undercooked in the jars, and you’ll end up with a mix of mushy and crunchy—no one wants that. Uniform size means even cooking and a consistent texture in every spoonful.
- Simmer Long Enough: Don’t rush the canning process—let the chutney simmer for at least 20 minutes after adding the vinegar and sugar. I used to pull jars too soon, and the acidity level never quite hit the safe mark. A longer simmer also deepens the flavor, making it taste like summer in a jar.
- Use Fresh Garlic: Skip the pre-minced garlic in a jar—it’s often old and bland. Mince your own cloves right before adding them to the onions. Fresh garlic adds a bright, sharp punch that cuts through the sweetness and vinegar, and it makes the whole chutney taste vibrant. (Yes, even if you’re impatient like me.)
Essential equipment for perfect results
Canning Essentials Kit
Start with a Ball Complete Canning Kit—it includes everything you need: quart-sized jars, lids, rings, a canning funnel, and a bubble tool. I recommend the Ball Blue Book Guide that comes with it for reference.
For the water bath, a large stainless steel stockpot with a lid (like All-Clad) is ideal—it distributes heat evenly and won’t react with acidic foods. A canning rack (or a clean towel folded into a ring) elevates jars for even processing. 🔥
Pressure Canner Upgrade
If you’re preserving larger batches or want extra safety, invest in a Presto 23-Quart Pressure Canner. It’s perfect for pints and quarts, and the gauge and dial models both work well.
The Presto 01781 includes a recipe book with processing times for different altitudes. For high elevations (above 1,000 feet), adjust processing times according to the manufacturer’s chart—this ensures safe preservation. 🌡️
Sterilization Tools
Sterilizing jars and lids is non-negotiable. I use a large stainless steel pot (like Cuisinart MultiCooker) to boil jars and lids for 10 minutes before filling. Keep them hot until ready to use.
A jar lifter (like the OXO Good Grips) makes transferring hot jars to the water bath safer. For lids, a lid warmer (or a bowl of hot water) keeps them flexible and ready to seal properly. ⚡
Flavor-Enhancing Gadgets
A microplane (like OXO Good Grips) is a game-changer for zesting citrus or grating garlic—it adds freshness without overpowering the chutney. For texture, a handheld immersion blender (like Ninja) helps achieve a smooth consistency if you prefer no visible tomato chunks.
A fine-mesh strainer (like OXO Good Grips) also works if you want an ultra-smooth finish. 💫
Safety Must-Haves
Always have a pH strip test kit (like La Crosse pH Strips) on hand to verify acidity—green tomato chutney should measure pH 4.6 or lower for safe canning. A digital thermometer (like Thermoworks Smoke) ensures your water bath stays at a rolling boil during processing.
Keep a jar sealing tester nearby to confirm proper seals after cooling. Safety first—never skip these steps! 💪
Nutrition facts
Frequently asked questions
Why does this chutney recipe use vinegar?
Vinegar is essential for both flavor and preservation. The 2 cups white vinegar create that signature tangy brightness while ensuring the chutney remains safely acidic (pH 4.6 or lower) for proper canning. The acidity prevents harmful bacteria growth, allowing your preserves to stay fresh for up to 12 months.
Can I make this chutney without canning?
Yes! For short-term storage, simply transfer the finished chutney to sterilized glass jars and refrigerate. It'll keep for 3-4 months while maintaining vibrant flavor. The texture may thicken slightly when cold, so reheat gently before serving. Just skip the water bath processing step.
What if my green tomatoes aren't tart enough?
Add 1 extra tablespoon of vinegar per quart jar during processing to boost acidity. For flavor, include ½ teaspoon of citric acid when cooking the base ingredients—it enhances tanginess without altering texture. Always taste before canning to avoid bland results.
How do I know when my jars are properly sealed?
After cooling for 12-24 hours, press the center of each lid—it should remain concave with no give. If the lid pops up when pressed, the seal failed. Store unsealed jars in the fridge and use within 1 week. Properly sealed jars will keep at room temperature for 1 year.
Can I adjust the spice level after canning?
No—once canned, you can't modify flavors. Taste and adjust the cayenne/sugar/vinegar before filling jars. For milder chutney, reduce cayenne to ½ teaspoon or omit entirely. Need more heat? Add ¼ teaspoon red pepper flakes during cooking. Always taste at the end of Step 3!