
Desserts
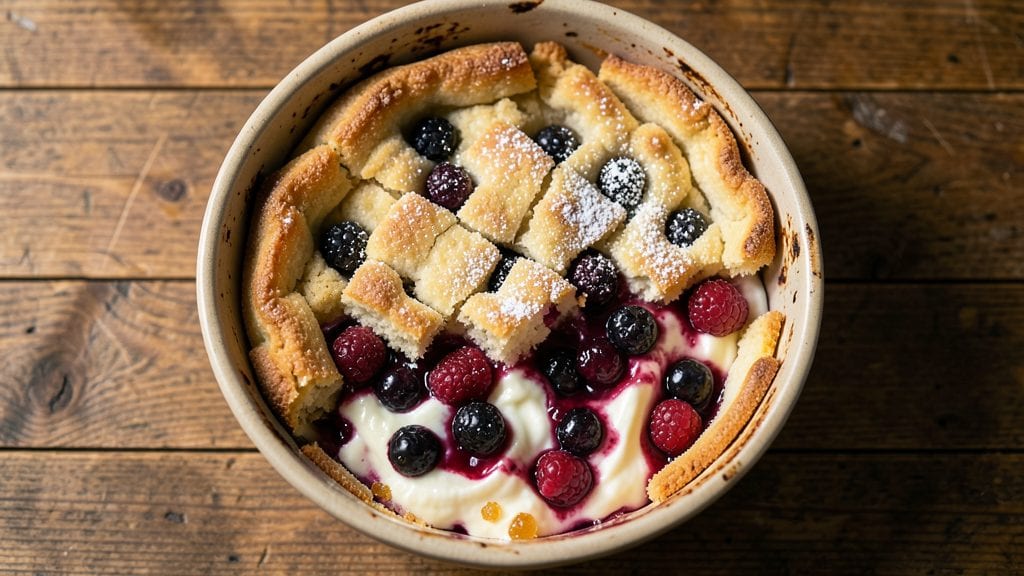
This Jiffy Cobbler recipe delivers the perfect balance of a flaky biscuit crust and juicy, bubbling berry filling that tastes like summer in every bite.
The secret lies in the crisp, golden topping that cracks open just enough to reveal the sweet-tart fruit underneath—it’s the kind of dessert that disappears faster than you can say "seconds, please."
I’ve perfected this version over years of testing, ensuring the crust stays tender while the filling bursts with flavor.
The beauty of this recipe is its simplicity: just a handful of ingredients for both the crust and filling, yet the results are anything but basic.
You’ll need about 30 minutes of prep time, followed by 45 minutes in the oven, where the magic happens as the berries release their juices and the crust transforms into a delicate lattice.
The biscuit topping is foolproof—no rolling required—and the fruit filling can be customized with peaches, blueberries, or even a mixed berry blend.
What you’ll end up with is a warm, fragrant cobbler straight from the oven, its crust glistening with golden cracks and the filling bubbling at the edges.
The aroma alone will have everyone gathering around the table, and the first bite—warm berries melting into that buttery crust—is pure comfort food bliss. This is the kind of dessert that feels special without requiring hours of effort.
Serve it warm with a scoop of vanilla ice cream or a dollop of whipped cream for the full experience. The leftovers reheat beautifully, making this the perfect make-ahead dessert for family gatherings or a cozy weeknight treat. Let’s get baking!
Ingredients for jiffy cobbler
Six simple ingredients for the crust, five for the filling—just enough to create dessert magic.
| Ingredient | Amount | Notes |
|---|---|---|
| All-Purpose Flour 🌾 | 2 cups | Sifted for light crust |
| Granulated Sugar 🍚 | ½ cup | White or light brown |
| Baking Powder 🧂 | 2 tsp | Freshly opened for lift |
| Salt 🧂 | ½ tsp | Fine sea salt preferred |
| Cold Unsalted Butter 🧈 | ¾ cup | Cut into small cubes |
| Milk 🥛 | ¾ cup | Room temperature |
| Fresh Blueberries 🫐 | 3 cups | Or frozen, no thawing |
| Granulated Sugar 🍚 | ¾ cup | For fruit filling |
| Cornstarch 🌾 | 2 tbsp | For thickening |
| Lemon Juice 🍋 | 1 tbsp | Freshly squeezed |
| Vanilla Extract 🍯 | 1 tsp | Pure vanilla preferred |
| Vanilla Ice Cream 🍦 | 1 ½ cups | For serving, optional |
The butter is non-negotiable here—cold cubes create that flaky, biscuit-like crust. Grab the European-style butter from Whole Foods or Trader Joe's if you can, but any good brand works. The baking powder? Check the date—expired powder won't rise. For the berries, fresh is ideal, but frozen works perfectly (no need to thaw). I usually grab organic blueberries when they're on sale—cheaper and sweeter. The cornstarch is key for that perfect thick-saucy filling without gumming it up.
No vanilla extract? Vanilla bean paste is a great swap—just use half the amount. Short on blueberries? Peaches or raspberries work beautifully (adjust sugar to taste). The milk can be almond or oat milk, but whole dairy gives the best texture. For the crust, self-rising flour works if you skip the baking powder and salt. And if you're feeling fancy, add 1 tsp cinnamon to the filling for extra warmth. Just don't skip the lemon juice—it brightens everything up.
This cobbler reheats like a dream—350°F for 10 minutes brings it right back to life. Store leftovers in the fridge for 4 days, or freeze the whole thing for up to 3 months. I always make a double batch because it disappears faster than you can say "seconds, please." The crust stays fresh for 2 days if you separate it from the filling—great for making ahead.
Why You'll Love This Recipe
- No-Fuss Mix-In: This thing comes together with five ingredients—flour, sugar, butter, baking powder, and salt—mixed in a bowl while dinner simmers. Honestly, I’ve made it with my eyes closed (okay, maybe not that blindly), and it still turns out golden and tender.
- Sweet Crisp Magic: That buttery crust with cold butter cut into flour? It’s the secret weapon—flaky, crisp edges that give way to a soft, almost custardy center. Between us, the first bite makes me want to skip dessert.
- Weeknight or Company: Throw it on the table after a busy day (it bakes while you eat) or bring it to a potluck—no one will guess it’s just flour, sugar, and a little elbow grease. My daughter’s friends always ask for the recipe, and I just smile and say, “It’s a jiffy.”
- Leftovers? More Like Seconds: The crust stays crisp even reheated, and the filling? Still creamy. I’ve sent slices to work in a thermos, packed them for lunch, and even frozen portions for lazy mornings. Budget-friendly? Absolutely. Reliable? You bet.
Step-by-step instructions for jiffy cobbler
Here's how to make a golden crust that's crispy on top and tender underneath, paired with juicy blueberries that burst with every bite.
Make the Biscoffy Crust
Preheat your oven to 375°F. In a large bowl, whisk together the 2 cups all-purpose flour, 0.5 cup granulated sugar, 2 teaspoons baking powder, and 0.5 teaspoon salt. Cut in the 0.75 cup cold unsalted butter using a pastry cutter or your fingers until the mixture resembles coarse crumbs with pea-sized butter pieces still visible.
This texture is crucial—it creates the signature biscoffy layers. Pour in the 0.75 cup milk all at once and stir gently with a fork until just combined. The dough will be slightly sticky, but don't add more flour or you'll lose that tender crumb. Press the dough into a 9-inch square baking dish, spreading it evenly to the edges. This ensures even baking and that perfect golden crust.
Prepare the Blueberry Filling
In a medium bowl, combine the 3 cups fresh blueberries, 0.75 cup granulated sugar, 2 tablespoons cornstarch, and 1 tablespoon lemon juice. Gently stir until the blueberries are evenly coated. The cornstarch helps thicken the juices as they cook, preventing a watery filling. If using frozen blueberries, don't thaw them first—they'll release moisture more gradually during baking.
Spread the blueberry mixture evenly over the crust in the baking dish. The berries should be in a single layer with no more than 2-3 berries thick in any spot. This even distribution ensures every bite has that perfect balance of berry and crust. Sprinkle the 1 teaspoon vanilla extract lightly over the top—this adds depth without overpowering the berry flavor.
Bake to Perfection
Bake the cobbler for 45-50 minutes until the crust is deep golden brown and the filling is bubbling vigorously. The edges should pull away slightly from the pan, and the crust should be firm to the touch. If the top browns too quickly, tent loosely with aluminum foil after 30 minutes to prevent over-browning while the filling finishes cooking.
Here's the thing—don't rely solely on time. The cobbler is done when the crust is golden and the filling is thickened but still juicy. If you're unsure, insert a toothpick into the center—it should come out clean or with just a few moist crumbs clinging to it. Let the cobbler rest for 10 minutes before serving, which allows the juices to distribute evenly throughout the filling.
Serve Warm with Ice Cream
Slice the warm cobbler into 6 equal squares and serve immediately. The contrast of the warm cobbler with the 1.5 cups vanilla ice cream is what makes this dessert magical. The ice cream softens slightly from the heat, creating a creamy, cool counterpoint to the warm berries and crust.
For the best experience, let everyone scoop their own ice cream onto their slice. This way, the ice cream melts just enough to create little pools of creaminess that cut through the sweet-tart berries. The crust should be crispy on top but tender underneath, with that signature biscoffy texture that makes every bite worth it.
Pro Tips For Making Jiffy Cobbler
- Cut Butter in Pulses: DESCRIPTION: Use your fingers or a pastry cutter to work the cold butter into the flour—don’t overmix. I learned this the hard way after turning my first batch into a sad, dense brick. Stop when the mixture looks like coarse crumbs with pea-sized butter chunks. That’s your golden ticket to a flaky, tender crust.
- Preheat Pan to Medium: DESCRIPTION: Skip the high heat—medium is where the magic happens. Too hot, and your cobbler burns before the filling sets. Too low, and it steams instead of browning. I now set my oven to 350°F (175°C) and let the pan warm up for 5 minutes before adding the batter. That extra step guarantees even cooking.
- Sift the Dry Mix: DESCRIPTION: Baking powder loses its lift when clumped. Sift the flour, sugar, baking powder, and salt together before adding butter—no exceptions. I used to eyeball it, and my cobbler would rise unevenly. A quick sift ensures every bite gets that light, airy texture.
- Press Batter Firmly: DESCRIPTION: Don’t spoon the batter in—press it down with your fingers or a spatula until the pan is ¾ full. This keeps the filling from spilling over and guarantees a thick, gooey center. Yes, it takes 10 seconds extra, but the difference is night and day. (Your future self will thank you.)
Essential equipment for this recipe
Must-Have Baking Tools
You don’t need a fancy kitchen to make this cobbler, but a few key tools make all the difference. First, grab a 9-inch square baking dish—I use a Ceramic Nonstick Baking Pan from Pyrex because it distributes heat evenly and prevents sticking.
For the crust, a pastry cutter or even your fingers work, but a hand mixer on low speed (with a dough hook) saves time when combining ingredients. 🧈
Precision Measuring Essentials
Accurate measurements are everything in baking. Invest in a stainless steel measuring set—I recommend the OXO Good Grips for its clear markings and durable construction. For the butter, use a bench scraper to cut it into pea-sized cubes for even distribution in the crust.
A fine-mesh sieve comes in handy for sifting the flour and baking powder to avoid lumps. The difference between 1 tsp and 1 tbsp of baking powder can mean the difference between a fluffy crust and a flat one.
Heat Control Helpers
An oven thermometer is a game-changer—your oven’s temperature gauge can be off by 25°F or more. I use the Thermoworks Oven Thermometer to ensure my oven hits the exact 375°F needed for this recipe.
For browning the crust, a light-colored aluminum foil tent helps prevent over-browning while the filling cooks. A kitchen timer (I love the Cuisinart Digital Timer) ensures you don’t overbake, as cobbler can go from perfect to dry in just 5 extra minutes. 🌡️
Fruit Prep Tools
If using fresh berries, a berry basket or fine-mesh strainer makes rinsing and draining easier. For frozen berries, skip the thawing step—but if you’re using peaches or other soft fruits, a sharp paring knife helps remove skins efficiently.
A small mixing bowl (like the Corelle Stoneware) is perfect for tossing the fruit with sugar and cornstarch. Pro tip: Use a rubber spatula to spread the filling evenly in the dish—it prevents tearing the crust when scraping.
Serving & Garnishing
For serving, a sharp chef’s knife or pizza cutter makes clean slices. I also keep tongs handy for serving ice cream without melting it prematurely. A small whisk comes in useful for mixing the vanilla extract into the filling.
For garnishing, a microplane lets you zest lemon peel for an extra bright flavor, or a sprinkle bottle (like the OXO Good Grips) makes it easy to add powdered sugar or cinnamon on top. 🍦
Budget-Friendly Swaps
No need to break the bank! Use a glass baking dish instead of nonstick if you prefer. A wooden spoon works fine for stirring the filling, and a measuring cups set from your local dollar store is better than eyeballing.
For the pastry cutter, two forks pressed together do the job. The most critical splurge is the oven thermometer—it’s the only tool I’d recommend upgrading for consistent results. Even a $10 one will save you from under- or over-baked cobblers.
Nutrition facts
Frequently asked questions
Can I make this cobbler with frozen berries?
Frozen berries work perfectly without thawing first—they release moisture gradually during baking. Just make sure to drain any excess liquid from thawed berries if you accidentally thaw them. For best results, use high-quality frozen berries (like organic blueberries) to avoid artificial flavors.
Why did my crust turn out dense instead of flaky?
Overmixing the dough is the most common culprit—handle it gently after adding milk. Another issue could be warm butter or expired baking powder. Always use cold butter (cut into small cubes) and check your baking powder's freshness (it should fizz when mixed with water).
Can I make this cobbler ahead of time?
Yes! Assemble the cobbler up to 24 hours ahead and refrigerate. Bake straight from the fridge (add 5-10 minutes to baking time). For longer storage, freeze the unbaked cobbler for up to 3 months. Thaw overnight before baking, adding 10 minutes to the baking time.
What's the best way to reheat leftovers?
Warm leftovers in a 350°F oven for 10-15 minutes until heated through. For microwave reheating, cover with a damp paper towel and heat in 20-second intervals on medium power. The crust stays crispy when reheated gently—never microwave uncovered.
Can I substitute the biscuit crust for something else?
Try a streusel topping (mix 1 cup flour, 0.5 cup sugar, 0.5 cup cold butter) or even a simple pie crust. For a no-bake option, use graham cracker crumbs mixed with melted butter. The texture will differ, but the fruit filling remains the star—just adjust baking time accordingly.