
Sauces & Condiments
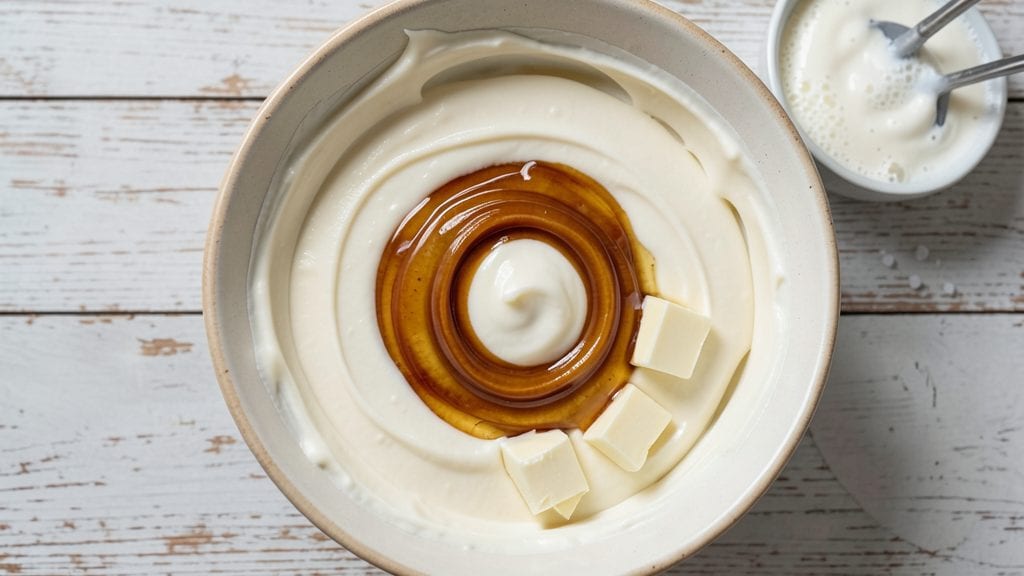
This old-fashioned icing recipe delivers the perfect balance of buttery richness and vanilla sweetness that stays firm all day—ideal for layering cakes or decorating cupcakes. The secret lies in precise measurements and gradual mixing, which prevents the icing from becoming too soft or grainy.
I've perfected this technique over years of baking, ensuring every batch turns out smooth and professional.
What sets this recipe apart is its versatility—it works for both buttercream and royal icing applications, depending on the ratio of powdered sugar to butter. The key to achieving that signature firm texture is using cold butter and avoiding overmixing, which keeps the icing stable even in warm kitchens.
This isn't just any icing; it's the kind that holds swirls, rosettes, and borders without melting or sliding.
By the time you finish whipping this icing, you'll have a batch that's creamy yet sturdy enough to pipe intricate designs or spread evenly between cake layers. The vanilla flavor shines through without overpowering, making it a crowd-pleaser for any occasion.
Whether you're frosting a wedding cake or decorating birthday treats, this recipe ensures a polished, bakery-quality finish every time.
For best results, prepare the icing at room temperature and store it in an airtight container in the refrigerator. It keeps for up to five days, making it perfect for prepping ahead.
The instructions will guide you through each step to achieve that signature buttery swirl and firm consistency that makes this icing a classic favorite.
Ingredients for old fashioned icing
Buttery swirls and vanilla kisses—this classic icing stays firm all day.
| Ingredient | Amount | Notes |
|---|---|---|
| Unsalted Butter 🧈 | 1 cup | Cold, cubed for best texture |
| Pure Vanilla Extract 🌿 | 2 tsp | High-quality, not imitation |
| Powdered Sugar 🍚 | 4 cups | Sifted for smooth consistency |
| Heavy Cream 🥛 | ½ cup | Cold, for stability |
| Corn Syrup 🍯 | ¼ cup | Light, not dark |
| Salt 🧂 | ¼ tsp | Fine sea salt |
| Vanilla Bean Seeds 🌿 | 1 tsp | Scraped from 1 pod |
| Lemon Juice 🍋 | 1 tbsp | Freshly squeezed |
The butter is non-negotiable—cold cubes from the fridge give that signature firm texture. Plugrá or Land O'Lakes work perfectly, but avoid salted (we're controlling the salt). Powdered sugar? Domino or C&H are reliable, but sift it first—no lumps allowed. The vanilla extract should smell like pure Madagascar bourbon beans (none of that imitation stuff). For the vanilla bean seeds, grab a high-quality pod from Williams Sonoma—it makes all the difference when scraped fresh. And the heavy cream? Cold straight from the fridge keeps the icing stable, even in warm kitchens.
No corn syrup? Honey or agave at half the amount works, but it'll be slightly softer. Short on vanilla? Double the extract, but don't skip the seeds—they add real depth. Using salted butter? Cut the salt to just a pinch. For a royal icing version, swap the butter for 2 extra cups of powdered sugar and 2 tbsp meringue powder. Want more sheen? Add 1 tsp vegetable glycerin—it keeps the icing glossy for days. And if you're piping intricate designs, chill the icing for 30 minutes first—it'll hold shapes perfectly.
This icing is a prepper's dream—makes 2 cups and keeps for 5 days in the fridge, covered tightly. For longer storage, freeze portions in 1-tbsp scoops—thaw overnight in the fridge before using. The buttercream version? 3 days max in the fridge, or it'll get grainy. Pro tip: Line your piping bags with parchment to avoid clogs. And if it softens too much? Pop it in the freezer for 10 minutes—it'll firm right back up.
Why You'll Love This Recipe
- Five-Ingredient Magic: I swear by this combo—just butter, sugar, cream, vanilla, and corn syrup. No fancy gadgets, no waiting for eggs to set, just melt-and-whisk simplicity. Honestly, the hardest part is deciding which cake to dump it on first.
- Velvet Smoothness: That corn syrup keeps it silky, not grainy, while the heavy cream adds a luscious sheen. It’s the kind of icing that makes you slow down to savor every bite—no dry crunch here, just pure, rich indulgence.
- Crowd-Pleaser Flex: Dress up a birthday cake or slather it on donuts for a coffee shop vibe. I’ve even used it to glaze pound cake for breakfast—yes, really. Works for celebrations or lazy weekends, no judgment.
Step-by-step instructions for buttery vanilla swirl icing
This old-fashioned icing stays firm all day—creamy, flavorful, and perfect for cakes or cookies!
Whip the Butter and Cream to Light Fluffiness
In a large mixing bowl, combine the 1 cup unsalted butter (cold and cubed) with the 0.5 cup heavy cream (also cold). Using a hand mixer or stand mixer fitted with the paddle attachment, beat on medium speed for 3-4 minutes until light and fluffy. You'll see the mixture nearly double in volume and become pale yellow—this incorporates air, which is key for that classic buttery texture.
I like to press down on the butter with a spatula during the first minute to break it up evenly. This prevents lumps and ensures a smooth, creamy base. If the mixture looks too stiff, let it sit at room temperature for 5 minutes before continuing—this helps the butter soften just enough to blend properly without melting.
Add Sweetener and Flavorings for a Silky Texture
Gradually add the 4 cups powdered sugar (sifted) to the butter-cream mixture, mixing on low speed to avoid a sugar cloud. Once incorporated, increase the speed to medium and beat for another 2-3 minutes until completely smooth. The powdered sugar should dissolve evenly, leaving no gritty residue.
Next, add the 2 tsp pure vanilla extract, 1 tsp vanilla bean seeds, 1 tbsp lemon juice, and 0.25 tsp salt. Mix on low speed for 30 seconds to combine. The vanilla bean seeds add a beautiful fleck of color and an extra layer of depth, while the lemon juice brightens the flavor. Taste the mixture—it should be sweet but balanced, with a clean vanilla aroma and a hint of citrus.
Incorporate Corn Syrup for Stability and Shine
With the mixer running on low speed, slowly drizzle in the 0.25 cup corn syrup. This step is crucial—it prevents the icing from becoming too stiff or cracking as it sets. The corn syrup also adds a subtle gloss, making the finished icing look professional and inviting.
Continue mixing for 1-2 minutes until the icing reaches a smooth, spreadable consistency. It should coat the back of a spoon without being too runny. If it’s too thick, add 1-2 teaspoons of water at a time until it reaches the perfect pouring consistency. If it’s too thin, add 1-2 tablespoons of powdered sugar to thicken it back up.
Pipe or Spread for Decorative Swirls
Transfer the icing to a piping bag fitted with a star tip (or use a zip-top bag with a small corner snipped off). Pipe decorative swirls onto your cake or cookies, or spread it evenly with an offset spatula for a classic, smooth finish. For extra flair, pipe a border around the edges before adding the swirls.
This icing sets beautifully at room temperature, so you can decorate your baked goods up to 24 hours in advance. If you’re working in a warm kitchen, chill the icing for 10-15 minutes before piping to help it hold its shape. The result? A buttery, vanilla-kissed finish that stays firm all day—no weeping or melting, just pure, old-fashioned perfection.
Pro Tips For Making Old Fashioned Icing
- Melt Butter Slowly: Heat the butter just until it turns liquid—no sizzling, no browning. I learned this the hard way when I rushed it and ended up with a grainy, off-flavored icing. A double boiler or microwave (30-second bursts) keeps it smooth and neutral-tasting.
- Whisk the Powdered Sugar: Sift the powdered sugar first, then whisk it vigorously with the corn syrup before adding anything else. This cuts lumps and ensures the icing starts silky. Skipping this step means you’ll be chasing clumps later—trust me, it’s not fun.
- Add Cream Gradually: Pour the heavy cream into the butter-sugar mix a little at a time, whisking constantly. Dumping it all at once risks curdling the cream, and you’ll end up with a lumpy, watery mess. Patience here guarantees a glossy, stable finish.
- Use Real Vanilla: Skip the imitation stuff—pure vanilla extract (or even better, a scraped vanilla bean) makes a noticeable difference. The cheap stuff just smells like solvent, and your icing will taste flat. A splash of bourbon or a pinch of salt can elevate it further if you’re feeling fancy.
Creative variations of these flavors
Citrus Twist Variation
Brighten your icing with a zesty lemon or orange twist—add an extra 1 tbsp freshly grated lemon zest or 1 tsp orange extract along with the vanilla. The citrus cuts through the butter's richness while adding a refreshing pop.
For extra flair, top with 1 tsp candied lemon or orange peel before piping. This variation works especially well for spring or summer desserts. 🍋
Chocolate-Dipped Swirls
Elevate your icing by creating chocolate-dipped swirls—pipe your vanilla icing into decorative shapes, then dip the tips in melted dark or white chocolate. Let the chocolate set before placing on cakes or cookies.
For a marbled effect, mix 1 tbsp cocoa powder into half the icing before piping alongside the vanilla version. This adds depth and a sophisticated touch. 🍫
Spiced Chai Infusion
Transform your icing into a warm, spiced chai version by adding 1 tsp ground cinnamon, ½ tsp cardamom, and ¼ tsp ginger. Simmer these spices with 2 tbsp warm milk for 5 minutes, then strain and mix into the icing.
The spices complement the vanilla beautifully, making this perfect for autumn or holiday treats. 🌿
Royal Icing Conversion
Turn this into a royal icing by replacing the butter with an extra 2 cups powdered sugar and adding 2 tbsp meringue powder. Whisk with 2 tbsp water until it reaches a thick, pipeable consistency.
This version sets hard and is ideal for intricate cookie decorations or cake borders. For a glossy finish, add 1 tsp vegetable glycerin. ✨
Cream Cheese Swirl
Add a tangy cream cheese twist by blending 4 oz softened cream cheese into the icing after mixing. This creates a lighter, airier texture with a subtle tang that balances the sweetness.
Pipe swirls onto carrot cake or red velvet for a showstopping finish. For extra richness, fold in 1 tbsp sour cream as well. 🧀
Seasonal Peppermint
Create a festive peppermint version by adding ½ tsp peppermint extract and 1 tbsp crushed candy canes (for color and flavor). This works beautifully for Christmas cookies or gingerbread cakes.
For a marbled effect, pipe half the icing white and the other half with a few drops of green food coloring. Chill before using for crisp, clean lines. 🎄
Nutrition facts
Frequently asked questions
Why does this icing stay firm all day while others melt?
The secret is the corn syrup and cold butter. Corn syrup acts as a stabilizer, preventing the icing from becoming too stiff or cracking, while cold butter creates a denser structure that resists melting. The heavy cream also adds stability without making it too heavy. Chilling the icing for 10-15 minutes before piping helps it hold its shape even in warm kitchens.
Can I make this icing ahead of time?
Store it in an airtight container in the fridge for up to 5 days. For longer storage, freeze portions in 1-tbsp scoops—thaw overnight in the fridge before using. The buttercream version lasts 3 days in the fridge, while royal icing keeps for 7 days when refrigerated. Just give it a quick whisk to smooth out any separation before using.
What if my icing turns out too soft or too stiff?
Too soft? Add 1-2 tablespoons of powdered sugar at a time and mix until thickened. Too stiff? Thin with 1-2 teaspoons of heavy cream or water. For piping, the icing should hold its shape when piped but still be spreadable. If it’s too warm, chill for 10 minutes to firm up. The key is working with cold ingredients from the start!
How do I achieve those beautiful swirls?
Use a piping bag with a star tip (like Wilton 1M or 2D) and pipe the icing in continuous lines, then gently drag a toothpick through the lines to create swirls. For extra flair, pipe a border first, then add the swirls on top. Chill the icing for 30 minutes before piping to help it hold its shape. Practice on parchment paper first to get the hang of it!
Can I use this icing for cookies instead of cakes?
Yes! This icing works perfectly for decorating cookies, especially if you convert it to royal icing by adding meringue powder and extra powdered sugar. For cookies, use a smaller piping tip (like Wilton 2 or 3) and chill the icing for 15 minutes before piping to prevent spreading. It sets hard, making it ideal for intricate designs.