
Side Dishes
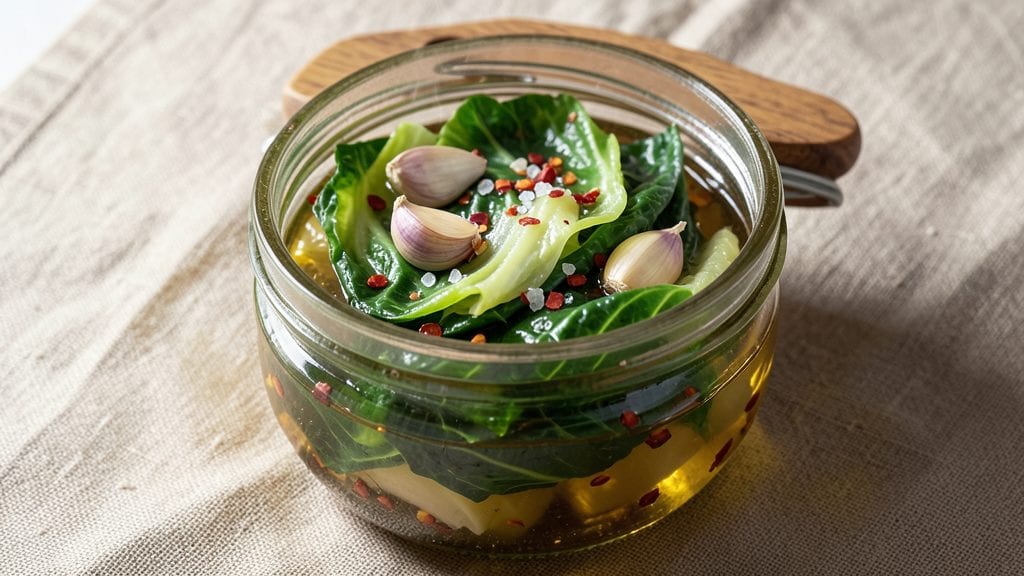
This cabbage pickled recipe transforms simple green cabbage into crisp, tangy bites that add brightness to any meal in just 10 minutes of prep—though the real magic happens during fermentation.
The process is straightforward: thinly sliced cabbage soaks in a simple brine of salt and water, developing complex flavors over time. I’ve perfected this method to deliver restaurant-quality crunch without the wait of traditional sauerkraut.
The beauty of this recipe lies in its versatility—whether you’re making a quick-pickle for tonight’s sandwich or fermenting for long-term storage, the same core technique applies. For quick results, use vinegar; for deeper flavor, let lactic acid fermentation work its magic in a clean jar.
The key is precision: proper salt levels prevent soggy cabbage, while the right temperature ensures safety and optimal fermentation.
What you’ll end up with is cabbage that’s crisp enough to stand up to hearty meals but tender enough to melt in your mouth. The tangy, slightly sour flavor cuts through rich dishes, balancing flavors perfectly.
This method works for both raw-fermented (vegan) versions and those with optional additions like garlic or chili for extra depth.
Store your pickled cabbage in the refrigerator for up to a month, or extend its shelf life with an airlock for room-temperature fermentation. The possibilities are endless—use it in tacos, salads, or as a side dish. Let’s get started on creating your own batch of tangy, crunchy goodness.
Ingredients for cabbage pickled
Simple ingredients, bold flavor—this vegan pickled cabbage keeps crisp and tangy for weeks.
| Ingredient | Amount | Notes |
|---|---|---|
| Green Cabbage 🥬 | 1 ½ lb | Thinly sliced, outer leaves removed |
| Non-Iodized Sea Salt 🧂 | ¼ cup | Fine grain preferred, no additives |
| Filtered Water 💧 | 2 cups | Chlorine-free, room temperature |
| White Vinegar 🍶 | ½ cup | For quick-pickle version (optional) |
| Garlic Cloves 🧄 | 4 cloves | Thinly sliced, optional for flavor |
| Red Chili Flakes 🌶️ | 1 tsp | Adjust for heat preference |
| Fresh Dill 🌿 | ¼ cup | Chopped, optional for brightness |
| Black Peppercorns 🌶️ | 1 tsp | Crushed, optional for depth |
| Apple Cider Vinegar 🍶 | ¼ cup | For fermentation (optional) |
| Pickling Spice Blend 🌶️ | 1 tbsp | Optional, store-bought or homemade |
| Lemon Juice 🍋 | ¼ cup | Freshly squeezed, optional |
| Glass Fermentation Jar 🍶 | 1 whole | Clean, airtight, quart-sized |
| Fermentation Weight 🪨 | 1 whole | Ceramic or glass, optional |
The cabbage is everything here. Look for heads with tight, crisp leaves—avoid any with brown spots or wilted edges. Whole Foods or Trader Joe's usually have the freshest, or grab one from the farmers market. If you're fermenting long-term, organic cabbage is worth the splurge—fewer pesticides mean cleaner fermentation. Slice it thinly (about 1/8-inch) for even pickling. I use a mandoline for consistency, but a sharp knife works too if you're careful. The outer leaves? Save them—they make great wraps for tacos or sandwiches later.
No vinegar? Apple cider vinegar or lemon juice works just as well for quick pickles. Running short on dill? Fresh parsley or tarragon adds a nice brightness. Skip the garlic if you're sensitive to its flavor—it’s optional, not essential. The red chili flakes can be swapped for smoked paprika if you prefer a milder kick. For fermentation, Diamond Crystal kosher salt is ideal—it dissolves cleanly without leaving grit. If you’re making a big batch, Costco sells bulk salt at a great price. The fermentation weight? You can use a bag of marbles or even a zip-top bag filled with water if you don’t have one.
Quick-pickle version keeps in the fridge for up to 2 weeks, while fermented batches last months if stored properly. For long-term fermentation, use an airlock to keep the cabbage submerged and prevent mold. Store in a cool, dark place like your pantry. Once opened, transfer to the fridge and use within 1 month. The flavor gets better with time—start tasting after 3 days of fermentation if you're impatient. I always make extra; it disappears faster than you’d think—especially when paired with smoked salmon or vegan tacos.
Why You'll Love This Recipe
- No-Fuss Fermentation: I swear by this method—just slice the cabbage, sprinkle salt, and let time do the work. No fancy equipment, no guesswork, and honestly, the first jar is ready in as little as 3 days.
- Garlic-Kissed Crunch: That first bite? The vinegar’s tang cuts through the cabbage’s crispness while the garlic cloves infuse just enough warmth to make it ridiculously good. I reach for this over store-bought any day.
- Meal Prep MVP: Pack it in lunches, toss it on sandwiches, or serve it as a side—it keeps for weeks and turns even the simplest meal into something special. My lunchbox has never been happier.
- Pocketbook Hero: A whole head of cabbage and a few cents’ worth of salt and vinegar stretch into meals for days. Between us, this is how I feed my family without breaking the bank.
Step-by-step instructions for crispy, tangy quick-pickled cabbage
Here's how to transform simple ingredients into vibrant, crunchy pickled cabbage in just minutes.
Prep and Salt the Cabbage
Remove the outer leaves from the 1.5 lb green cabbage and cut it into thin, even strips—about ¼-inch thick. I like to work on a cutting board with a sharp knife, making vertical slices first, then horizontal ones to create uniform shreds. The thinner the slices, the quicker they'll pickle and the more crunch they'll retain.
Place the sliced cabbage in a large bowl and sprinkle evenly with the 0.25 cup non-iodized sea salt. Use your hands to massage the salt into the cabbage for about 2 minutes until it starts releasing liquid. This step draws out moisture and begins the pickling process. Let the cabbage sit for 10 minutes while you prepare the remaining ingredients—you'll see it soften slightly and release more liquid.
Mix the Pickling Liquid
In a separate bowl, combine the 2 cups filtered water, 0.5 cup white vinegar, 0.25 cup apple cider vinegar, and 0.25 cup lemon juice. Add the 1 tbsp pickling spice blend, 1 tsp red chili flakes, 1 tsp crushed black peppercorns, and 4 thinly sliced garlic cloves. Stir well to dissolve the salt and distribute the spices evenly throughout the liquid.
This tangy, aromatic mixture is what transforms plain cabbage into something vibrant and complex. The vinegars work together to create acidity, while the spices add layers of flavor. Taste the liquid now—it should be bright and slightly spicy. If you prefer more heat, add an extra pinch of red chili flakes.
Combine and Pack the Jar
Drain any excess liquid from the salted cabbage, but don't rinse it—those salty juices are flavor gold. Transfer the cabbage to the glass fermentation jar and press it down firmly to remove air pockets. The cabbage should fit snugly, but not so tightly that it can't be submerged completely in the pickling liquid.
Pour the prepared pickling liquid over the cabbage until it's fully submerged. If needed, use the fermentation weight to keep the cabbage submerged—this prevents mold growth and ensures even pickling. The cabbage should be completely covered by at least 1 inch of liquid. Seal the jar tightly and let it sit at room temperature for 10 minutes before refrigerating.
Chill and Develop Flavor
After the initial 10 minutes, transfer the jar to the refrigerator. The cabbage will continue to soften and absorb the flavors over the next 2 to 24 hours—the longer it sits, the more pronounced the tang and crunch will become. For best results, I recommend letting it sit for at least 4 hours before eating, but it's ready to enjoy as soon as it's chilled.
When you're ready to serve, stir in the 0.25 cup chopped fresh dill just before eating. This herb adds a bright, fresh note that cuts through the tangy, spicy flavors. The pickled cabbage will keep in the refrigerator for up to 2 weeks, making it a great make-ahead side dish or snack. The texture should remain crisp, and the flavor should be perfectly balanced between tangy, spicy, and fresh.
Pro Tips For Making Cabbage Pickled
- Shave the Cabbage: I learned this the hard way—thin, even slices (about 1/8-inch thick) pickle faster and stay crisp. Skip the thick wedges unless you’re okay with a mushy texture after a week.
- Salt in Stages: Don’t dump all the salt at once. Start with half the sea salt, massage it into the cabbage for 10 minutes, then add the rest. This draws out moisture more evenly and prevents a watery brine.
- Use Cold Water: Fill the jar with filtered cold water—not warm—before adding vinegar. Warm water speeds up fermentation, which can turn your pickles sour too fast. Cold keeps the process steady.
- Smash the Garlic: Skip the whole cloves. Mince or crush the garlic before adding it to the jar—it infuses flavor faster and doesn’t leave bitter chunks. (Yes, even if you’re impatient like me.)
Common mistakes when making this dish
Over-Salting the Cabbage
Using too much salt—more than the ¼ cup called for—can make your pickled cabbage mushy and unpleasantly salty. The salt draws out moisture aggressively, which leads to sogginess.
I’ve learned the hard way that Diamond Crystal kosher salt is more forgiving than table salt, but even with it, stick to the measurement. If you’re unsure, taste the brine before adding the cabbage—it should be just barely salty, not overwhelming. 🧂
Skipping the Submersion Test
Never let your cabbage sit uncovered or only partially submerged in liquid. This is a common mistake that leads to mold or uneven pickling. Always use a fermentation weight (or a bag of marbles) to keep the cabbage fully submerged by at least 1 inch of brine.
I’ve seen batches go bad because someone forgot this step—don’t let that happen to you! The weight ensures the cabbage stays safe and crisp.
Using Iodized Salt
Iodized table salt can introduce unwanted flavors and may interfere with the fermentation process. The iodine can react with the cabbage, leaving a metallic or bitter taste. Always use non-iodized sea salt or kosher salt for pickling.
If you’re in a pinch, Morton kosher salt works fine, but avoid iodized table salt at all costs. The difference in flavor is noticeable!
Ignoring Temperature Control
Fermenting cabbage above 70°F (21°C) speeds up bacterial growth, increasing the risk of mold or off-flavors. If your kitchen is warm, refrigerate the jar immediately after packing it. For room-temperature fermentation, use an airlock lid to prevent contamination.
I keep my fermenting jars in a cool pantry or basement—consistent temperatures are key to safe, flavorful results. 🌡️
Rushing the Process
Quick-pickled cabbage is ready in hours, but fermented versions need time to develop depth. Skipping the 4-hour minimum chill time means you’ll miss out on the best texture and flavor.
Patience pays off—let the cabbage sit overnight if possible. The longer it ferments (up to 2 weeks in the fridge), the more complex the taste becomes. Trust the process!
Not Sterilizing Jars Properly
Dirty jars introduce bacteria that can spoil your cabbage before it even ferments. Always wash your glass fermentation jar with hot, soapy water, then sanitize it by rinsing with boiling water or a vinegar solution.
I like to run my jars through the dishwasher’s sanitize cycle for extra safety. Sterile jars mean cleaner fermentation and fewer surprises. 🍶
Nutrition facts
Frequently asked questions
Can I use red cabbage instead of green?
Red cabbage works beautifully and adds a vibrant purple hue that turns pink when pickled. The flavor is slightly sweeter and more delicate than green, but the same technique applies. Just be aware the color may bleed into your pickling liquid—use a separate jar if you want to preserve the original color for garnishes.
How do I know when my fermented cabbage is ready?
Fermented cabbage is ready when it develops a tangy aroma (like yogurt or sauerkraut) and the bubbles slow down. For best flavor, wait at least 3 days at room temperature (with an airlock) or 1 week in the fridge. Taste test after 5 days—if it's still too mild, let it ferment another 2-3 days. Over-fermenting can make it too sour.
Can I make this recipe without vinegar?
Yes! For a true fermented version, skip the vinegar and rely on lactic acid fermentation. Use 2% salt brine (20g salt per liter of water) and ferment at 60-70°F (15-21°C) for 1-2 weeks. The cabbage will develop deeper, probiotic-rich flavors. Just ensure it stays submerged and use an airlock if fermenting at room temperature.
What can I do with extra pickled cabbage?
This versatile condiment works in endless ways! Use it as a topping for burgers, tacos, or grilled meats, mix into potato salad, or serve with sandwiches and deli meats. For extra creativity, blend some into hummus or coleslaw. The tangy crunch pairs perfectly with rich, fatty foods—think fried chicken or creamy pasta dishes.
Why did my quick-pickled cabbage turn yellowish?
Yellowing usually happens from oxidation (exposure to air) or over-fermentation. To prevent it, keep the cabbage fully submerged and store in an airtight container. If it's already yellow, the flavor is likely still fine—just less vibrant. For future batches, add a splash of lemon juice or apple cider vinegar to the brine to help preserve color.