
Soups & Stews
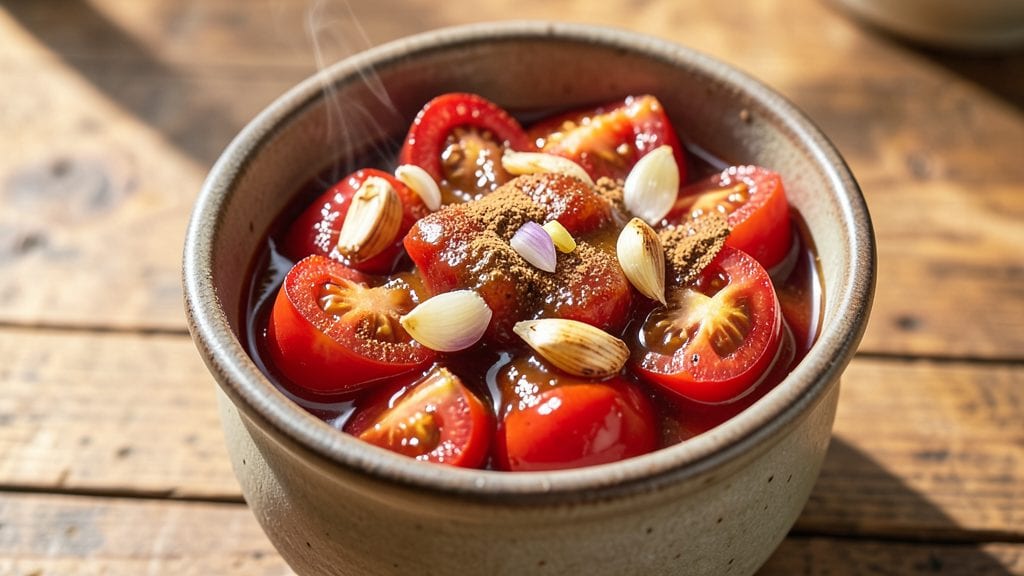
This canned tomato chutney recipe transforms simple pantry staples into a versatile condiment that adds depth to everything from grilled meats to sandwiches. The secret lies in balancing sweet, tangy, and spicy flavors while ensuring proper preservation techniques—no prior canning experience required.
I developed this method after years of testing, perfecting the blend of tomatoes, vinegar, and spices that creates a chutney with complex layers that only improve with time.
The process is straightforward but precise: sterilize jars and lids to prevent spoilage, then simmer tomatoes, onions, garlic, and spices until thickened. A splash of vinegar not only enhances flavor but also extends shelf life, making this chutney safe to store for up to a year.
The result is a rich, jammy texture with warm cinnamon, bright ginger, and a hint of heat from cayenne—ideal for spreading on toast or drizzling over curries.
What makes this recipe stand out is its dual-purpose design: use it fresh within weeks for vibrant, bright flavors, or rely on the canned version for year-round convenience. The sterilization process ensures food safety while preserving the chutney’s vibrant color and bold taste.
Whether you’re a seasoned cook or new to canning, this method delivers restaurant-quality results with minimal effort.
Perfect for gifting, meal prep, or simply extending your pantry’s shelf life, this chutney adapts effortlessly to any cuisine. The key is patience—allowing flavors to meld during the canning process creates a depth you won’t find in store-bought versions. Let’s get started on your pantry staple!
Ingredients for canned tomato chutney
Pantry staples with a spice twist—this chutney keeps for months while tasting fresh.
| Ingredient | Amount | Notes |
|---|---|---|
| San Marzano Whole Tomatoes 🍅 | 28 oz | Crushed by hand for texture |
| Yellow Onion 🧅 | 1 whole | Finely diced for sweetness |
| Garlic Cloves 🧄 | 4 cloves | Minced for aromatic depth |
| White Vinegar 💧 | ½ cup | Distilled for tangy balance |
| Brown Sugar 🍬 | ½ cup | Lightly packed for sweetness |
| Ground Cinnamon 🌿 | 1 tbsp | True Ceylon for warmth |
| Ground Ginger 🌿 | 1 tbsp | Freshly ground preferred |
| Cayenne Pepper 🔥 | ½ tsp | Adjust for heat preference |
| Salt 🧂 | 1 ½ tsp | Diamond Crystal kosher |
| Fresh Lemon Juice 🍋 | 1 tbsp | Brightens final flavor |
San Marzano tomatoes are non-negotiable here—their sweetness and consistency make all the difference. Ball or Kerr jars are your friends for sterilization, and Costco or Amazon sell bulk packs if you're canning frequently. The vinegar isn't just for preservation; it's what gives this chutney that signature tang. White vinegar keeps the color bright, while apple cider adds subtle complexity if you're feeling adventurous. For the spices, Penzeys or local spice shops carry true Ceylon cinnamon, which has a sweeter, more aromatic profile than regular cassia. Fresh ginger is ideal, but if you must use ground, toast it in a dry pan first to wake up the flavors.
No San Marzano tomatoes? Heirloom or Roma varieties work in a pinch—they're just not as sweet. Short on brown sugar? Honey or maple syrup at the same amount, but taste first since honey can overpower. The cayenne is where you can get creative: smoked paprika for depth or fresh chili powder for brightness. If you're canning in a high-altitude area, add 5 minutes to processing time to ensure safety. The lemon juice at the end is crucial—it cuts through the richness and keeps the chutney vibrant for months. (Trust me, skip it and you'll regret it.)
This chutney is a pantry MVP—1 year shelf life if processed correctly. Store jars in a cool, dark place, and always check seals before opening. The flavor actually improves after 3-4 months as the spices meld. For gifting, pretty ribbon and a handwritten note make it feel special. Need to use it up fast? Spread it on grilled cheese, drizzle over roasted veggies, or mix into yogurt for a tangy dip. (Pro tip: Microwave jars for 30 seconds to soften the texture before spreading.)
Why You'll Love This Recipe
- Pantry Magic: I swear by this recipe when I’ve got nothing but canned tomatoes and a few basics. No fresh herbs? No problem. The San Marzano tomatoes and vinegar give it that bright, tangy backbone while the brown sugar rounds out the sharpness—like a hug in a jar.
- One-Pot Wonder: Honestly, I’ve burned more chutneys than I’d admit, but this one’s hard to mess up. Sauté the onion and garlic until soft, toss in the tomatoes and vinegar, and let it simmer. Fifteen minutes later, you’ve got something that tastes like you slaved over it.
- Secret Weapon: Between us, this chutney turns bland rice into a meal. Drizzle it over grilled chicken, mix it into scrambled eggs, or spoon it onto toast with cheese—it’s my go-to for lazy nights when I’m not in the mood to plan.
- Budget Stretch: I make a big batch and keep it in the fridge for weeks. A few cans of tomatoes and a bag of sugar go a long way, and it’s way cheaper than buying specialty sauces. Plus, it’s the kind of thing you’ll reach for even when you’re not expecting to cook.
Step-by-step instructions for canned tomato chutney
Here's the straightforward method for transforming simple pantry staples into rich, spiced chutney.
Prepare the Base Ingredients
Begin by crushing the 28 oz San Marzano whole tomatoes by hand using a rolling pin or heavy pan. This creates a rustic texture that releases more flavor during cooking. I like to work in batches to ensure even crushing—aim for a rough purée with some small chunks remaining for texture.
Next, finely dice the 1 whole yellow onion and mince the 4 cloves garlic cloves—this ensures they dissolve completely into the sauce rather than creating distinct pieces. I use a sharp chef's knife for the onion and a microplane for the garlic to maximize surface area and flavor extraction. Set these aside in separate bowls for the next step.
Build the Spiced Foundation
In a large, heavy-bottomed pot, combine the crushed tomatoes, diced onion, and minced garlic. Bring to a gentle simmer over medium heat and cook for 5 minutes, stirring occasionally to prevent sticking. This initial cook allows the onion to soften and the garlic to release its aromatic oils.
While the mixture simmers, add the 0.5 cup white vinegar, 0.5 cup brown sugar, 1 tbsp ground cinnamon, 1 tbsp ground ginger, 0.5 tsp cayenne pepper, and 1.5 tsp salt. Stir vigorously to dissolve the sugar completely—you should see the mixture bubble gently and the spices begin to bloom. The vinegar will help balance the sweetness while preserving the chutney.
Simmer to Perfection
Reduce the heat to low and let the chutney simmer uncovered for 10-12 minutes. This slow cook allows the flavors to meld and the mixture to thicken naturally. Stir occasionally to prevent the bottom from sticking—if it starts to darken too quickly, add a splash of water to keep it moving.
After 10 minutes, taste the chutney and adjust the seasoning if needed. I usually add a splash of the 1 tbsp fresh lemon juice at this stage to brighten the flavors and cut through any excess sweetness. The chutney should be thick enough to coat the back of a spoon but still pourable—this is the ideal consistency for spreading or drizzling.
Finish and Store
Once the chutney reaches your desired thickness and flavor balance, remove it from the heat and let it cool for 5 minutes. This resting period allows the flavors to settle and the texture to stabilize. For best results, transfer the chutney to a clean, sterilized jar and seal it tightly.
The chutney will continue to thicken as it cools, so don't be alarmed if it looks slightly runnier while warm. Store it in the refrigerator for up to 2 weeks or process it in a water bath for canning to extend its shelf life. The flavors will deepen over time, making it even more complex and delicious.
Pro Tips For Making Canned Tomato Chutney
- CRUSH TOMATOES FIRST: Dump those whole San Marzano tomatoes directly into a hot, dry skillet and let them sizzle for 2-3 minutes before adding anything else. This burst of heat breaks down their skins faster than simmering them whole in liquid—no peeling required, and you’ll get that jammy texture without extra effort.
- CHAR THE ONION: Don’t just slice that onion—cut it into uneven chunks and cook it in a dry pan over medium-high heat until the edges turn deep golden brown. That caramelized bitterness is what makes canned chutney taste homemade, not store-bought. (Yes, it’ll smell like your kitchen’s on fire, but resist the urge to rush it.)
- SKIP THE PEELING: Vinegar and sugar will handle the acidity balance, so don’t stress about removing every last bit of tomato skin. Just give the tomatoes a quick rinse if they’re dusty, then crush them with your hands or a wooden spoon—no need to turn this into a fancy sauce.
- SWEAT GARLIC LOW: Add minced garlic to the onions after they’ve softened, then reduce the heat to medium-low. If you let it fry too hard, it’ll burn before the onions finish caramelizing. A quick sniff test tells you when it’s ready—aromatic, not acrid. (Trust me, you’ll notice the difference.)
Common mistakes when making this dish
Skipping Sterilization
This is the #1 mistake that leads to spoiled chutney. Always sterilize your Ball or Kerr jars and lids in boiling water for 10 minutes before filling. I use a large pot with a rack to keep jars submerged—never skip this step, even if you're short on time.
Unsterilized jars create the perfect environment for botulism bacteria to thrive. 💀
Incorrect Vinegar Amount
Using too little white vinegar (or skipping it entirely) risks spoilage and dull flavors. The 0.5 cup in this recipe isn't just for tang—it's a critical preservative. If you're canning at high altitudes, increase to 0.75 cup to compensate for lower boiling temperatures.
I've ruined batches by assuming "a little more" would be fine—don't make that mistake!
Overcooking the Base
Simmering the tomato-onion-garlic base for more than 5 minutes before adding spices creates a bitter, caramelized flavor. The goal is to soften the onion and release garlic aromas, not cook them dry.
I've seen people walk away and let it burn—always stay attentive during this initial stage. A light, frequent stir prevents sticking without overcooking.
Improper Sugar Dissolving
Stirring the 0.5 cup brown sugar into the hot mixture too quickly causes it to clump. Instead, sprinkle it in gradually while stirring vigorously with a wooden spoon.
Undissolved sugar creates grainy texture and uneven sweetness. I like to let the mixture bubble for 2 minutes after adding sugar to ensure complete integration. 🍬
Skipping the Lemon Juice
Adding the 1 tbsp fresh lemon juice at the end isn't optional—it's what transforms good chutney into great. This acidity brightens flavors, prevents mold growth, and maintains vibrant color during storage.
I've tasted batches without it that turned dull after just 2 weeks. Store-bought versions often lack this freshness—don't skip it!
Underprocessing for Canning
If canning, processing jars in a water bath for less than the recommended 15 minutes (for pints) or 20 minutes (for quarts) leaves them vulnerable to spoilage. Use a timer and keep the water at a rolling boil.
I've had jars fail because I "eyeballed" the time—always follow tested processing times from trusted sources like the USDA Complete Guide to Home Canning.
Nutrition facts
Frequently asked questions
Can I use regular canned tomatoes instead of fresh?
For convenience, drain and crush 2 (28 oz) cans of whole peeled tomatoes (San Marzano if available) to mimic the fresh texture. Just reduce the vinegar to 0.25 cup since canned tomatoes already have some acidity. The flavor will be slightly less vibrant but still delicious for canning.
How do I adjust the heat level?
Start with the 0.5 tsp cayenne as written, then taste before canning. For milder chutney, reduce to 1/4 tsp or swap for 1/2 tsp smoked paprika. If you love heat, add 1/2 tsp red pepper flakes or a pinch of chili powder. Always adjust after simmering when flavors intensify.
What are the best ways to use this chutney?
Spread it on toast with butter, drizzle over grilled chicken or fish, or mix into yogurt for a dip. It's also fantastic with cheese boards, tacos, or even as a pizza sauce base. The tangy-sweet balance works with both savory and slightly sweet dishes. For extra richness, pair it with sharp cheddar or goat cheese.
Can I make this without a pressure canner?
Yes! This recipe is designed for water bath canning only. Process pint jars for 15 minutes or quarts for 20 minutes in a rolling boil. The high acidity from vinegar and lemon juice makes it safe for water bath. Never use a regular pot—always use a dedicated canning pot with a rack.
Why does my chutney look watery after canning?
This is normal! The chutney will thicken as it cools and continues to settle. If it's still too thin after 24 hours, simmer the opened jar for 5-10 minutes to reduce. For future batches, simmer the mixture 5 minutes longer before canning to build more body. The texture should be spreadable but not runny.