
Desserts
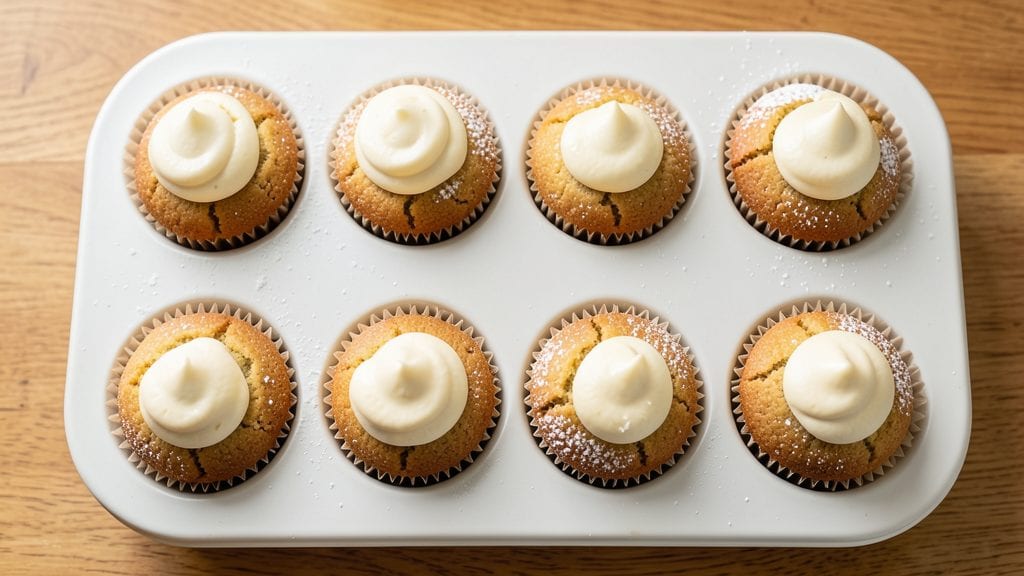
Baking this nostalgic hostess cake recipe from scratch brings back that beloved pillowy texture and creamy vanilla frosting swirls you love. The secret lies in a tender sponge cake baked just until golden, then filled with light vanilla buttercream and topped with a glossy chocolate glaze.
After perfecting this recipe over years of baking, I’ve cracked the code for that signature softness and rich flavor—no shortcuts needed.
This recipe delivers three distinct layers: a moist vanilla cake, fluffy vanilla frosting, and a glossy chocolate coating that mimics the iconic Hostess look. The cake bakes in 350°F for about 12-15 minutes, while the frosting and glaze come together in minutes.
No special equipment required—just patience and precise timing to ensure each cupcake stays tender without drying out.
The result? Cupcakes with a light, airy crumb that melts in your mouth, swirled with creamy vanilla frosting and crowned with a glossy chocolate finish. These taste just like the classic Hostess treats but with the satisfaction of homemade baking.
Perfect for birthdays, potlucks, or when you need a nostalgic dessert fix.
Once you try these, you’ll never buy the boxed version again. The key is in the baking time—don’t overbake—and the frosting consistency, which should be thick enough to hold swirls without sliding. Let’s get baking!
Ingredients for hostess cake
Twelve simple ingredients transform into nostalgic Hostess-style cupcakes with creamy swirls and glossy chocolate tops.
| Ingredient | Amount | Notes |
|---|---|---|
| All-Purpose Flour 🌾 | 2 ½ cups | Sifted for light texture |
| Granulated Sugar 🍚 | 1 ½ cups | White or light brown |
| Unsalted Butter 🧈 | 1 cup | Cold, cubed for cake |
| Large Eggs 🥚 | 2 whole | Room temperature preferred |
| Vanilla Extract 🌸 | 1 tbsp | Pure, not imitation |
| Baking Powder 🧪 | 2 tsp | Aluminum-free preferred |
| Salt 🧂 | ½ tsp | Fine sea salt |
| Milk 🥛 | ½ cup | Whole for richness |
| Vanilla Buttercream Frosting 🍰 | 2 cups | Homemade or quality store-bought |
| Dark Chocolate Chips 🍫 | ½ cup | Semi-sweet for glaze |
| Heavy Whipping Cream 🥛 | ¼ cup | Cold for glaze |
| Powdered Sugar 🍚 | ½ cup | For glaze sweetness |
| Mini Vanilla Cupcake Liners 🧁 | 12 whole | For perfect size |
The flour and butter are non-negotiable for that signature pillowy texture. King Arthur or Gold Medal flour gives the best rise—don’t substitute with self-rising or gluten-free blends. For the butter, Plugrá or Land O’Lakes brands stay cold longer when cubed. Room-temperature eggs prevent dense cupcakes, so let them sit out for 30 minutes before mixing. The vanilla extract should be pure, not imitation—look for brands like McCormick or Nielsen-Massey in the baking aisle. Baking powder is key here—Aluminum-free ensures no metallic aftertaste. For the milk, whole milk adds richness, but 2% works in a pinch.
No vanilla buttercream on hand? Make your own—just butter, powdered sugar, and vanilla extract, whipped together until fluffy. The chocolate glaze can be swapped for a caramel drizzle if you prefer, but dark chocolate chips give that classic Hostess look. Short on baking powder? Baking soda plus cream of tartar at a 3:1 ratio works, but test your batch first. The cupcake liners? Mini size is crucial—standard liners make them too large. For a shortcut, Betty Crocker or Duncan Hines can be doctored with extra vanilla and buttercream, but homemade tastes infinitely better.
Store frosted cupcakes in an airtight container between layers of parchment paper for up to 5 days. Freeze unfrosted cupcakes for 3 months—thaw at room temperature before adding frosting. The glaze sets best at room temperature, so let cupcakes sit for 10 minutes before refrigerating. For parties, assemble cupcakes morning-of—the frosting swirls hold up beautifully, but the glaze might melt if left out in heat. Double the recipe? Use a large mixing bowl and two batches of liners—these cupcakes are too good to skip.
Why You'll Love This Recipe
- No Mixer Needed: I swear by this—just a bowl and a fork. The butter gets creamed with sugar until it’s light and fluffy (no electric help required), and the eggs blend right in. Honestly, my arms get a workout, but the result is worth it.
- Vanilla Buttercream Magic: That rich, buttery frosting? It’s all about the butter and sugar ratio here. The vanilla extract cuts through the sweetness just enough to make it irresistible—like a hug for your taste buds. (Yes, even on a Tuesday night.)
- Party in a Box: Slice it for a potluck, stack it for a birthday, or pack it for a picnic. The layers hold up perfectly, and it’s way more impressive than store-bought. Between us, I’ve used it for everything from office treats to last-minute dessert emergencies.
- Budget-Friendly Stunner: Flour, sugar, butter, eggs—these are pantry staples, not splurges. A single batch feeds a crowd, and leftovers? They disappear fast. I’ll be real: my grocery bill stays happy, and so does my dessert table.
Step-by-step instructions for Hostess cupcakes recipe
Here's how to recreate that nostalgic Hostess cupcake magic with perfect swirls and moist texture.
Prepare the Cake Batter
Preheat your oven to 350°F and line a muffin tin with the 12 whole mini vanilla cupcake liners. In a medium bowl, whisk together the 2.5 cups all-purpose flour, 2 tsp baking powder, and 0.5 tsp salt. Set aside.
In a separate large bowl, cream the 1 cup unsalted butter and 1.5 cups granulated sugar together until light and fluffy, about 3-4 minutes using an electric mixer. This step is crucial for that tender, melt-in-your-mouth texture. Add the 2 whole large eggs, one at a time, mixing well after each addition.
Incorporate the 1 tbsp vanilla extract and 0.5 cup milk, mixing until just combined. Gradually add the dry ingredients to the wet mixture, mixing on low speed until everything is incorporated. Be careful not to overmix—just until the batter is smooth.
Bake the Cupcakes
Divide the batter evenly among the prepared liners, filling each about two-thirds full. Bake in the preheated oven for 12-15 minutes, or until a toothpick inserted into the center comes out clean. The tops should be golden brown, but don't overbake—they'll continue cooking slightly as they cool.
While the cupcakes are baking, prepare the 2 cups vanilla buttercream frosting according to the package instructions or your homemade recipe. You want it to be smooth and spreadable, but not too runny. Let it cool slightly while the cupcakes bake.
Create the Signature Swirl
Once the cupcakes have cooled completely, use a serrated knife to cut each cupcake horizontally in half, creating two even layers. Place the bottom layer on a serving plate or back in the liner.
Spread about 1 tablespoon of the vanilla buttercream frosting on top of each bottom layer. Then, place the top layer on top of the frosting. The goal is to create a thin layer of frosting between the two cake layers.
Now for the fun part—the swirl! Use a piping bag fitted with a star tip to pipe a generous dollop of frosting on top of each cupcake. Gently swirl the frosting with a small offset spatula or the back of a spoon to create that classic Hostess-style swirl pattern. This is where the magic happens—don't rush it!
Add Chocolate Drizzle
In a small saucepan, combine the 0.5 cup dark chocolate chips, 0.25 cup heavy whipping cream, and 0.5 cup powdered sugar. Heat over low heat, stirring constantly, until the chocolate is completely melted and the mixture is smooth. Remove from heat and let it cool slightly, about 2-3 minutes.
Use a fork to drizzle the chocolate mixture over the top of each cupcake, allowing it to create that signature zigzag pattern. Work quickly so the chocolate doesn't set before you finish. For extra flair, you can also sprinkle a few additional dark chocolate chips on top of each cupcake before the drizzle sets.
Chill and Serve
Place the cupcakes in the refrigerator for 15-20 minutes to allow the chocolate drizzle to set. This chilling step is essential—it helps the frosting firm up slightly and makes the chocolate glaze crisp rather than sticky.
Once chilled, your Hostess-style cupcakes are ready to serve. They're perfect for parties, picnics, or just a nostalgic treat. Store any leftovers in an airtight container in the refrigerator for up to 3 days, or freeze for up to 1 month. Enjoy the sweet memories with every bite!
Pro Tips For Making Hostess Cake
- CREAM BUTTER FIRST: Mix the butter and sugar until it’s light and fluffy—no streaks left, and it should look like wet sand. I learned this the hard way: under-mixed butter means dense cake, and overworking it? Glue. Two minutes with a hand mixer (or five by hand) gets it right every time.
- WEIGH YOUR FLOUR: Scooping flour from the bag packs it down, adding extra moisture and throwing off your ratio. Use a kitchen scale for precision—1 cup of all-purpose flour isn’t always 120g. If you’re eyeballing, spoon it in and level it off; don’t tap the bowl. Trust me, your cake’s texture depends on this.
- DON’T OVERBAKE: The cake’s done when a toothpick comes out with moist crumbs, not clean. Hostess cake is tender, not dry—pull it when the edges pull away from the pan but the center still has a slight wobble. Every oven runs hot; start checking at 2 minutes before the recipe’s suggested time.
- EGG ROOM TEMP: Cold eggs? They’ll sink in the batter and create pockets of uneven texture. Take them out 30 minutes before mixing—no need to microwave them. Room-temperature eggs blend smoothly and give you that classic Hostess cake crumb. (Yes, even if you’re impatient like me.)
Pro cooking tips for great hostess cake
Batter Consistency
Your cake’s tenderness starts with the batter—do not overmix after adding the dry ingredients. Mix just until combined to avoid developing gluten, which makes cupcakes tough. I use a hand mixer on low speed for 10-12 strokes after incorporating flour.
The batter should be smooth but slightly lumpy, like thick pancake batter. Overmixing is the #1 reason for dense cupcakes. 🥄
Mini Liners Matter
Using mini cupcake liners (not standard size) is non-negotiable for that authentic Hostess texture. Standard liners make cupcakes too large and dense. I recommend Wilton mini liners—they’re sturdy enough to hold the batter without leaking while baking.
Grease the liners lightly with butter or baking spray to ensure easy removal. If you’re short on liners, use butter-flavored parchment paper cut into circles.
Baking Time Precision
Bake cupcakes for 12-15 minutes at 350°F—no longer! I pull them out when a toothpick comes out with a few moist crumbs (not wet batter). Overbaking dries them out, and underbaking leaves them gummy.
For even baking, rotate the muffin tin halfway through at the 8-minute mark. A wire rack helps cool cupcakes evenly after baking, preventing soggy bottoms. 🌡️
Frosting Swirl Secrets
The signature swirl requires frosting at room temperature—cold frosting won’t hold its shape. Pipe a generous dollop (about 1.5 tablespoons) on top of each cupcake, then use a small offset spatula to swirl gently.
Work quickly to avoid melting the frosting. For extra flair, dip the spatula in powdered sugar before swirling to create a dusted effect. If the frosting slides, chill cupcakes for 5 minutes before swirling.
Chocolate Glaze Tricks
For a glossy, crack-free glaze, melt the chocolate and cream together gently—never boil. Heat on low until smooth, then let it cool for 2-3 minutes before drizzling. If the glaze thickens too much, warm it briefly in 10-second bursts in the microwave.
To prevent chocolate from setting too fast, work in batches of 3-4 cupcakes at a time. For a matte finish, add 1/8 tsp coconut oil to the glaze mixture. ✨
Chilling for Perfection
Refrigerate cupcakes for 15-20 minutes before serving—this sets the glaze and firms the frosting. If you’re in a hurry, place them in the freezer for 5 minutes, but watch closely to avoid over-chilling.
For extra stability, brush the tops with a tiny bit of apricot jam before chilling—it acts as a natural glue for the glaze. Store leftovers in an airtight container with parchment paper between layers to keep them fresh. 💫
Nutrition facts
Frequently asked questions
Why do my homemade Hostess-style cupcakes turn out dense?
Overmixing the batter is the #1 culprit! Mix dry ingredients with wet just until combined (about 10-12 strokes) to avoid developing gluten. Also, check your baking powder—old or aluminum-based versions can cause dense texture. For reference, the batter should look like thick pancake batter, not smooth cake batter.
Can I make these cupcakes without a piping bag for the frosting swirl?
Use a ziplock bag with a tiny corner snipped off to pipe frosting. For swirling, spread a thin layer of frosting between cake layers, then pipe a dollop on top. Use a butter knife or offset spatula to create swirls—press gently and rotate the cupcake while pulling the tool upward. Practice makes perfect, but even imperfect swirls taste amazing!
How do I prevent the chocolate glaze from cracking?
Work in batches of 3-4 cupcakes at a time to keep the glaze warm and smooth. Let it cool for exactly 2-3 minutes before drizzling—hot glaze cracks when it hits cool frosting. For extra insurance, brush cupcake tops with a tiny bit of apricot jam before chilling (it acts as a glue). If cracks happen, dust with powdered sugar to camouflage!
Can I substitute the chocolate glaze with something else?
Yes! Try a caramel drizzle (melted caramel sauce + cream) or a simple powdered sugar glaze (powdered sugar + milk). For a citrus twist, add 1 tsp lemon juice to the chocolate glaze. The key is keeping the glaze thin enough to drizzle—it should coat the back of a spoon but not be syrupy. The texture should be similar to melted chocolate candy coating.
How far ahead can I make these cupcakes?
Bake cupcakes up to 2 days ahead and store in an airtight container at room temperature. Frost and assemble them morning-of for the best texture. For longer storage, freeze unfrosted cupcakes for 3 months—thaw at room temperature before assembling. The frosting and glaze are best added fresh, but you can refrigerate frosted cupcakes for 3 days if needed.