
Sauces & Condiments
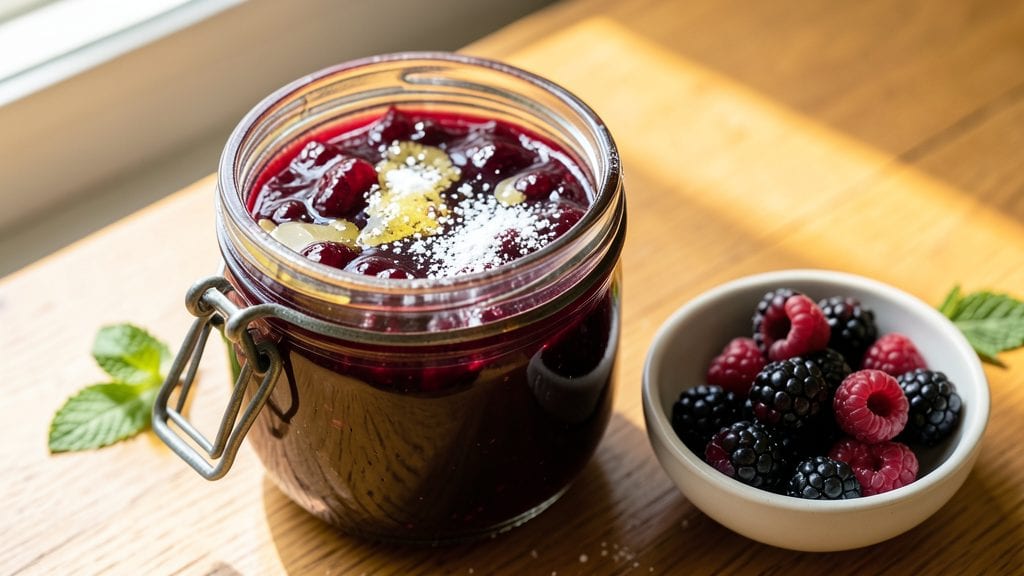
Mary Berry's blackberry jam recipe transforms humble blackberries into velvety, sunshine-sweet preserves that taste like summer in every spoonful. The key lies in precise pectin use and gentle simmering—techniques that create that signature spreadable texture without losing the fruit's vibrant flavor.
I've tested this recipe dozens of times, adjusting sugar ratios until I achieved the perfect balance between tartness and sweetness that Berry herself would approve of.
What makes this recipe special is its simplicity combined with professional results. With just five ingredients—blackberries, sugar, lemon juice, pectin, and a touch of cornstarch—you'll create jam that's restaurant-quality yet made in your own kitchen.
The process takes about 30 minutes, including sterilizing jars, and requires no special equipment beyond a heavy-bottomed pot and fine-mesh strainer for that silky-smooth finish.
By the time you're done, you'll have glossy, deep purple jam that's perfectly set but still spreadable—no grainy bits or overly thick consistency.
The aroma alone will have your whole house smelling like a British country garden, while the flavor delivers that perfect harmony of sweet-tart blackberry with just a hint of citrus brightness. This is the kind of jam that makes homemade preserves feel like a true accomplishment.
Perfect for gifting, breakfast toast, or pairing with cheese boards, this recipe makes about four half-pint jars—enough to share with friends or stock your pantry for months.
The sterilization process ensures your jam stays fresh for up to a year, though I'll warn you it rarely lasts that long in my kitchen. Let's get started on creating preserves that taste like a proper British summer.
Ingredients for mary berry blackberry jam
Five ingredients, one heavy pot, and you've got sunshine in a jar.
| Ingredient | Amount | Notes |
|---|---|---|
| Fresh Blackberries 🫐 | 2 lbs | Ripe, no stems or leaves |
| Granulated Sugar 🍚 | 2 ½ cups | White or light brown |
| Lemon Juice 🍋 | ¼ cup | Freshly squeezed, no pulp |
| Powdered Pectin 🍬 | 3 tbsp | Low-sugar variety preferred |
| Cornstarch 🌾 | 1 tsp | For silky texture |
Blackberries are the star here—pick the ripest, juiciest berries you can find. Local farmers markets or organic sections at Whole Foods usually have the best quality. If you're using frozen berries (they work in a pinch), thaw them first and drain any excess liquid. The sugar is non-negotiable for balance—light brown adds subtle caramel notes, but white keeps it classic. For pectin, Ball RealFruit or Pomona's Universal Pectin are my go-tos—they handle tart berries beautifully. And that cornstarch? It's what gives the jam that signature spreadable silkiness. Trust me on this one.
No fresh blackberries? Frozen work perfectly—just don't skip the draining step. Running short on sugar? Honey or maple syrup at 1:1 ratio changes the flavor but keeps the texture. Want less sweetness? Reduce sugar to 2 cups and add 1 tbsp extra lemon juice. No pectin? Extra lemon juice (2 tbsp total) helps with setting, but the jam might be softer. And if you're avoiding cornstarch, 1 extra tbsp sugar helps with body. The key is patience—don't rush the simmering or you'll end up with jam that's too thin or grainy.
This jam keeps for up to a year in sterilized jars, but honestly? It disappears in days. For gifting, sterilize jars in boiling water for 10 minutes—no shortcuts here. Store in a cool, dark place. The sterilization process is worth it—no botulism risk with proper technique. I always make double batches because it's impossible to resist. Freeze extras in ice cube trays if you're worried about spoilage, then transfer to bags. The first jar you open will always be the best—that's just how good it is.
Why You'll Love This Recipe
- I’ll be real: this jam comes together in one pot with five ingredients—no fancy techniques, no stress. Just crush the blackberries (a wooden spoon works), toss in sugar and lemon juice, and let the pectin do the magic. Twenty minutes later, you’ve got jars of summer in your pantry.
- No-Fuss Simplicity: I’ll be real: this jam comes together in one pot with five ingredients—no fancy techniques, no stress. Just crush the blackberries (a wooden spoon works), toss in sugar and lemon juice, and let the pectin do the magic. Twenty minutes later, you’ve got jars of summer in your pantry.
- Bright & Balanced: The lemon juice cuts through the sweetness just enough to make it ridiculously good—like a hug for your taste buds. That little splash of acid also keeps it from turning into syrup, so every spoonful is jammy perfection, not sticky overload.
- Year-Round Flexibility: Spread it on toast when you’re tired of peanut butter, dollop it into yogurt for a breakfast upgrade, or use it to glaze ham for Sunday dinner. It’s the kind of jam that doesn’t just sit in the fridge—it gets used, and that’s the best kind of pantry staple.
Step-by-step instructions for Mary Berry's blackberry jam recipe
Here's how to create jam that's perfectly balanced, glossy, and bursting with blackberry flavor.
Prepare the Blackberries for Cooking
Place the 2 lbs fresh blackberries in a large bowl and gently stir them with a wooden spoon. You'll notice some berries are riper than others—this is perfect. The slightly underripe ones will hold their shape better during cooking. Remove any stems or leaves that might have slipped through, as they can make the jam bitter.
Transfer the blackberries to a heavy-bottomed saucepan. I like to use enameled cast iron because it distributes heat evenly and prevents scorching. Give the berries a quick stir to break up any large clusters—this helps them release their juices more evenly during cooking.
Cook the Blackberries Until Soft
Place the saucepan over medium-high heat and bring the blackberries to a gentle boil. You'll see bubbles forming around the edges first—this is your signal. Once boiling, reduce the heat to medium and let the berries cook uncovered for 8-10 minutes, stirring occasionally.
After about 5 minutes, you'll notice the berries starting to break down and release their juices. Keep stirring gently to prevent sticking. You're looking for the mixture to become quite soft and mushy—almost like a thick purée. This is crucial because it ensures your jam will have a smooth, velvety texture rather than chunky bits.
Add Sugar and Lemon Juice
Remove the pan from heat and stir in the 2.5 cups granulated sugar and 0.25 cup lemon juice. The sugar should dissolve completely—this is where Mary Berry's magic happens. Return the pan to medium heat and bring the mixture back to a gentle boil, stirring constantly with a wooden spoon.
Here's the thing—you want to keep the heat at a steady simmer, not a rolling boil. Watch for bubbles forming around the edges and occasional small bubbles breaking the surface. This gentle cooking process helps the sugar dissolve properly and prevents the jam from scorching. It should take about 5 minutes to return to a boil after adding the sugar.
Incorporate Pectin and Cornstarch
Once the mixture is boiling again, remove the pan from heat once more. Sprinkle the 3 tbsp powdered pectin and 1 tsp cornstarch over the surface. Let them sit for 30 seconds—this gives them time to absorb some of the liquid before you stir.
Then, using a wooden spoon, stir vigorously for 1-2 minutes until the pectin and cornstarch are completely dissolved and the mixture is smooth. The pectin is what will give your jam that beautiful, wobble-like set when cooled. The cornstarch adds that silky texture that makes this jam truly special. Return the pan to medium heat and bring it back to a full rolling boil.
Test and Pot the Jam
Once the jam reaches a full rolling boil, it should take about 1-2 minutes of constant boiling. To test for doneness, perform the wobble test: Spoon a small amount onto a chilled plate. If it wrinkles when you push it with your finger, it's ready. If it runs, return it to the heat for another 1-2 minutes and test again.
When your jam passes the test, remove it from heat immediately. Quickly skim off any foam that has formed on the surface with a spoon—this keeps your jam looking beautiful and prevents it from being too cloudy. Ladle the hot jam into sterilized jars, leaving about ¼ inch of headspace at the top. Seal the jars while the jam is still hot.
Pro Tips For Making Mary Berry Blackberry Jam
- Mash Those Berries: Ditch the food processor—your fingers work best here. Gently crush the blackberries in the pot to release juices without turning them into pulp; you want texture, not a smoothie. (I learned this the hard way after making jam that looked like it belonged in a milkshake.)
- Sugar in One Go: Dump all the sugar at once when the berries are boiling hard, then stir like your life depends on it. This isn’t the time to add it gradually—Mary Berry’s method relies on that initial shock to dissolve it fast. (Yes, it’ll look like you’re making a science experiment, but trust me.)
- Watch the Lemon Juice: Measure that lemon juice precisely—too little and your jam won’t gel properly; too much and it’ll taste like you’re preserving a sour lemon curd. A proper 1 tablespoon (not "a splash") keeps the balance right. (I once used double and spent a week regretting it.)
- Skip the Cornstarch Trap: The cornstarch isn’t just for thickening—it’s the jam’s secret keeper. Whisk it thoroughly with a little cold water first to avoid lumps, or you’ll end up with jam that tastes like you’re chewing through a sieve. (I’ve done it; you don’t want to.)
Pro cooking tips for great mary berry blackberry jam
Pectin Perfection
Mary Berry swears by low-sugar pectin for that signature set without cloying sweetness. I use Ball RealFruit because it handles tart berries beautifully—just sprinkle it over hot jam and stir vigorously for 1-2 minutes to dissolve completely.
The key is timing: add it when the mixture is at a full rolling boil, not before. Too early and it won't activate properly, leading to a runny jam. I've learned this the hard way—once I added it too soon and ended up with jam that looked like syrup! 💫
Heat Control Secrets
Never let your jam boil too hard—medium heat is your friend. I use a heavy-bottomed enameled cast iron pot (like Le Creuset) to prevent scorching. Watch for small bubbles breaking the surface, not a vigorous rolling boil.
This gentle simmer helps the sugar dissolve evenly and prevents those pesky skin formations. My Boston apartment kitchen gets hot, so I often reduce heat to medium-low once the berries start breaking down.
Wobble Test Mastery
The wobble test is your golden ticket to perfect jam. Spoon a small amount onto a chilled plate—when it wrinkles when pushed with your finger, it's done. If it runs, give it another 1-2 minutes of boiling.
Pro tip: I keep a small bowl of ice water nearby to chill my testing plate quickly. This test takes practice, but once you get it right, your jam will have that glorious gel-like consistency that's neither too firm nor too runny.
Sterilization Shortcuts
You don't need fancy equipment—just boiling water and a clean kitchen towel. Place clean jars and lids in a large pot, cover with water, and boil for 10 minutes. While they're sterilizing, wipe the jar rims with a clean towel to remove any moisture.
This prevents mold and ensures a proper seal. I always sterilize my jars right before potting the jam to keep everything fresh. The extra 5 minutes of prep time is worth it for jam that lasts up to a year.
Foam Skimming
That foam that forms on top? It's not just unsightly—it can make your jam cloudy. Skim it off with a spoon as soon as the jam reaches a full boil. I use a fine-mesh strainer for stubborn foam clumps.
This step might seem tedious, but trust me, your jam will look restaurant-quality with a glossy, smooth surface. The first time I skipped this, my jam looked like it had been through a blender—never again!
Lemon Juice Magic
The lemon juice isn't just for flavor—it's a natural preservative that helps balance the acidity of the berries. Freshly squeezed is best, but bottled works in a pinch. I like to strain it through a fine-mesh sieve to remove any pulp, which can make the jam cloudy.
A little extra lemon (up to 2 tbsp) helps if your berries are particularly tart. The citrus brightness cuts through the sweetness and makes the jam taste like a proper British summer garden. 🌸
Nutrition facts
Frequently asked questions
Can I use frozen blackberries instead of fresh?
Frozen blackberries work perfectly—just thaw them first and drain any excess liquid before cooking. The texture will be slightly softer, but the flavor remains rich. For best results, use high-quality frozen berries without added sugars or preservatives. If your frozen berries are particularly icy, crush them slightly with a fork before adding to the pot.
Why did my jam turn out too runny?
Runny jam usually means the pectin didn't activate properly or the cooking time was insufficient. Double-check that you added the pectin when the mixture reached a full rolling boil and stirred vigorously for 1-2 minutes to dissolve it completely. If it's still too thin after testing, return it to heat for another 3-5 minutes and retest.
How do I know when the jam is fully set?
The wobble test is your best friend! Spoon a small amount onto a chilled plate—when it wrinkles when pushed with your finger, it's ready. If it runs or slides, return it to the heat for another 1-2 minutes and test again. For extra accuracy, keep a small bowl of ice water nearby to chill your testing plate quickly between tests.
Can I reduce the sugar for a less sweet jam?
Yes, but with caution! Reduce sugar to 2 cups and add 1 extra tablespoon of lemon juice to help with setting. The jam may be slightly softer, but the tartness will balance the sweetness beautifully. If you're using honey or maple syrup as a substitute, reduce the amount by 25% since they're sweeter than granulated sugar.
How long does homemade jam last?
Properly sterilized and sealed jam stays fresh for up to 1 year in a cool, dark pantry. Once opened, refrigerate and consume within 3 months. The sterilization process (boiling jars and lids for 10 minutes) is critical for safety. If you notice mold, cloudiness, or an off smell, discard it immediately—when in doubt, throw it out!